I grew up in a city home that was dressed up as a country cottage.
It had plaster ceilings, beams galore, barn wood chair rail, trim work, barn board doors and black vintage farmhouse hardware everywhere. My parents still live there. As a child I wondered why my home didn’t look like my friend’s new build homes, but over time I learned to love all the character that surrounded me.
Staring up at barn board beams every night for like, forever, will do that to you.
I learned to love the old black latches on the bedroom doors and most of all the little secret door on the stairway; the one that looks like it’s just a barn board but that swings open to share what’s in it’s depths. It was my favorite thing to share with visitors. We would of course make visitors guess what was inside the door and no one ever figured it out. Turns out when the door swung open a big ‘ole hose was hidden within the wall. A hose hooked up to a water source just in case. A plus for our house clad in bard board with a wood stove as it’s main heating source.
The original builder of my childhood house was a fireman….can you tell?
I always felt safe knowing that I could play firefighter too…if I had to. 😉
Kids don’t try this at home.
Those childhood humble beginnings bring me to today.
I feel most comfortable in homes surrounded by natural elements — and I’m not just talking about wood and plaster things. No, laundry piles and messy hand prints also put me at ease. 😉
But most of all beams have a way of making me feel at home.
Big sturdy beams.
Beams that make you believe in their ability to hold up a roof and chase away the boogy man.
Like the good old days.

We decided to add beams to our new-to-us home while we were taking out the original mid century ceiling tiles.
I shared our pine wood ceiling HERE.
Now it was time to bulk up that ceiling.

We started with 1″ by 12″ by 12 foot boards. Sometimes referred to as rough cut boards. Hubby would later cut them to size, but FIRST: putting on their makeup.

We knew what color we wanted to stain them after years of playing with stains but during that stage we also wanted to give them a little bit of character.
After all, what’s a girl made up out of without a few laugh lines beneath it all?? 😉

I convinced my nine year old son to join me in giving these boards some much needed character.
We picked our weapons of choice and got to work dinging up our boards.

We used some chain scraps and the back of a hammer and got to work distressing our boards.


He obviously had a lot of fun with this project. 😉

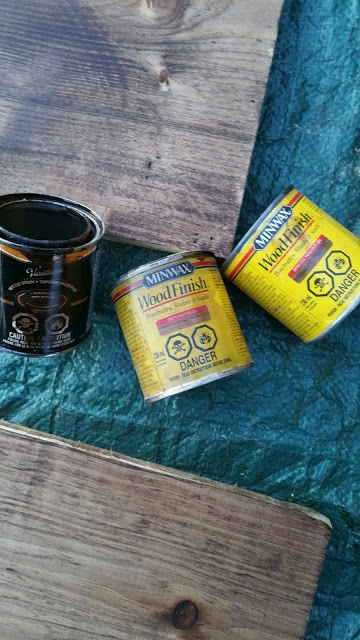
After a lot of contemplation, I finally came to a conclusion I was sure of and mixed equal parts special walnut, espresso and provincial in the Minwax brand for our stain.
1 part Special Walnut
1 part Espresso
1 part Provincial

I stained the boards in batches and once the stain was soaking into the wood my little assistant helped distress the first set of boards. It took some trial and error but I like the way the indents looked after they already had stain on them.
Stain, beat, repeat.

I simply used an old soft cloth to apply my custom stain and then we let the stain soak in out in the open air. Having an open space with plenty of breathing room is key when staining anything. Those fumes are strong!
Although the air was cold and damp our boards dried pretty fast. It only took an evening before we pulled the boards into the garage for cover.

I stained some boards on an old ping pong table base that we have yet to put together (Sorry kids!) and then I stained others on an old tarp on the ground. I wanted to see which way would be better for you guys, but honestly either way would do. The stain soaks into pine boards so fast that you arent leaning over boards for too long at all.
Easy peasy!
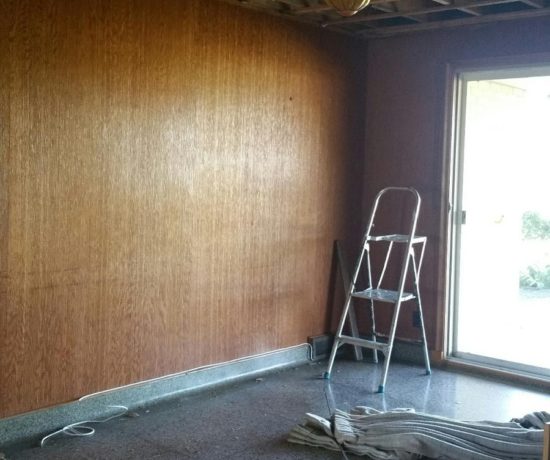
Here’s what the pine boards looked like before:


And here is what the boards looked like during the staining process…

In my next post I’ll be showing you what our beams looked like all dried up and then UP on our ceiling! All our DIY tips and tricks for installing faux beams are on their way!
Chat soon!

{The Moving Chapters: Chapter 16: Living Room Reveal} | This Little Estate
February 24, 2017 at 3:56 am[…] the top with rough pine and stained it to match our DIY beams that you can find a tutorial for HERE. We wrapped the inside of our entertainment unit with shiplap that you can find a tutorial […]
The Moving Chapters {Chapter 22: The Kitchen Reveal! ( A Christmas tour!)} | This Little Estate
December 20, 2017 at 2:31 pm[…] My handy hubby helped me make our kitchen’s faux beams that not only cover the seven foot seams of our pine and groove ceiling but they also add so much personality to our kitchen. They also are one of the first elements people compliment. I stained them with a custom blend that you can read all about HERE. […]