This week came and went in a flash. A flash of dry wall dust and spackling, a flash of hurried patching and futile huffing and puffing in attempts to make it all dry just a little bit faster. The truth is we made a mistake this week that cost us time.
Now, its not everyday that a design specialits and a renovation expert make a combined terrible decision. But the truth is, that once in a while we do. Call it a secret, call it a behind the scenes glance, but sometimes we mess up. The mess ups ofcource have been fewer and farther between in the last few years, so when they happen, their ripple effect causes waves within our household.
If the walls could talk, they would tell you that Hubby and I got in a squabble this week over them. One that required a lot of repair and finagling. If these walls could talk, they would tell you that they were the focus of many hours of work and correction this week. Basically, they were like a three year old. 😉
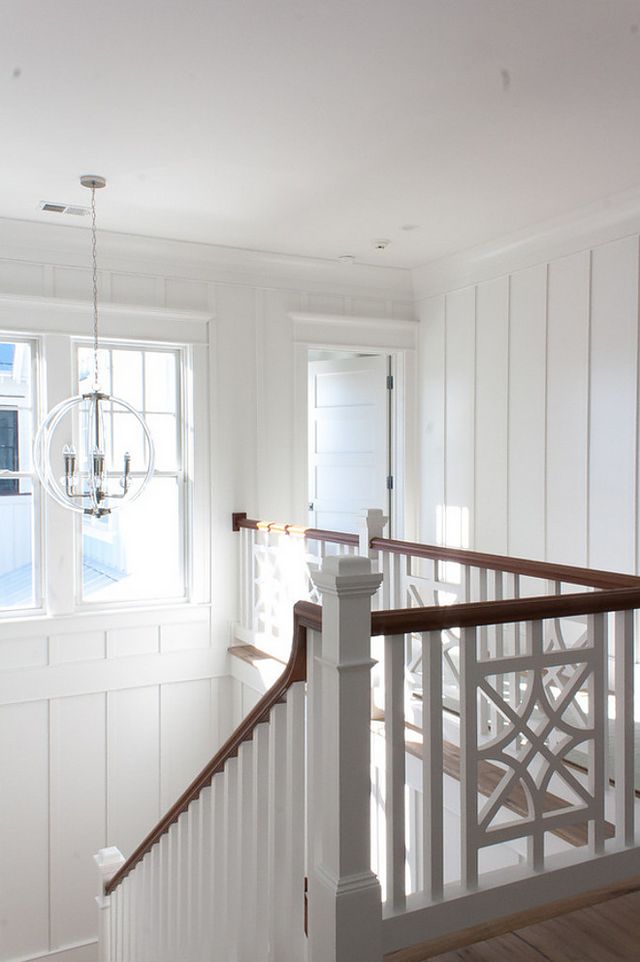
It all began a week ago today when Handy Hubby went ahead and installed our METRIE board and batten to our son’s bedroom; the space we are tackling for the One Room Challenge. To an untrained eye, the install probably looked perfect, but to a designer’s eye, every inch of that wall was planned out and happily anticipated and it had to be perfect. The boards spacings were off by just enough, in the end, to make my eyes itch. Of course, after Handy Hubby had already glued and attached the boards to half of the room’s plaster walls, he wasnt keen on tearing them off. I, however, was. The walls listened.
Now, as with every post around here, we aim to inspire you and right now this story isn’t sounding very inspirational. So, lets get to how our errors can help you!
In the end, after some board and batten set backs and some subsequent inadvertent demolishing of our old plaster walls, we have some solid advice for you to consider if you are going to be applying simple and stunning floor to ceiling board and batten to your space.
Not sure what floor to ceiling board and batten is?? Check out WEEK TWO of our ONE ROOM CHALLENGE to get caught up on our favourite classic board and batten spaces.
(I know, I know, HOW could we mess it up when we had so many visuals as inspiration to replicate? Professionals can make mistakes too. ;))

STEP ONE: Determine how far apart you want your board and battens. THIS is your most important step so you can have a seamless install! (Get this is writing from the one making the designing decisions!;))
STEP TWO: For an easier install, take your width measurement and create a template out of a scrap piece of board. This will allow you to simply hold the board in between each board and quickly mark where your next board will be installed. This little hack will ensure that your boards are evenly spaced for the entire room installation. There will be no looking back!
STEP THREE: Trim out your room with boards to act as crown moulding. Secure your boards close to your ceiling on every wall within your space. This step is crucial for creating a seamless finished look.
STEP FOUR: Measure from the floor of your room to the base of the board you just attached to your ceiling and cut boards accordingly.
STEP FIVE: Secure your boards with PL glue and nail secure with nail gun.
STEP SIX: Add baseboards to the perimeter of your space on top of the bottom of your battens.
STEP SEVEN: Fill in the spaces between each board and batten and the gap between your baseboards and wall with a measured and cut piece of board and batten. This will fill the empty space between your wall and your base board.
STEP EIGHT: For an even more finished look, caulk both sides and length of each board and batten with wood trim caulk in a clear finish.
STEP NINE: Fill nail holes with white wood filler with a small trowel. Let dry and then sand for a smooth finish.
STEP TEN: Once your caulk and filler is dry and sanded smooth, paint your entire wall, including your top “crown piece” in the appropriate paint finish for your space.
THATS IT! If you follow these easy and concise steps you’ll be able to simply install your floor to ceiling board and batten with no setbacks and absolutely no qualms, arguments and wall fixing. The walls will only be able to share stories of how they witnessed the creation of your precise and pretty wall finishings! 😉
I wish we had of referred to these steps before we had encountered this weeks projects and our subsequent arguments. But, on the flip side, I think we both learned that when we are working as a husband and wife Design and Build team we need to be concise with our communication instead of yelling out directions as we are feeding the kids/dog/cats or chickens. 😉
In the end, our space is turning into one of my favourites ever. The floor to ceiling interior finishings look so dang good! We cant wait to show you the BIG reveal of our little boys room next week!!!
Have you guys ever encountered DIY dilemmas? Did you learn anything from it? Do share! We are all friends here and we would love to learn from your mistakes too. Our walls don’t need more potential conversation starters.

Dannyelle
November 9, 2017 at 4:28 amThanks for keeping it real. Renos seem to always have a few bumps. I can’t wait to see it when it’s all done and love following along on your Insta Stories.