
When we bought our home it had a dropped ceiling throughout. Although dropped ceilings were completely useful and awesome when I was in the fifth grade. You know, so I could count away the time during math class until recess. Currently having dropped ceiling squares in our home just brought back a million bad memories of wishing away my bill free, care free, to-do-list-free youth.
Insert Rihanna’s song “Werk werk werk werk werk” HERE.
In any other home changing out a dropped ceiling might be an easy fix. One might consider many ceiling options after the dropped ceiling was removed, but unfortunately, for us, with a flat-roofed-mid-century-modern-home, there are fewer options we could use without changing the footprint of our home.
We removed the dropped ceiling though, and crossed our fingers, just IN CASE the ceiling magically went up and up and up and we could gain some height.
That was obviously not the case, no matter how many twinkling stars I wished upon.
So we embraced my husband’s age old saying “It is what it is” and we made the best of our plain old ceiling.
When we thought of the ceiling we could have we wanted a ceiling that was cozy and interesting. We quickly nixed the idea of applying plain drywall to our ceilings, no matter how many good hearted, advice giving people suggested it to us.
We’re rebels like that.
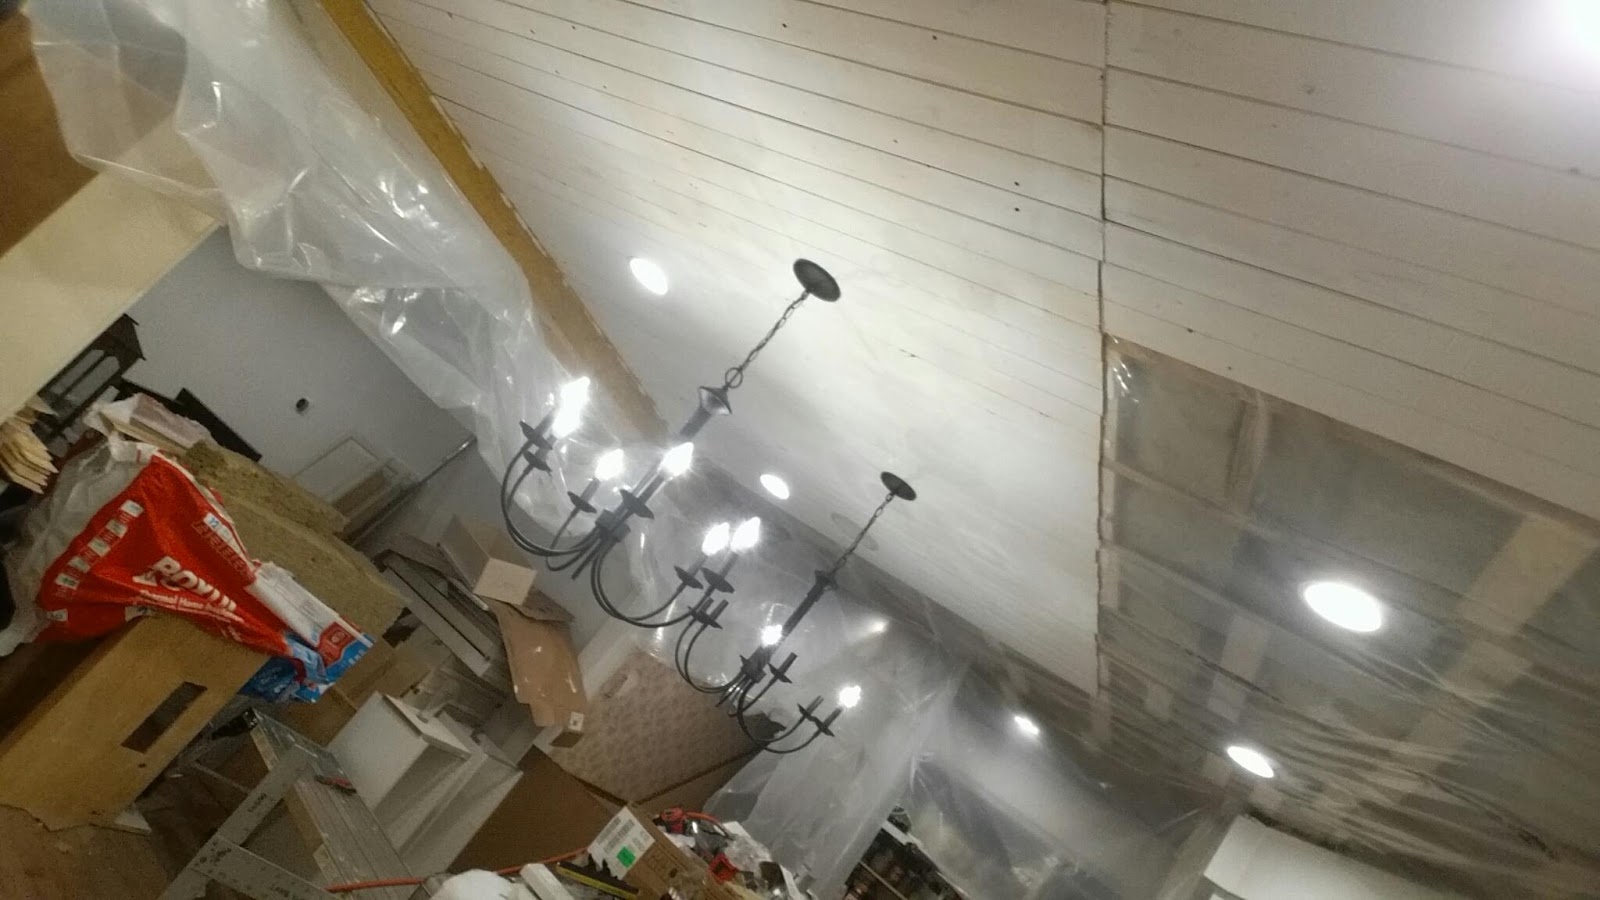
Crisp and clean ceilings didn’t seem right for the aesthetic we were going for. We wanted our space to feel like a cottage or a farmhouse and we knew immediately that tongue and groove paneling was the way to fully embrace that style.
We knew that pine ceilings and big ole beams would do the trick to add interest without feeling over the top.

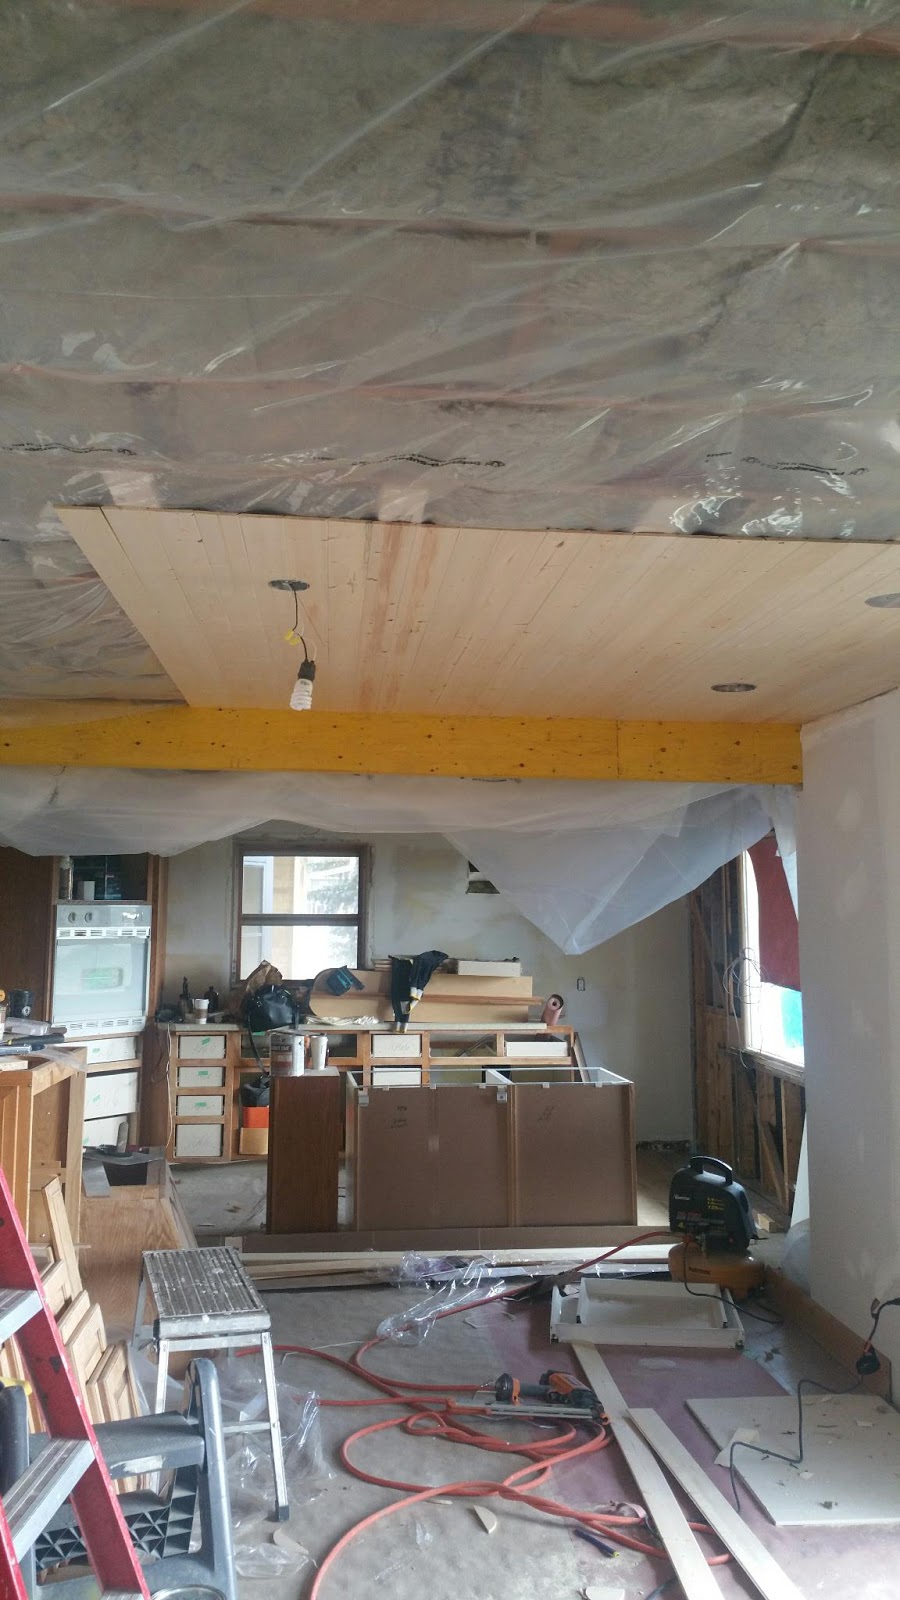
So we got to work applying a vapor barrier and attaching pine boards throughout our main floor.

We took into consideration our lighting, where it was located, and where we wanted our beams to end up. There was a lot of math involved in this step so I was super glad my husband didn’t waste away 5th grade like I did.

For someone who isn’t a planner and is more of a “doer” this is where the reno stood still.
My lovely handyman hubby wanted to jump right in and get started too, BUT he also knows to measure twice and cut once. My toe tapping may have not given me any brownie points.

Slowly but surely thought, after lots of measuring and mapping out the space the ceiling started to come together.
Literally.

Hubby installed the lights as he went and I busied myself sanding the crap (again, LITERALLY! ) out of our new-to-us cabinets.
See in the distance there? That’s what I’m talking about. ….

If you are thinking of installing a tongue and groove ceiling to your space, keep reading, this next bit is for you.
If you dont want your project to stall like ours did and if ultimately you want to take the guess work out of DIY-ing a wood ceiling then here is what you need to know.
1. Figure out which direction you want your boards to run. This decision may be the hardest step in this ceiling install. 😉
2. Depending on the way you are running your boards you may need to block out your ceiling. This means to simply add joists in between your joists to connect your boards to.
3. When picking out your boards you will need to find ones that have strong grooves. No cracks or knots in the grooves.
4. Ensure your boards are even and not bowed.
If you’re buying in packages don’t use the boards that are imperfect. Instead take back at a later date..
5. Make sure you have decided where you want your lighting, electrical and any other wiring that will end up in your ceiling. This may be a time when you decide to add speakers for that surround sound you have always wished for. 😉
6. When you are ready to I stall your boards makes sure the starting piece is completely level and perfect. This will make for a straight ceiling install that doesn’t bend.
7. For an easy install make sure you have a proper platform to stand on. Ideally this would be scaffolding of some sort.
8. To continuously and perfectly cut around your lighting try making a stencil out of paper. This will ensure that every cut is the same around your pot lights and won’t slow down the install.
9. Cut your stenciled holes with a jigsaw for ease.
10. Depending on the thickness of your boards you may want to use a different size of nails. We used 2″ Brad nails and bought them in bulk. It’s better to buy more and return your unused nails than to have to run out to the hardware store 4 times during install. 😉
11. When you’re attaching boards to your ceiling place the nails strategically into your boards. Don’t put the nails into knots or into the seam where it could splinter making it difficult to neatly fit the next board in.
11. If you have the time and want to make your final step of painting easier run a paintbrush across each board’s grooves as you install.
12. Plan out the placement of your boards where possible. Some boards have few knots and have a light wood grain. Some are filled with knots and have a contrasting wood grain. It is best to space out these pieces so your eye isn’t drawn to one specific part of your ceiling.
13. If you are not using beams in your ceiling install simply stagger your beams across your ceiling.
14. If you ARE using beams in your design, try spacing your beams 8 feet apart to avoid unnecessary cutting. Typically pre packaged boards are 8-9 feet long and your beams will cover the seams.
15. Use flat ceiling paint. If you use semi gloss or paint with a sheen it will show all of the imperfections.
16. If you want a white washed finish dilute your paint to desired consistency with water and apply one coat. (Remember to use drop cloths if applying in this manner)
17. If you want an evenly painted ceiling use two coats of flat ceiling paint.
18. If you find your boards are very knotty first conceal the knots by applying a primer/wood sealer then painting a coat or two of your flat white ceiling paint.
19. If you didn’t do the step at install where I recommended painting the seams of your boards then at this point you’ll want to get good paint coverage on the seams of your boards. Use a square sponge paint applicator and run the angled sponge part along the grooves of your board to ensure that paint gets right in there.
20. For best coverage apply your ceiling paint with a roller and an expandable handle to the rest of the ceiling.
21. Over time the places where your wood has knots may show through. Keep a re purposed jar filled with your ceiling paint for easy touch ups to use over time.
Now sit back, throw your feet up, rest your weary arms and watch your paint dry.
You deserve it.

Next up: Beams!
I can’t wait to share with you what we learned while DIY-ing beams.
Have you ever wondered how to install a pine ceiling? If you think this is something you may tackle in the future, perhaps to an unfinished basement or in a future space, feel free to pin this post.


Ashley Turns
September 6, 2017 at 2:48 amMy husband and I are hoping to put in a new wood ceiling while we’re remodeling. So thanks for letting us know that we need to consider where the lighting fixtures will be so that we won’t have to worry about making holes afterward. Though we’ll be hiring a contractor to install our ceiling since neither my husband or I have the time, we’ll definitely make sure they’re aware of where we want our light fixtures.
bethanygier
October 12, 2017 at 11:39 pmHi Ashley! Im so glad this post was helpful to you!
Good luck with YOUR ceiling! I bet it will look fabulous. Id love to see pictures when it is all finished. XO
John Parsley
January 15, 2018 at 3:44 pmGreat point with the beam/seam comment. I am minutes away from putting 1x8x8 knotty pine in my outdoor pub and was going to stagger the boards. I forgot about the large rough cut beams I have outside waiting to go up! You saved me a slight imperfection.