Our pop up trailer makeover was a slow and steady summer project for us. If you’re local to our location, an hour west of Toronto, then you KNOW we experienced more rain than sunshine this summer. Although, we still managed o squeeze every bit of summer goodness out of the kids holidays, it did take us more time than expected to finish painting the inside of our sweet little camper.#thecampercottage

If you’re in the market for a camper overall in the future, I’d love to share with you all of the things we did to make our small space perfect for our families needs. Steps, if you will. What worked for us and what didn’t. What we did, day by day, to completely makeover our little camper with our three kids in tow. (no pun intended.) ;0
So without further ado, here is what we did!
First, we thoroughly cleaned the camper by washing down all the walls, bedding, cupboards and the inside of the cabinets.

Next we started by removing the pair of tables that impeded the flow of the trailer. We are in the process of creating a custom dining table for the dining booth but for now we are reviling in so much open space!

After that I took off all of the cabinet doors, removed all of their hardware, scrubbed them down and made a game plan for tackling them with paint.

Next we took out the kitchen sink and tap to remove the counters in the trailer. It is as simple as unscrewing them from beneath!

I painted the newly cleaned base cabinets with my very favourite cabinet paint (We also used this paint for our kitchen makeover we have yet to reveal) You can find it HERE. It is good to note that this paint truly doesn’t need prep work. No primer needed, simply paint on in a well ventilated area and let dry and cure.
After the cabinet bases dried and cured for a few days we replaced our flooring by covering it in a roll out linoleum. We purchased ours from Lowes Canada and love the way it created another layer of cushion and warmth to our trailer floor as well as updating the overall look of the camper.

Next I filled all of the holes from the original hardware with a wood putty, let it dry and cure and then sanded down the excess putty. Once smooth and to my liking, I painted all of the cabinets with INSLX by Benjamin Moore and let them dry.
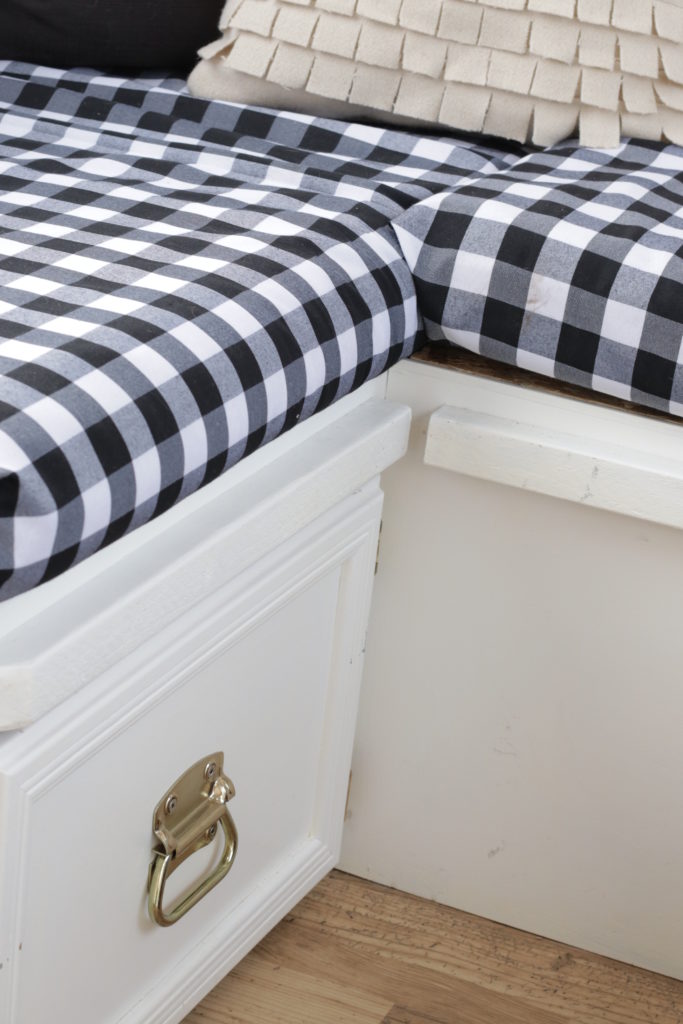
Once dried, I installed all of our cupboard hardware. I chose to use outdoor hardware for our camper.
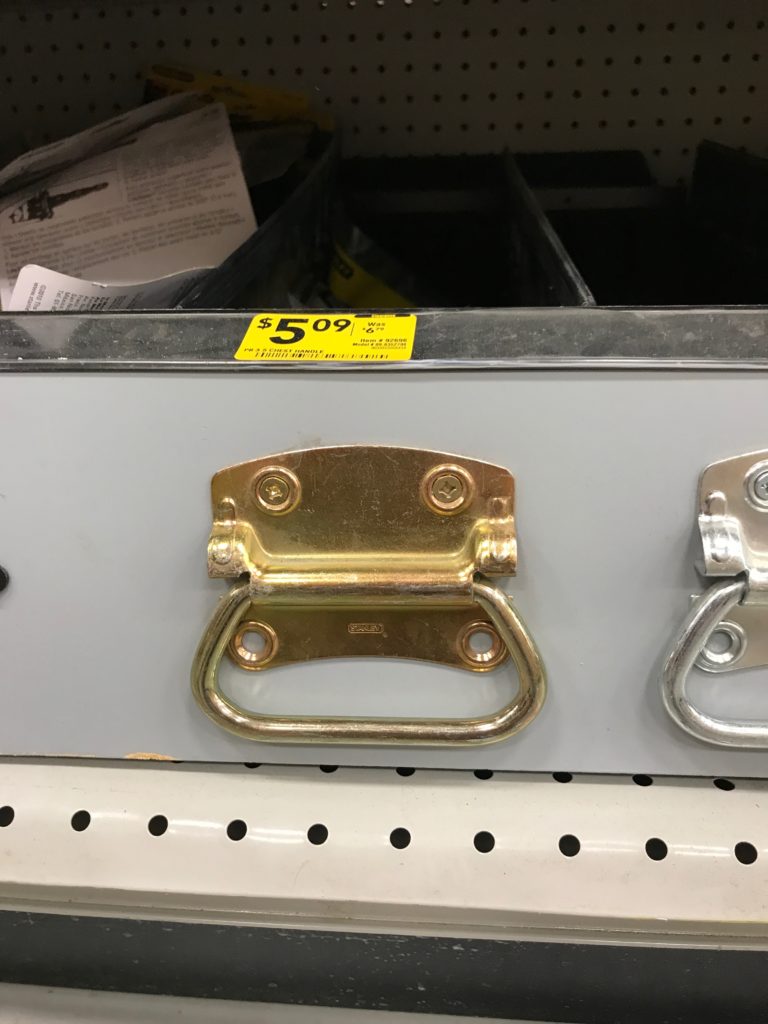 I reasoned that by using rust proof outdoor gate Stanley hardware we wouldn’t have to worry about we are and tear and corrosion from the unavoidable elements our camper will endure. (Find more products HERE)
To keep a cohesive feel and to save a little money, I spray painted the current cupboard hinges with a gold Krylon spray paint along with the original heads of all the screws, the base for the soon to be dining table and a piece of the roof vent that had aged to an off white hue. (See product HERE)
After that I removed the rest of the old counters, decided on a new counter, measured and ordered new ones in a faux marble from a local supplier. 
Next we loosened all of the cabinets from their secured position from the floor and walls of the trailer. This allowed the cabinets to be maneuverable for our new flooring install.
We chose a sheet vinyl flooring for the trailer because unlike traditional laminate this one wont rise or separate with moisture and cold.

We installed the flooring with a lot of adjusting, but in the end love the finished product.
(Here is where our makeover took a turn for the worst, but one that was easily fixed and can be completely unavoidable for you! Read on, if you care or, if you prefer a straight tutorial skip this next part!)
So, I installed the cabinet doors at this point, and stepped back to survey our updated camper and all of my hard work and realized that the camper with all of its natural light looked very different than our kitchen. Now most people wouldn’t have been bothered by the slightly yellow hue of the campers newly painted everything, but as a hair colorist with a sensitive eye, I couldn’t stand the way the trailer read “creamy cream” instead of a pure white. Especially against my new favourite bedding from CITY SCENE BEDDING.

SEEEEEEEEEEE????? So creamy white, right??
So, I took off all the cabinets, taped everything off again and repainted EVERY THANG. In the end it was the best decision because I am in love with the quick coat of DELUXE white paint I whipped on to everything. It was in fact my first time using Deluxe paint and I was pleasantly surprised. (I will let you know how it wears in the future!)
On the bright side, at this point, I also sanded down any noticeable paint drips for a smooth finish. Blessing in disguise? My handy hubby changed over our electrical outlets with LEGRAND units. We have them indoors and know that not only do we love their sleek look, we also love their versatility with their functions. While we were at it we upgraded out fire extinguisher as well. Out with the old and in with the new!!! (Find similar ones HERE)
My handy hubby changed over our electrical outlets with LEGRAND units. We have them indoors and know that not only do we love their sleek look, we also love their versatility with their functions. While we were at it we upgraded out fire extinguisher as well. Out with the old and in with the new!!! (Find similar ones HERE)
After that I reinstalled the cabinet hardware and doors and loved the final look of the trailer makeover!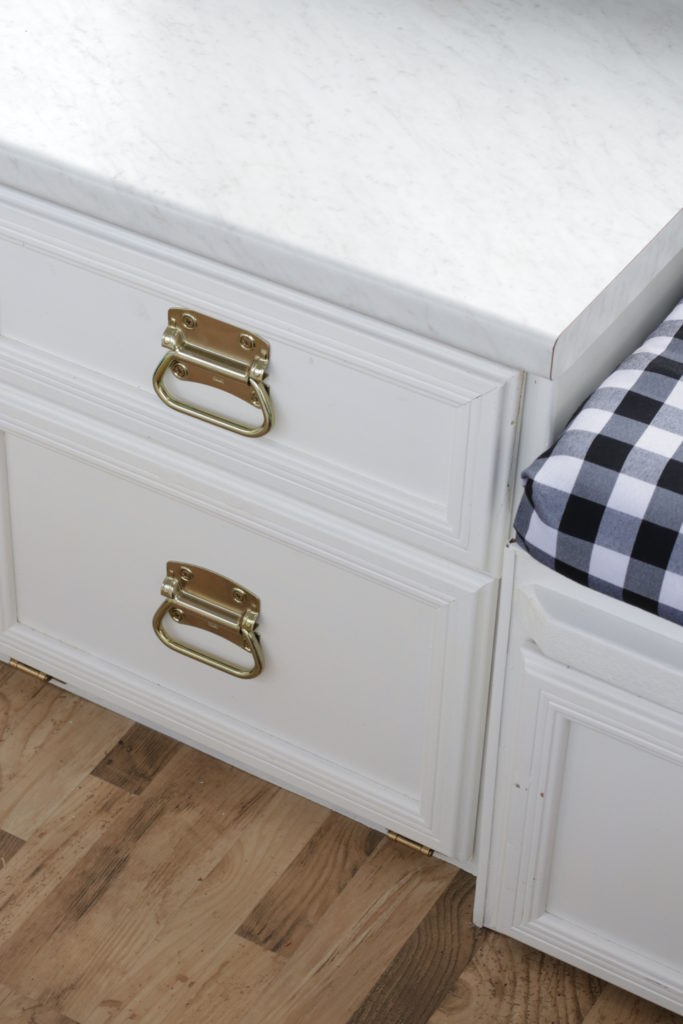
What do you think?
After that things moved quickly! Hubby installed the new counters and faucet in a different configuration than before which allows for more counter prep space (yah!)

Then I added in a pretty cool backsplash that you are going to want all of the information on!!!!

After the painting and messes were finished and cleaned up, I moved in the amazing covered cushions my incredible mother whipped up for us. Yes, I know I am one lucky daughter!
Oh yes, and during all of this, when the weather cooperated we also transformed the outside of our sweet cottage camper.
 We gave it a thorough scrub, removed its exterior dated decals and painting it a pure white. (More on that to come!)
Do you sense a theme here? 😉
I cant wait to show you the finished project of our tiniest labour of love!!
Oh wait. Did you see on Instagram we have kittens now? They may rival this tiny labour of love by a few major heaps. 😉 (If you HAVEN’T seen our teeniest little estate occupants, you need to. 😉
Sooooooo what do you think about our trailer makeover? Do these steps seem easy enough?? Any questions? Feel free to message us anytime with your DIY queries!

