When
we renovated our kitchen, almost four years ago, I wanted white and
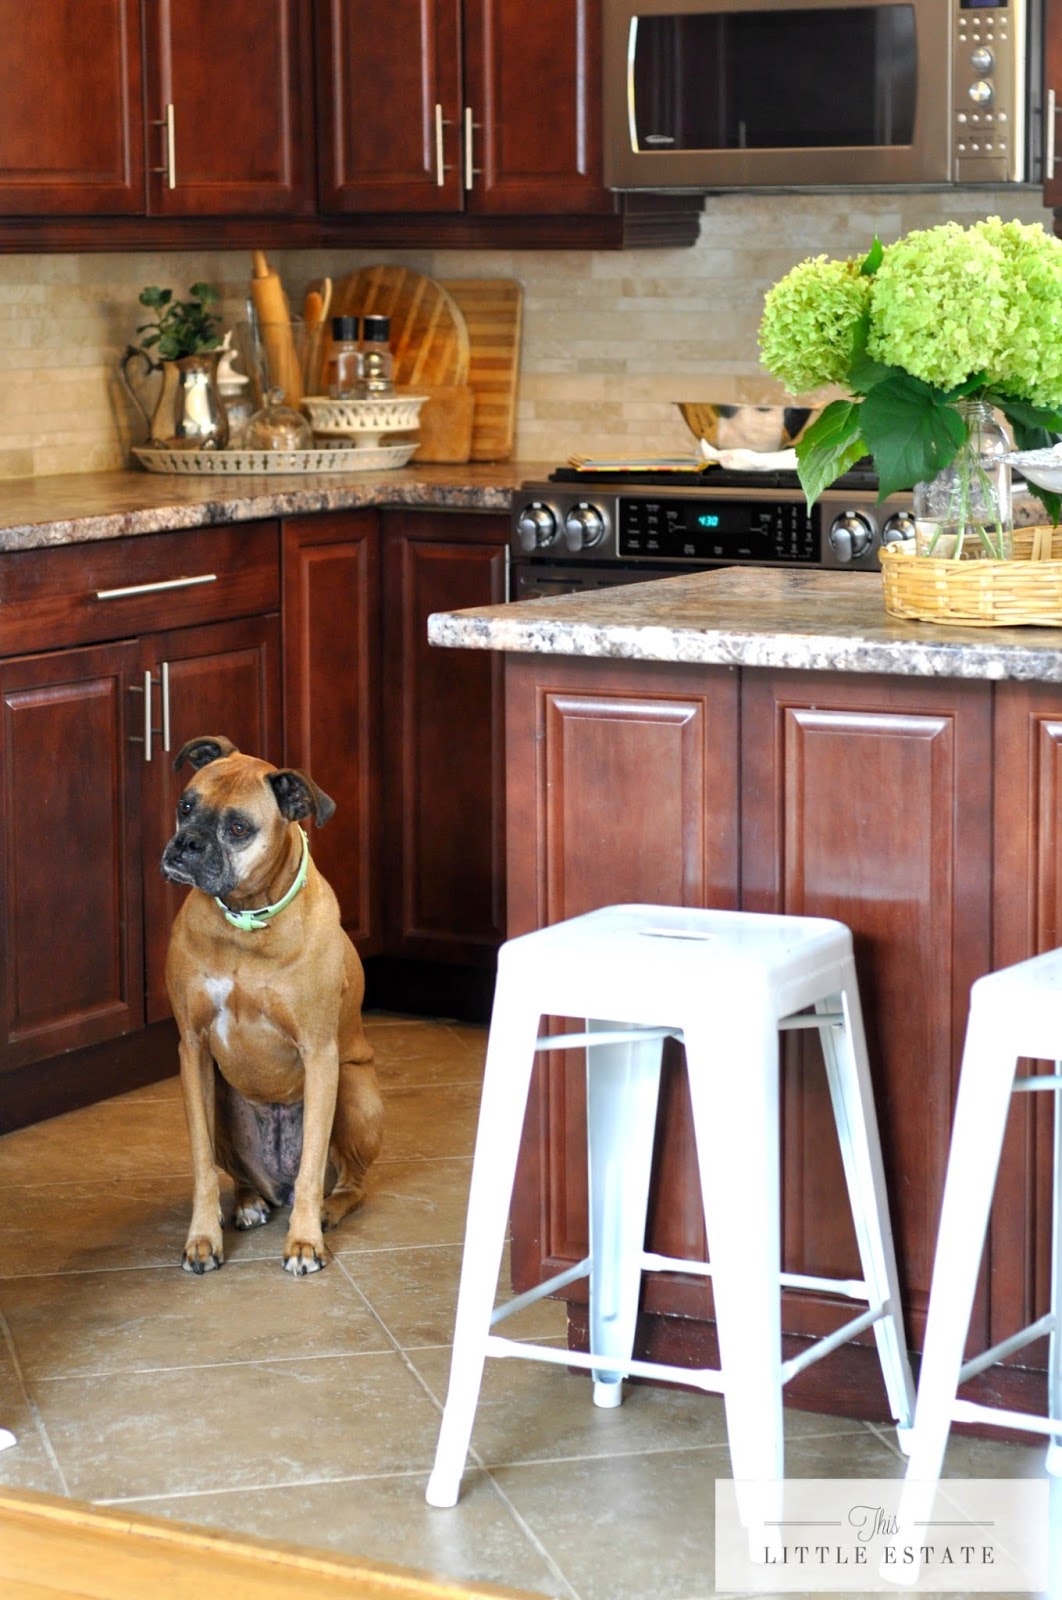
bright and my husband wanted dark and moody.
we renovated our kitchen, almost four years ago, I wanted white and
bright and my husband wanted dark and moody.
So, we compromised.

I looked deep inside my cooking-loving-cleaning-loathing heart and realized that dark cabinets were probably the best fit for our lifestyle.

So we went with dark cabinets and decided that in order to make our kitchen feel light and bright we would add a stone back splash that was light in tone. I then matched our paint color to our backsplash so that the whole room opened up and felt brighter and airy. We even carried our light colored stone up and around part of our kitchen and added open shelving for that bright look I was craving.
See? Compromise.

Since adding these babies I have changed them around a lot. I have learned a ton on what works and what doesn’t and today I wanted to share with you some solutions I have discovered that will help you get the most out of your open shelving too.

Before installing these, everyone I discussed them with were skeptical.
“Wont they get dusty?” “Who wants to see your dishes and junk?” “Wouldn’t you prefer a cupboard or pantry?” “The kids are going to knock everything off of them.”
No sweet husband, no to all of that and all your doubts. Give Mama all the shelves.

If you are wishing to brighten up your kitchen and want to embrace the open shelving that is trending now, take my humble advice and just do it. I have never looked back and have loved them since the moment they went up.

To keep your shelving light and bright you might consider displaying items that are similar in color. White dish ware is a great idea if you are trying to brighten your space. Your bare shelves give you the option of displaying your collections, whatever color they may be, or you have a good excuse to start a collection. 😉


I decided to collect white tea pots and jugs and have found all of these at thrift stores and junk shops. Collecting like items allows your shelving to look styled without actually trying.


Layering art work on open shelving is a lovely way to add some pretty in a place like a kitchen where there isn’t much space for hanging art work. By adding frames and pictures behind your collections you can fill up dead shelving space and you can show off some of your favorite pieces in an original way.

I am loving my custom Vancouver sketches we have displayed on our open shelving. I love that I get to enjoy staring at them, all zoned out and groggy eyed, in the mornings when I am making my coffee and day dreaming about the gorgeousness that is the water front in Vancouver.

Lighting is also an unexpected beautiful addition to open shelving.
Sometimes I sneak down here after dark to make a hot cup of sleepy time tea and this little light works perfectly in this space. A timer for your little light is a great option too.
You can use a small lamp or candles or combine the two, like we have done here. By adding faux candles you can plug them in and easily illuminate a little corner in your home without worrying about safety issues.

Using pretty canisters to hold usable items is also a nice way to pretty up a shelf.
Because we are using our shelving and this little corner in our kitchen as a coffee station at the moment, we have clear glass canisters full of tea bangs and jars full of sugar and closed white containers full of coffee odds and ends. Mixing clear and opaque containers in glass and ceramic are a great way to make open shelving look grown up and classy.

And speaking of grown up, if you have a pretty tea cup collection you can contain their gorgeousness in glass cylinders so you can still admire them.

Glass canisters are going to be your best friend when you are decorating your open shelving. By utilizing a thrift store glass container to hold tea cups and tea saucers, we can ensure that they are safely in place from crazy kids and clumsy adults.
Bonus: they get protected from dreaded dust too. 😉

Large glass canisters with lids are also a great way to hold coffee mugs that are used on the daily.
This will keep them from slipping and toppling over when stacked and it will also keep them dust free and easily accessible. Not to mention, they will always look neat and tidy.

Clear canisters are fabulous to use for the day to day things you will be accessing from your open shelves.
I like to fill an over sized glass canister with coffee pods to use when I am in a pinch and dont have the time to use our refillable coffee pod. Quick access to items is what you want on your open shelving and glass ware helps take the guess work out of what is inside of a container.

- Showcase your favorite collectibles
- Keep it simple by showing off only a few of your favorites
- To keep your shelves feeling bright display light colored items or clear items
- Store breakables in glass cylinders to keep safe
- To keep mugs dust free store in an easily accessible container
- Get rid of product boxes and unsightly containers and instead store things like tea and sugar in pretty clear containers
- Use cute ceramic air tight containers for perishable items
- Utilize your shelves by displaying framed pictures to fill in the space between your shelves
- Use lighting if possible to personalize your space and to add ambiance
- Have fun with it and switch things around with every season so you don’t get bored with your shelving

By trying one or two of these open shelving solutions, I’m certain that you will love your shelving as much as we love ours.

Useful and pretty.
Two musts in any kitchen.

If you are like me and want to take
on installing open shelving all by yourself, then stay tuned for a
future post where I finally share my adventures with the wet saw and give you all the dirty deets on how I installed these shelves and this tile in a weekend.
on installing open shelving all by yourself, then stay tuned for a
future post where I finally share my adventures with the wet saw and give you all the dirty deets on how I installed these shelves and this tile in a weekend.
(You can get updates free and right to your inbox by subscribing with your email right here…)
—————————————>>>>>>>

Shelfie love forever.
PSSST….Want to see what our shelving looked like at Christmas? Click the picture below.


Linda
April 13, 2015 at 5:31 pmWe remodeled our 50 yr. old tiny kitchen last yr. I love white/ hubby no. But because to the style of the home, the darker wood was the right choice. I wanted backsplashes like what you have and my hubby does not like.
So we compromised 🙂 All three of the bedrooms have new doors white and it really looks nice. Beautiful home .