
Our daughter turned ten this year and it was a BIG deal. Not just because she would be in double digits now but also because she hasn’t had a big friend party since she was five!
I blame our move and the fact that we’ve had saws living inside our house more than not, but this year we wanted to make it up to her with a big group of 20 ten year olds invited to celebrate her!
She created the idea of an outdoor drive-in theme for her guests and we kind of breathed a sigh of relief that for the most part, the big group would enjoy being outdoors, due to her theme. Yeah for summer birthdays!
We searched on line for inspiration for her drive-in theatre cake but came up empty handed and, honestly, a little stressed.
The truth is, I am NOT known as a cake decorator. In fact, we have pictures and PROOF that I have hacked out a pink Lightening McQueen cake and a Candy Land cake that no one could figure out WHAT IT WAS! So yeah, I don’t have a track record for being the Cake Boss or anything.
BUT, together with my creative sidekick, the birthday girl, we came up with creating a vintage drive-in cake and we can’t wait to share how EASY it was!
There was NO baking required AND it cost us approximately $30!!! Not bad at all for this sweet little number that got so many “ooohhs” and “ahhhhs” from her friends.
Here is the breakdown of this totally SIMPLE, totally ADORABLE DIY drive-in cake.

Supplies:
One blank slab cake (we got ours from Costco) $19.99
Green sprinkles (Bulk Barn) $1.25
Ground graham crackers (Bulk Barn) $1.00
Chocolate stone rocks (Bulk Barn) $2.25
Small 5inch by 7inch canvas (Dollar Store) $1.00
12 inch wood dowels (Dollar Store) $1.00
One string of twinkly lights (Dollar Store) $2.00
Bottle Brush Christmas Trees (we have had ours for years but Michaels Canada sells them) $0
Vintage cars (Toys R Us) (We bought these brown trucks and red trucks for $1 at Xmas time. The other cars we stole from little brothers car stash)
Time to make:
10 minutes flat!!
Here’s how:
First you’ll want to head into your local Costco and fill out an order form in their bakery section. You simply leave it behind in a drop box with the date and time you’d like to pick up the cake and anything specific you would like your cake to say. For us, we asked for them to leave it all white and blank. (You also get to choose if you’d like vanilla or chocolate at this point. We opted for all things vanilla!)

Next up, make your movie screen! You’ll simply print off whatever you want for your screen. We chose a paramount symbol and cropped it to size. We cut it out and pasted it on to a 5inx7in canvas with clear glue.
NOTE: If this step stresses you out, or you don’t have access to a printer, don’t sweat it.
I would instead paint out your “screen” black with some acrylic paint. If you’re extra creative try painting a scene onto your “screen” to really personalize it.


Next, add your green sprinkles by free hand sprinkling them directly on to the one side of your blank slab cake.

Next, attach your screen by placing it on top of your cake and sliding some popsicle sticks behind it to stabilize it in place.

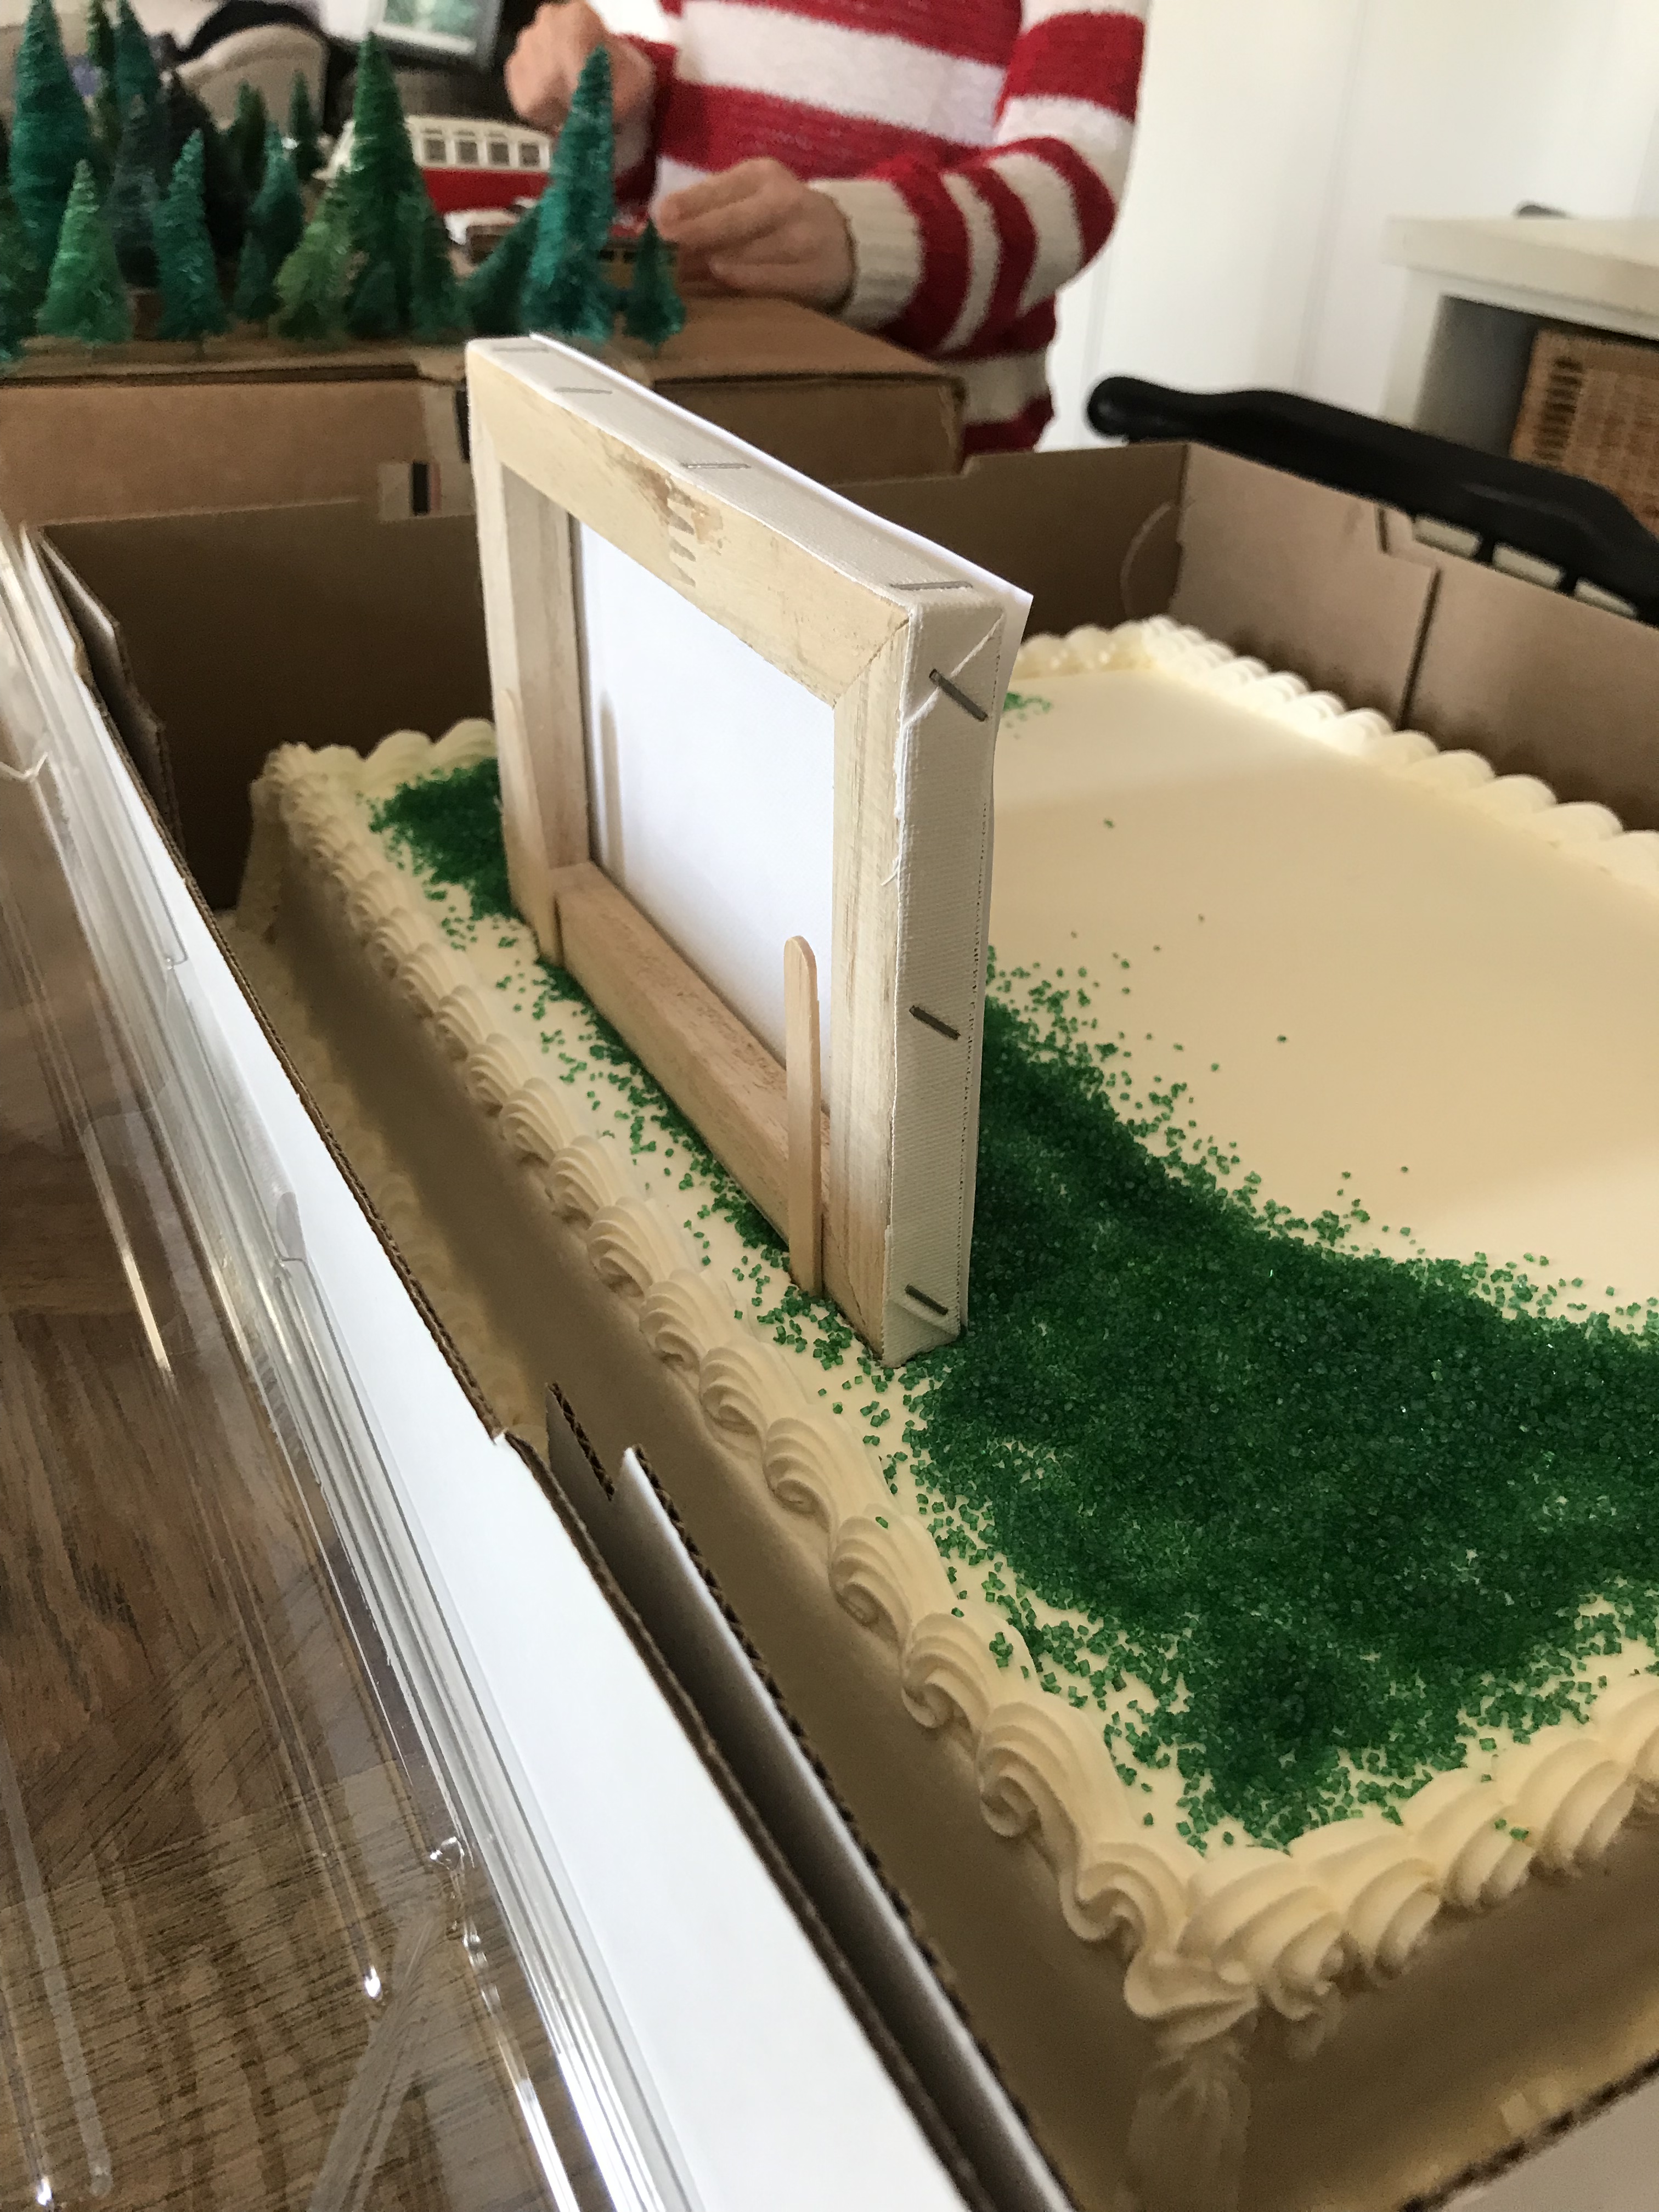
Next add your graham cracker “dirt” where you would like it. (We covered approx 3/4 of our cake and only purchased about a cup of ground graham cracker. It goes a long way!)

After that situate your trees around the screen so it looks like the screen is nestled in the woods somewhere.

Next create a boundary between the two features of “grass” and “dirt” with a pile of chocolate rocks.
NOTE: The mixture of edible rocks come with green and pink rocks too, however, we picked to use more of the realistic colours for our wall. (If you follow suit, keep the extra other colours for when you slice the cake, because, trust me, party goers LOVE to fight over the pieces with the most chocolate rocks. 😉)

Now the fun part!! Stagger your toy cars on to of the dirt side of your cake.

Lastly, place some long dowels in the corners of your cake and attach twinkly lights. Twist them around the dowels corners so the lights stay secure. Lastly hide the junction battery box behind the “screen”. For extra durability and especially if your cake will travel, add some popsicle sticks into the cake (just like you did with the screen!) to secure the box in place hidden behind the screen.

That’s it!!!

This fun vintage inspired cake design and build took a while for us to dream up, but it only took mere minutes to set up, put together, and BRING TO LIFE.
Our hope is that this DIY VINTAGE DRIVE-IN CAKE TUTORIAL will help you save time, have fun and create a party cake you and your future guests will love too!
In the end we were so happy with the look of it all and we really loved the way the party guests loved the twinkling lights!
We would say the level of skill to create this cake is very minimal. My ten year old daughter did most of it herself right before the plethora of party guests arrived!
Would you ever make a vintage drive-in themed cake? If you DO, please let us know so we can cheer you on!


