Have you seen all of the beautiful wreaths making their way around blog land? I love the start of a new season and the inevitable explosion of wreath ideas! I have been coveting the burlap wreaths that are same parts rustic and elegant.
Like this one HERE:

And this Spring themed burlap wreath from HERE

Are you as in love as I am?
I just had to make one for myself.
Or go steal one from someones door??
No, no, stay level headed…
I just had to have one of my own, adorning my own door!
I love to brainstorm and to use what I already have on hand. Especially after pricing the foam wreaths at my local craft store! They are expensive and I am cheap resourceful! So I decided to save myself the foam wreath and the burlap and instead use a coffee sack that my neighbourhood coffee shop let me have for FREE.
Then I searched town for some “pool noodles”. Three weeks later and after dragging my little entourage into every Dollar Store in town while simultaneously telling them ” No, I am not buying you more bubblegum, more treats, more toys, more balloons, more candy bars etc etc” we left empty handed. It wasn’t until I came across some at a local Bargain Shop did we all break out into a happy dance.
They were on sale.
Worth the wait in my opinion.
From $1.99 to $.99.
We had to get a “boy” colour and a “girl” colour of course and then my two hooligans played “lasers” for days.
Well, today, I was tired of being attacked with “lasers” every five minutes and was over envisioning my lamps being knocked to the floor and broken, so I set aside a good hour to make my interpretation of a burlap bubble wreath.
First I taped the pool noodle/laser foam wreath into a big circle by attaching the ends with some electrical tape. I loved that it was going to be bigger then a standard wreath from the craft store.
Voila.
Then I stopped to feed, change, cuddle and rock to sleep a crying baby.
Next, I took the project outside, since the type of burlap I was about to use sheds worse then our Boxer breed dog after a snuggle-fest.
Being outside in the crisp fall air warrants a warm tea; so does being a sleep deprived mama. So at this time in your project you should go get one. 🙂
I cut the coffee sack into random strips, some wider than others since I was aiming for the rustic look.
Of course when a Mama allots an hour to a project the new baby senses that the mothers’ undivided attention is no longer all on them, and thus awakens and wants to be involved.
So we went back inside and I wrapped one of the burlap strips around the blue laser wreath and glued little dabs where needed so it didn’t have any wiggle room.
Completely covered.
My glue gun was awaiting us and made it easy to add the strips of burlap in a bubble-like-manner with little dabs here and there.
I glued and turned the strips as it started to take shape.
This part is all personal preference, I made little loops, little bubbles, big loops and big bubbles, totally random and totally great for someone like me who has a hard time following crafting instructions.
One burlap strip glued on.
After all of the pieces were glued on, the wreath was full to my liking.
Sorry, no picture of that, since the baby needed settled which took four plus excruciating hours of screaming and crying from both of us some time. Then I had to run out and buy more glue sticks which took a while since the store near my house had already closed. Boooo.
So, by the end of gluing and looping I was worn out and plain tired and didn’t remember to take a picture with my good camera.
So, by the end of gluing and looping I was worn out and plain tired and didn’t remember to take a picture with my good camera.
You could stop at this point in the project like I almost did; but I knew I wanted my wreath to really represent Autumn.
So the next day I forged ahead.
I bought a stencil for $1 and used a ruler and scissors to cut out a banner.
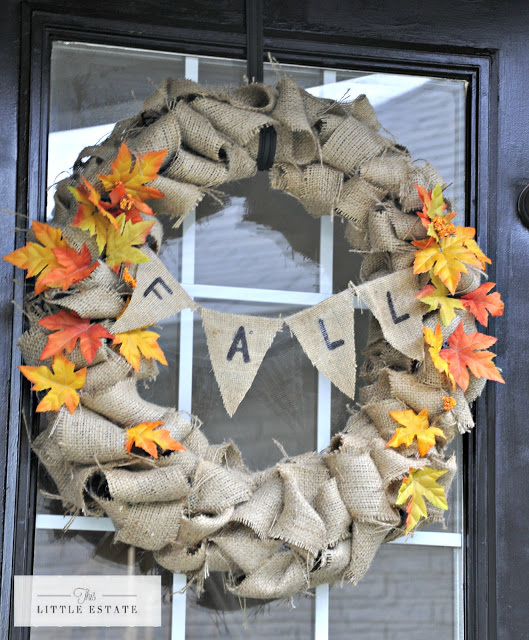
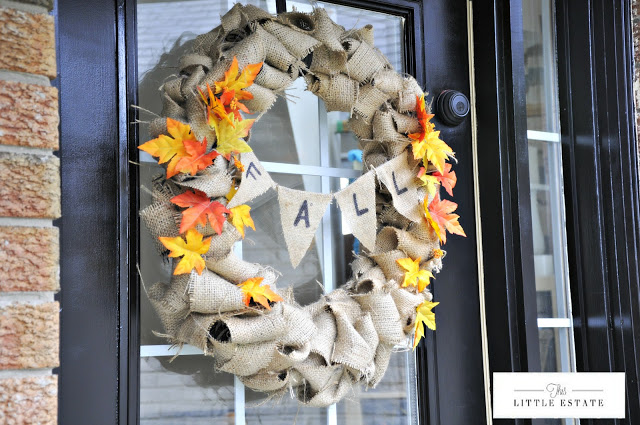
I traced the word “FALL” unto it and hung with twine. Some fall coloured leaves added the last touch to it.
Then, I was done.
I stepped back to survey my work.
I love it!
I love that this wreath only cost me $4!!
Here is the break down:
$1 for the pool noodle
$1 for the stencil I already had on hand
$1 for the fall leaves I already had on hand
$1 for the glue stick that I had to run out and get.
Technically I only had to buy $2 worth of supplies, but if you were going to re create this easy burlap bubble wreath (and I hope you do!) it would put you back a big whopping $4.
I love that it is huge in person and you can even see it from the street!
I love that Fall is here and all that is around us in nature is changing with the season.
I love the crisp air, and the warm houses.
I love the smell of pumpkin mixed with the Autumn leaves.
I love boots and sweaters and scarves.
I love snuggling under blankets while reading books to the babies.
And I love this burlap wreath!!
I LOVE FALL!
Do you?
I am sharing this post and getting inspired at:


Anne
September 26, 2012 at 1:01 pmExcellent job! Love your wreath!!
bethanygier
September 27, 2012 at 9:08 pmThanks Anne!
Aneta Kudasik
October 2, 2013 at 4:56 pmVery warm and inviting! I wouldn't mind knocking on a door with that on it 😉
Dining Room Reveal | This Little Estate
February 24, 2017 at 4:06 am[…] from the super sweet Jennifer at the City Farmhouse and used the $1 wreath form idea I talked about HERE. It was a project that took an entire evening, but it was so relaxing and I think it […]