
When I was a little girl my Grandparents would drive the three hour commute to my home town and take me back with them, to their home, for a summer vacation. The days seemed longer when I stayed with them. The sun seemed to shine a bit brighter and I felt loved and seen in the most beautiful memorable way.

Maybe it is because I find my birth order in the middle-ish of six siblings, or maybe my Grandmother just knew specifically how to connect with me over all of our shared interests, but whatever the case, I always felt so very special when I was with her and my Grandpa. The saying that says we will always remember how people made us feel, seems pretty accurate when I think about my childhood and the weeks of summer bonding we shared.
My grandparents loved the outdoors. They spent the summer days we shared, gardening, slipping in and out of their pool, eating al fresca, finding the best watermelon at the local grocery store and marveling at it’s colour and sweetness when we cut into it. We barbequed dinners and closed each day by taking long walks around their sleepy town, or sneaking out to a near by beach to comb the sand for seashells and special stones.

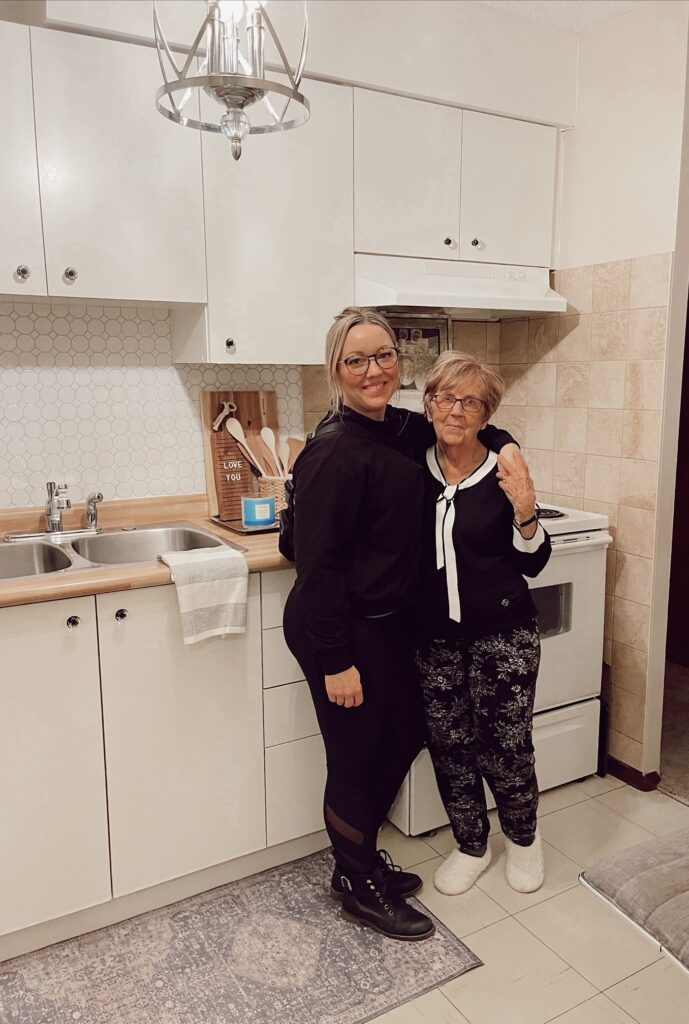
Flash forward to present day, and I wanted to attempt to make my Grandma feel as special as she has always made me feel.
My Grandma recently celebrated her 90th birthday and I wanted to commemorate her ninetieth year by gifting her a kitchen makeover.
I wanted her rented space to feel more like her. I wanted it to reflect the things she liked and I wanted it to remind her of those days when she lived beside the water. So, with a little time, I hatched a plan to surprise her with an updated and pretty space.
I knew I wanted to keep this project as budget friendly as possible, because Grandma would want it that way.
We love to go thrifting together and she appreciates upcycling and recycling items, so I knew she would appreciate all of the little treasures I scooped up while on my travels.
Over the last few months I have had so much fun scouring local antique stores looking for pretty little pieces that would fit Grandma’s style.

She loves all things blue and even decorated a lot of her past spaces with tones of the sea or water. She also has loved anything that has a little bit of sparkle to it.
From the muted sparkle inside of conk shells we would find water side, to the bling of pretty chandeliers to the sparkle of her treasured baby blue and blush stained glass mirror that has been a staple in all of her homes.
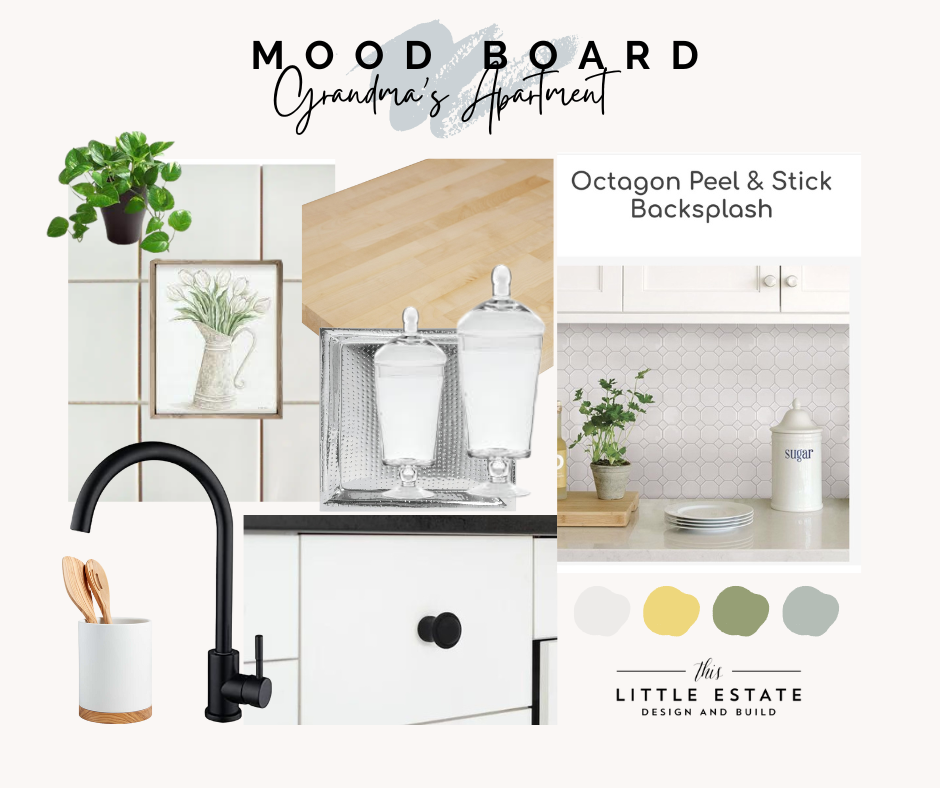
While keeping her current style in mind, as well as looking at the elements in her apartment that I was not able to change, I decided to call her apartment friendly design, “Coastal-Chic”.

My Grandma left the whole design of the space in my hands, with the only instructions being that she wanted her kitchen cabinets upgraded to a brighter true white colour.
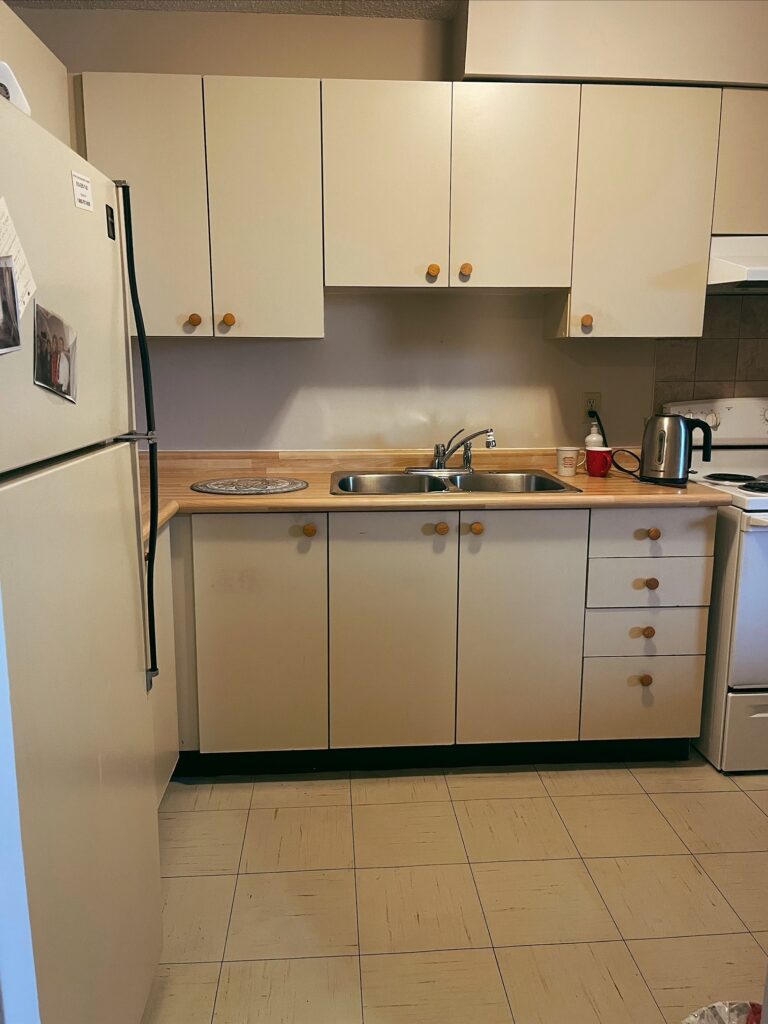
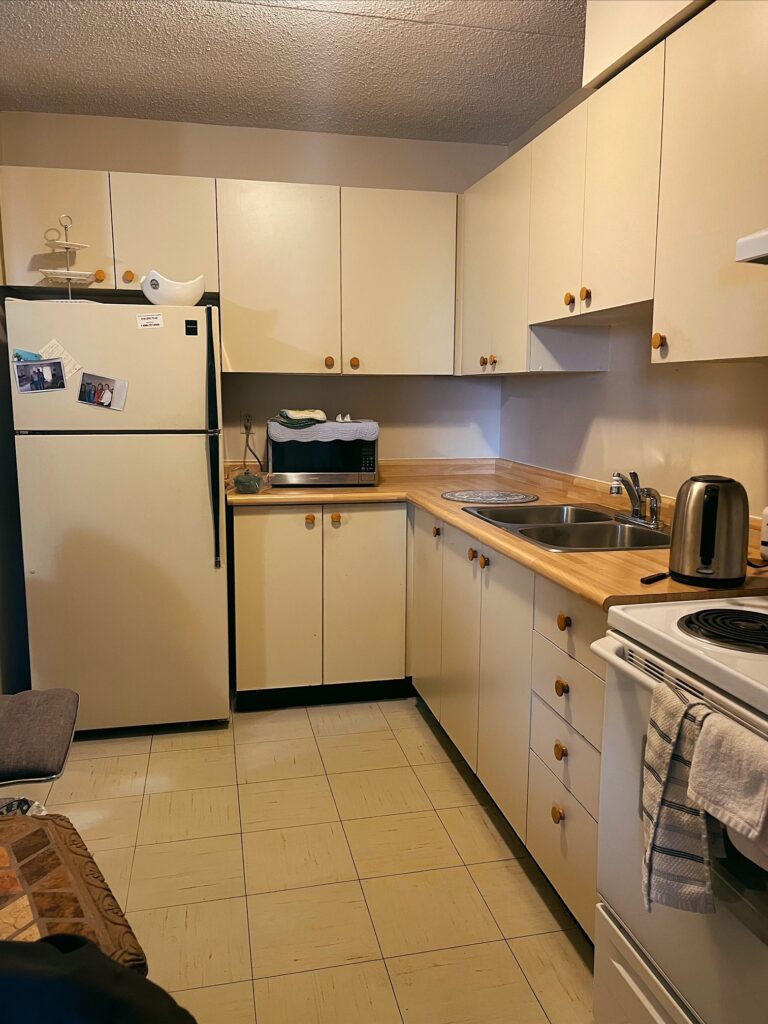
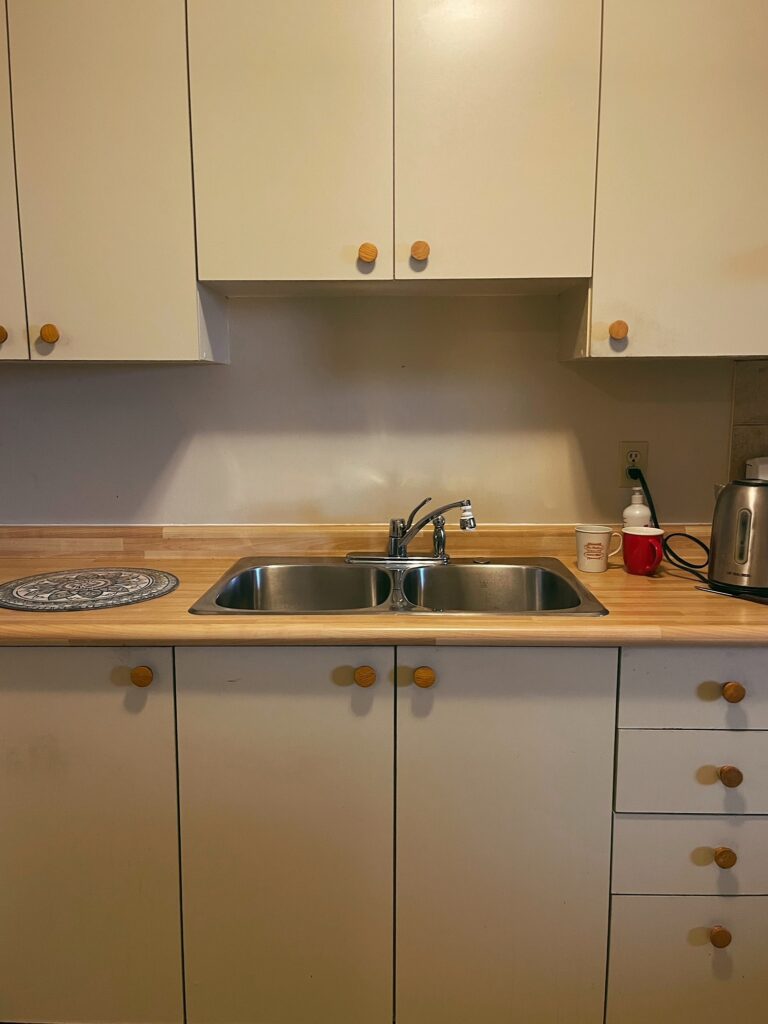
The cabinetry in her apartment is pretty typical to most rental units. They are a flat faced basic door panel and they had seen better days.
We aren’t sure if her cabinets have yellowed over time naturally or if this is just the muted beige tone they have always been. Regardless, she lives in an apartment building where each unit is getting updated once he current residence moves out, so these cabinets will be replaced upon her departure. We decided we might as well make them the colour she has always wanted and knew a fresh coat of heavy duty cabinet paint would elevate the space regardless.
DISCLAIMER: (If you are considering painting cabinets in your rental space, be sure to check with your landlord to see if doing so is permitted.)
(In my past experience renting, landlords have given the approval to make documented changes to my living area elements, as long as they add value to the space.)
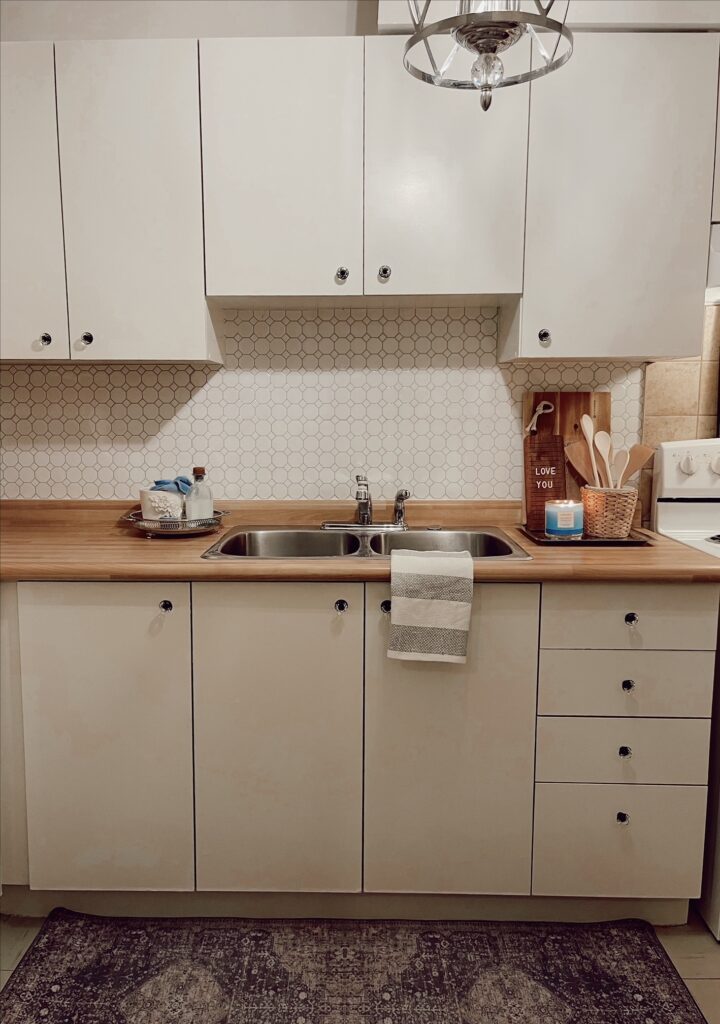
There are so many colours of white that look great on cabinetry but Grandma wanted to leave the decision process with me. I wanted to get this one right, as I wanted to choose a white tone and colour that wasn’t too bright, so her flooring wouldn’t look darker than it already was.
I chose to colour match an existing IKEA kitchen cabinet door to a can of cabinet and furniture paint. (I did this because I know the colour is a creamy white and not a true bright white and because Grandma loved seeing my own kitchen where we utilized these cabinets.)
Because here cabinets were made out of a press board material, sanding them down entirely wouldn’t make the biggest difference with how the paint adhered to the cabinets. Unlike wood, press board cabinets don’t lift the same way when they are sanded. I chose to forgo that step and instead focused sanding around the edges of her cabinets and around any high surface touch points, like where the cupboard hardware is.
Adding a little bit of roughness there, with a fine grit sandpaper, will help the paint grip to the press board and will ensure a longer lasting finish.
After a through wash down and scrub with degreasing soap, the cabinets were ready for paint!
I used a small pile roller and a one inch paint brush to cut in and paint the cabinets.
In the end the cabinets needed three coats of paint.

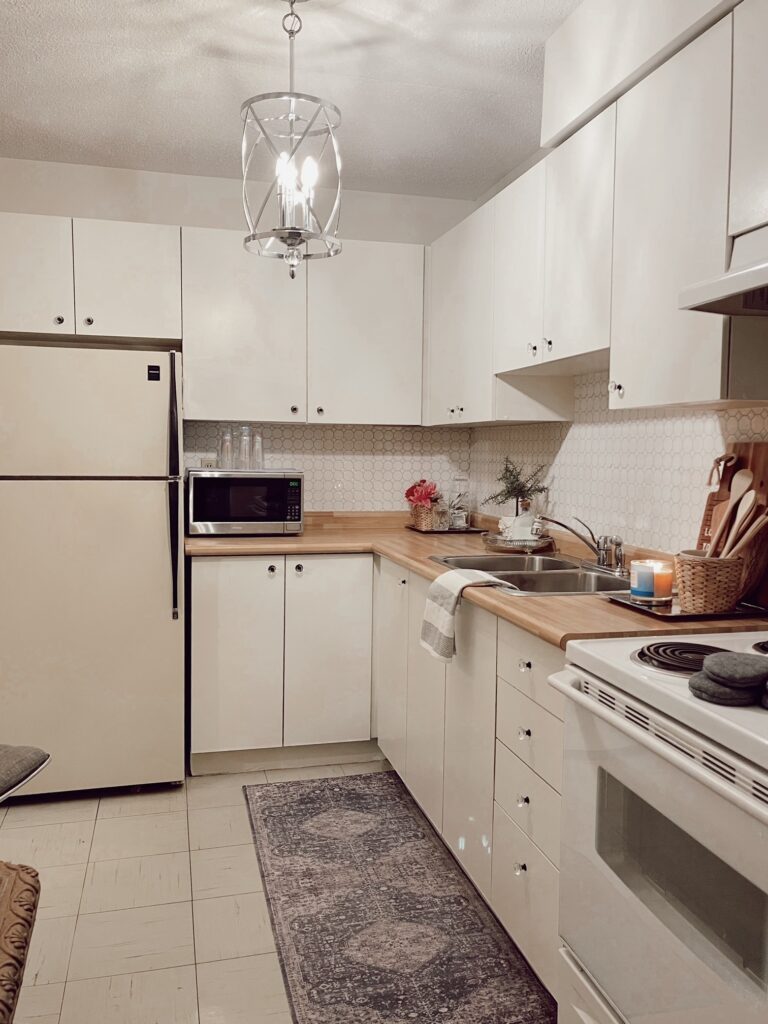
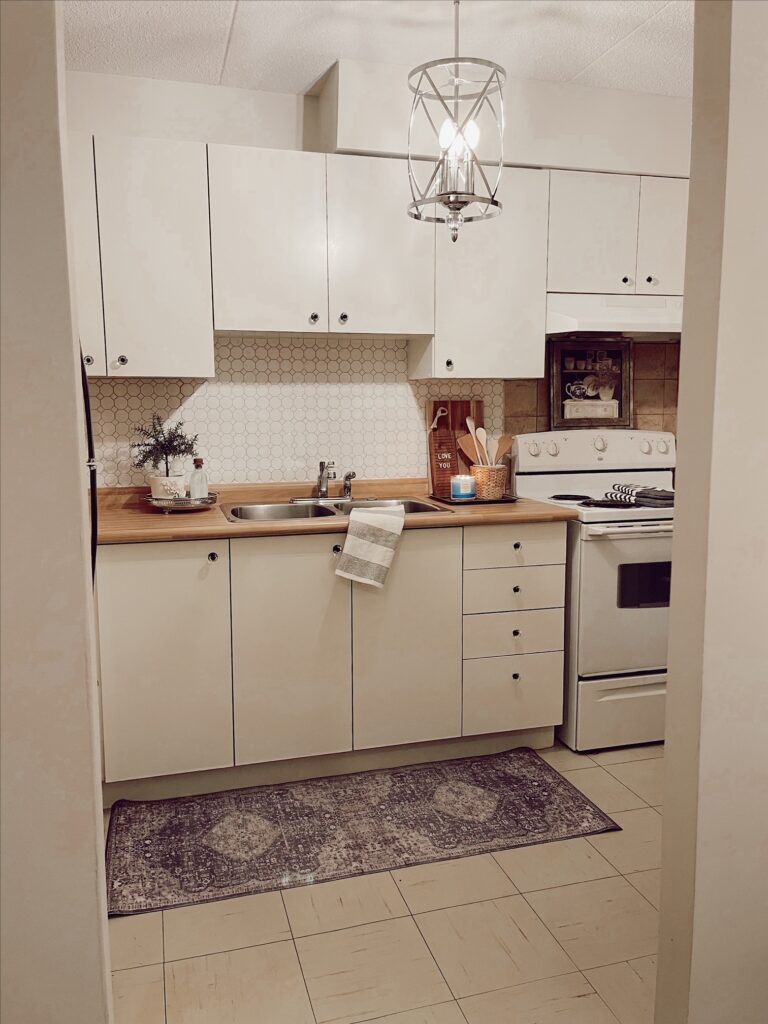
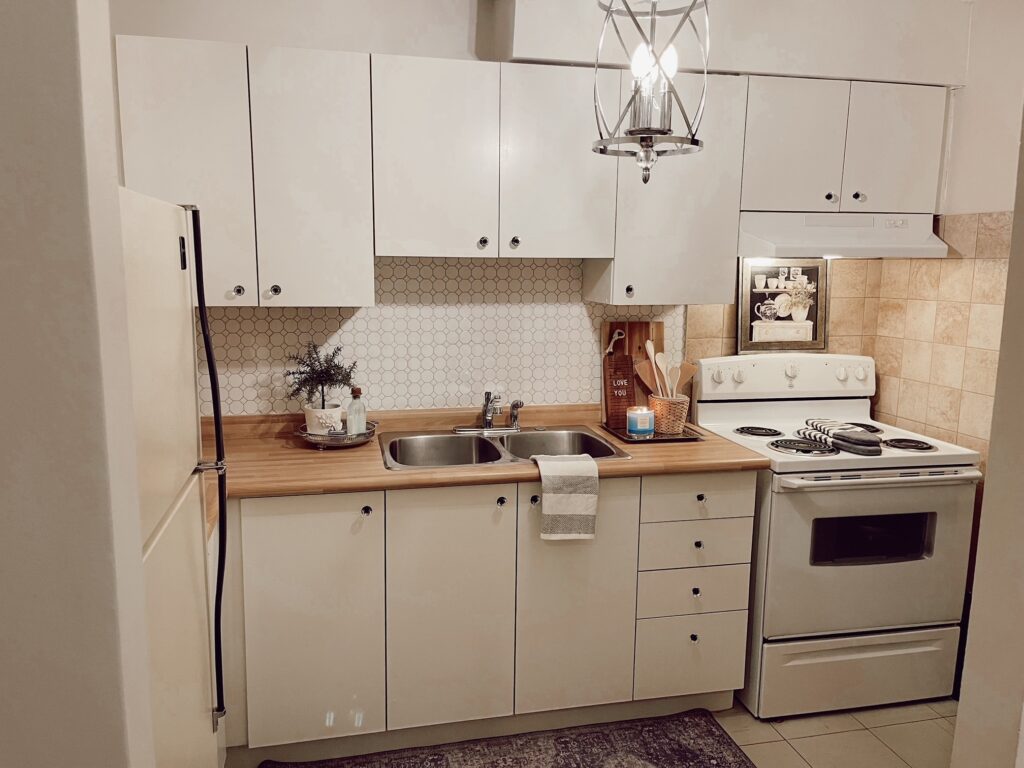
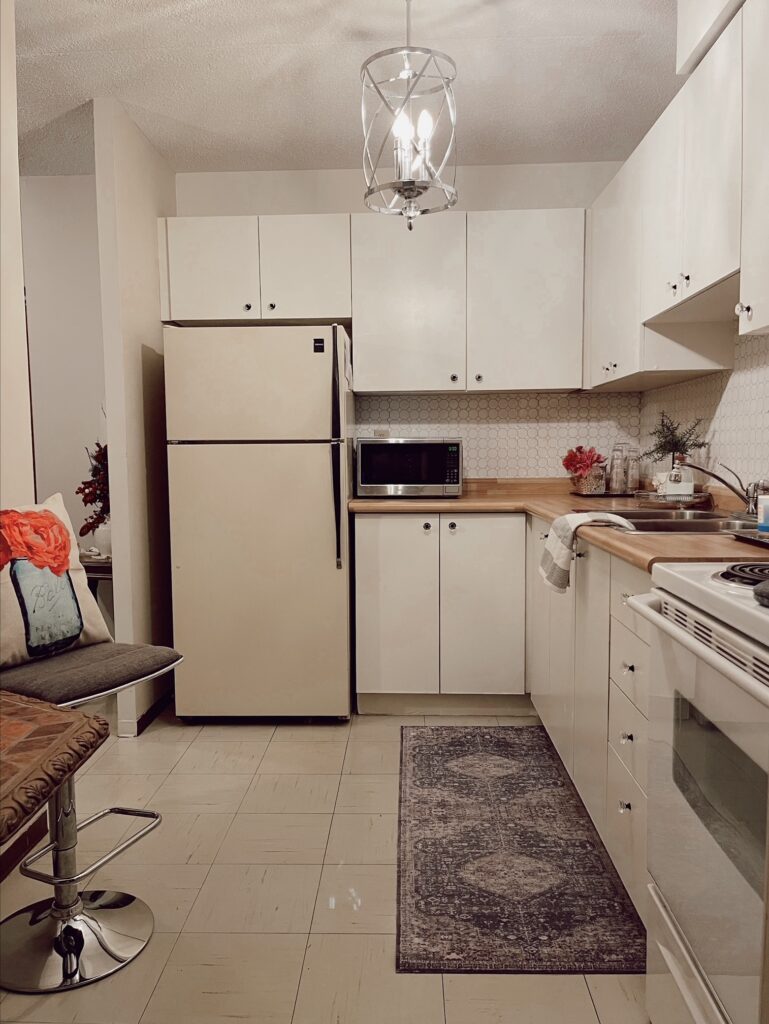
The brighter colour made such a difference in her space. By painting the dark kick plate and the walls above her cupboards, the space looks even bigger now.
Typically cabinet paint needs a long cure time to ensure a long lasting finish and will bend approximately 4 weeks to cure. This is an important point to take into consideration as you use your kitchen after it has been painted. Using your cabinets as minimally as possible will be great to ensure a diamond tough paint job.
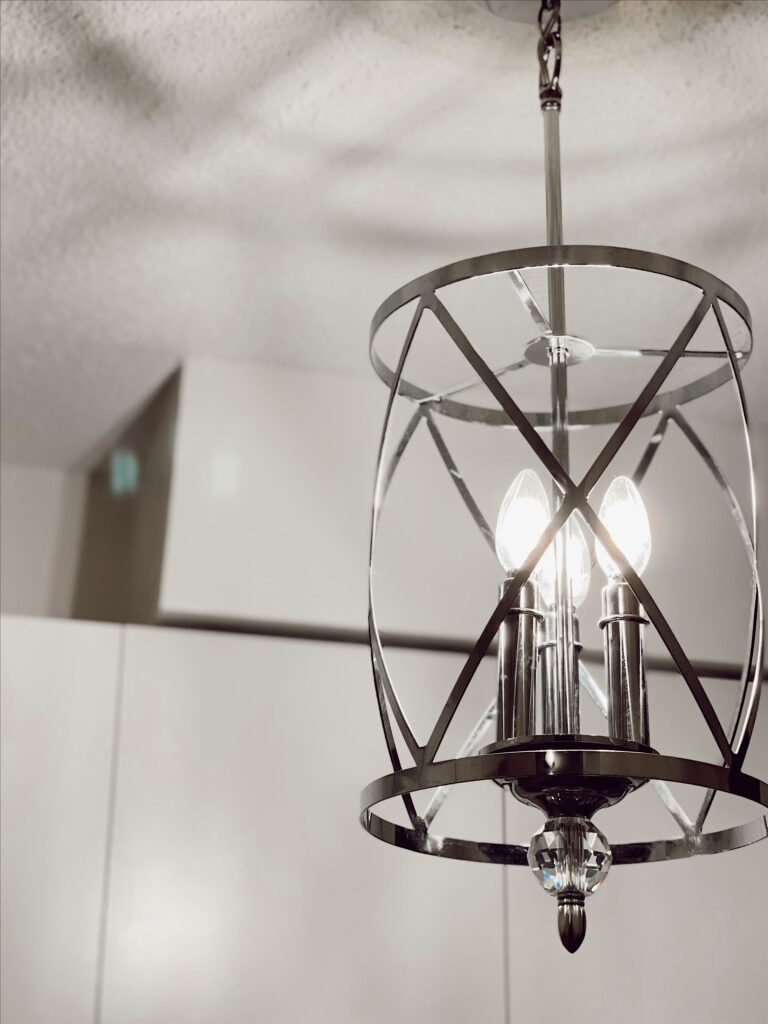
While the cabinets were being prepped and painted, my husband installed two light fixtures in Grandma’s space. One was meant for her kitchen and one was installed over her dining room table.
I loved the light fixtures as soon as I spotted them on Facebook Marketplace. They were oversized, held three chandelier lights to offer plenty of light and it’s “X” design reminded me of those sea side light posts that have metal strapping around their glass bulbs.
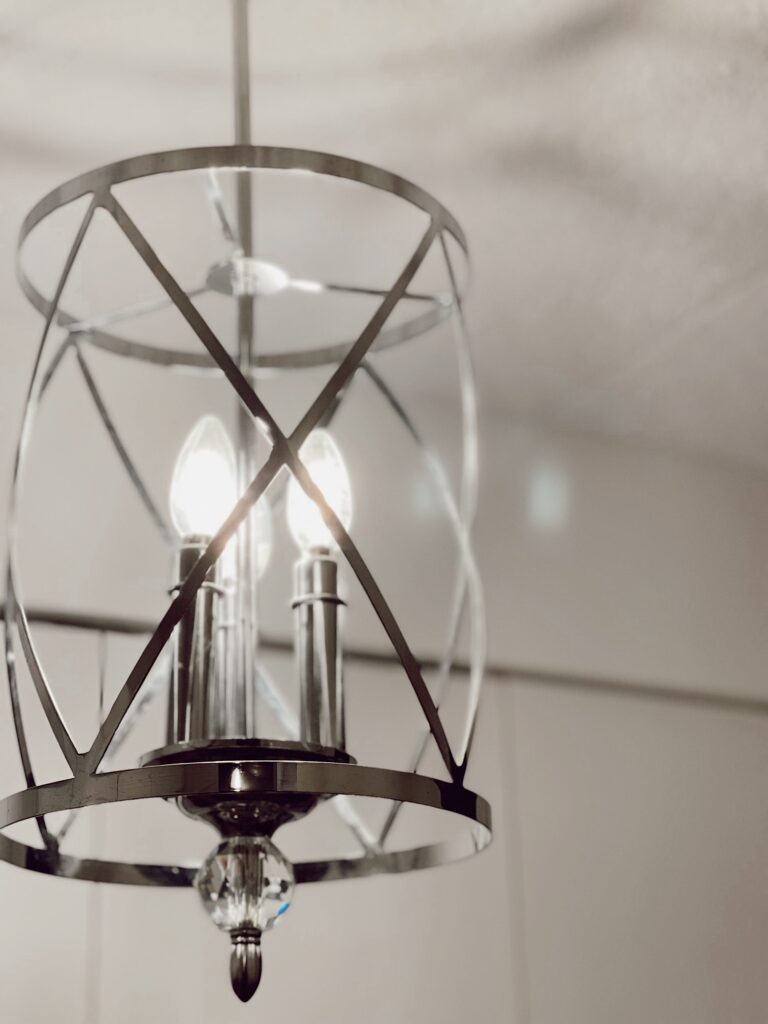
The little sparkly diamond element connected to it’s lowest piece, tied the look back to our glam vibe and even matched the crystal knobs I found for the kitchen’s cupboards.
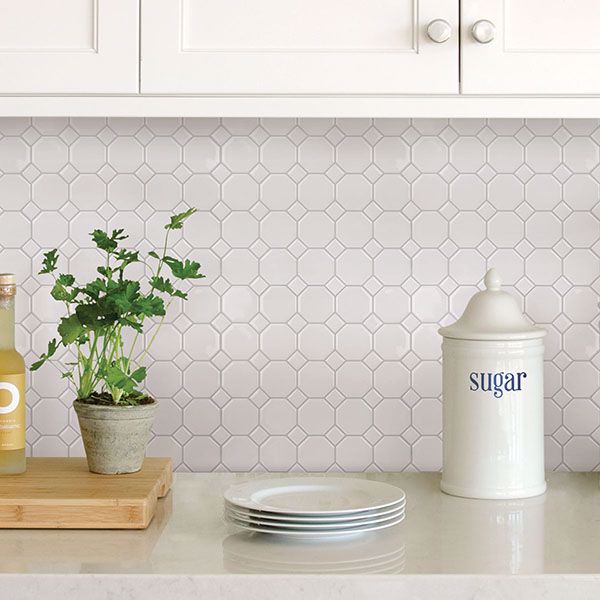
Instead of watching the paint dry, we got busy installing this fabulous Wallpops octagon peel and stick backsplash between coats of paint.
In the past, we have used Wallpops and Wallfoors for our bathroom makeover and they have stood up so well to our families daily use.
My Grandma however, had never heard of a peel and stick option for a backsplash and she was immediately intrigued when I mentioned adding them to her space. She wondered how they would hold up to water splashes, how well they would adhere to her walls and if they needed special care and treatment.
From my experience with peel and stick flooring and backsplashes, from Wallpops, they are very easy to maintain and have a finish that are all parts durable, washable and beautiful.
To install, you only need to use an exacto knife, a pair of scissors, a cutting board and a level. No power tools required!
We used the Octagon Peel and Stick Wallpop backsplash. Each pack comes with 4 pieces on 4 sheets that measure 10 x 10 inches.
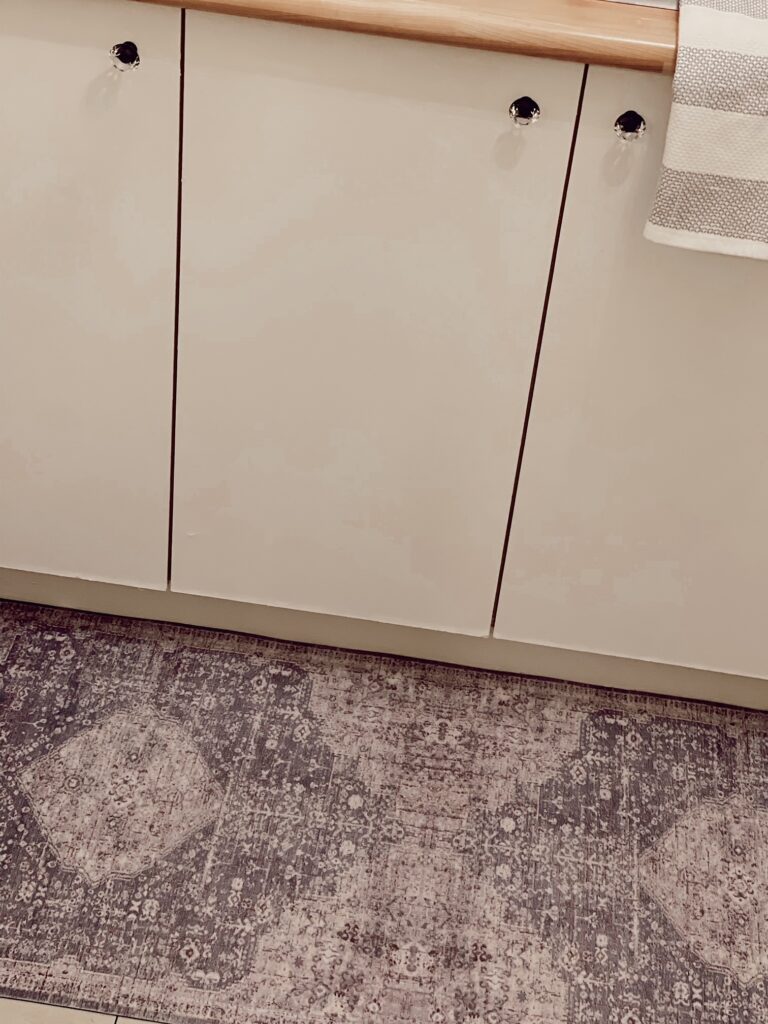
I found these beautiful little crystal knobs with a black finished base on Amazon and snapped them up as quickly as I could.
I needed a lot of handles for this design and needed to find the best value for my dollar. I had fallen in love with the idea of a crystal or glass knob for this space, but I also wanted them to have some visual interest so they wouldn’t just disappear into the white of the cabinets.
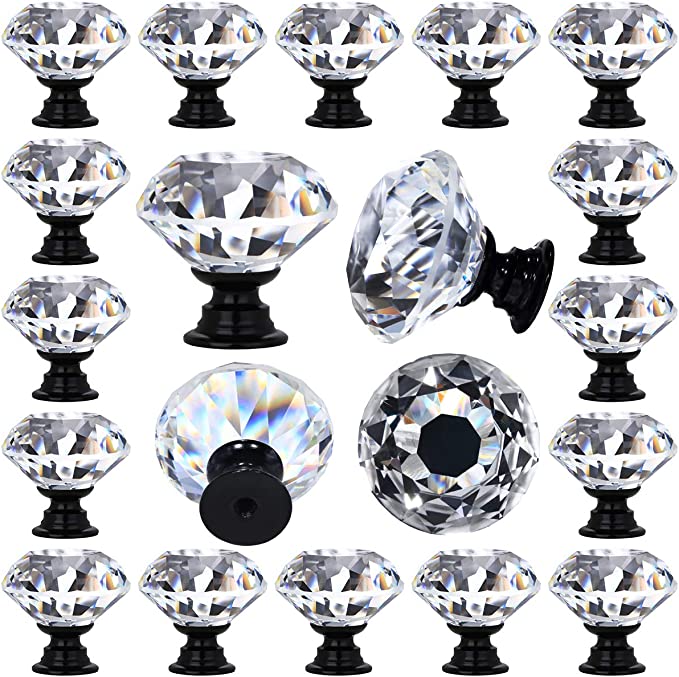
When I sourced these that had a contrasting dark base, I knew they would help the knobs stand out and they’d match the black faucet we found on Amazon as well!
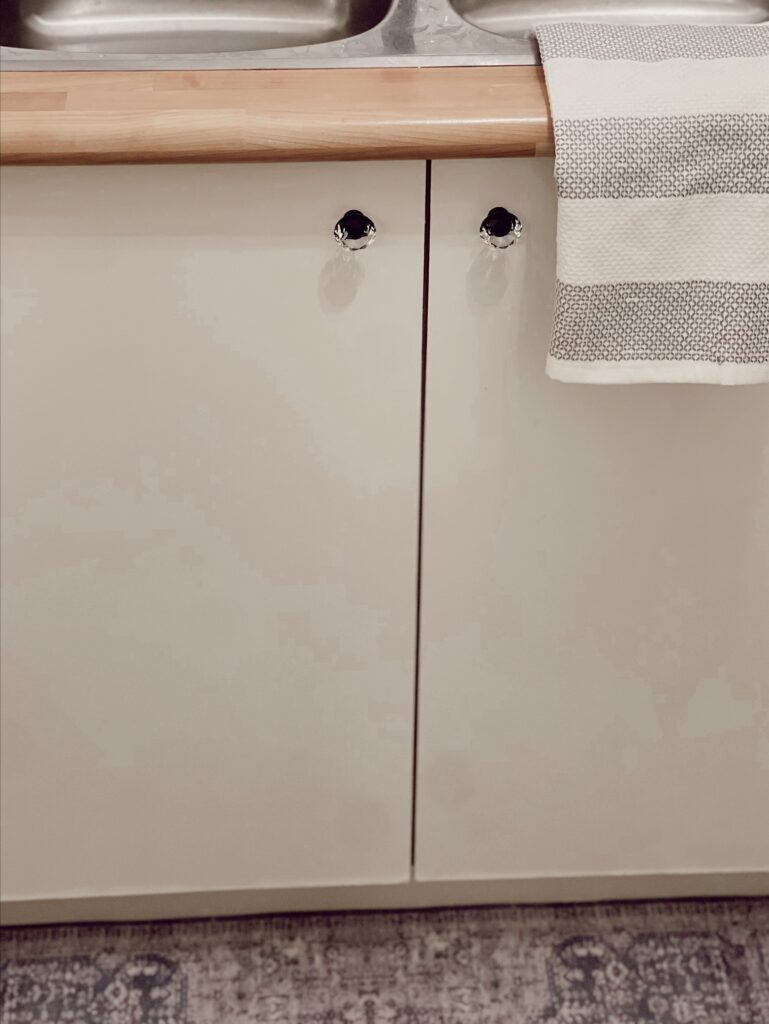
The knobs were straight forward to install, with a quick clipping of the screws that ended up being too long for a snug fit on her cabinets. (Thank you Hubby for your quick thinking and for packing along a wire cutter that did the trick in a pinch!)
Once the handles were installed, we were ready to add in the pretty simplistic black arched faucet. The only problem was, I didn’t realize that the sink in this space had an attachment sprayer connected to it and so, in the end, after much problem solving, the faucet wouldn’t actually work in the space.
Despite this set back, I think this view still looks amazing and updated!
Honestly, I was so disappointed as I really thought that dark element against the new back splash would be the finishing fixture that would pull the design together and elevate the final design.
But, unfortunately, at the time of install, during our allotted time left to complete this project, the faucet had to literally go on the back burner until we could figure out a fix for the a future visit.
C’est la vie!
To finish off this budget friendly, apartment kitchen makeover I layered in all of the thrifted and found items around the finished kitchen.
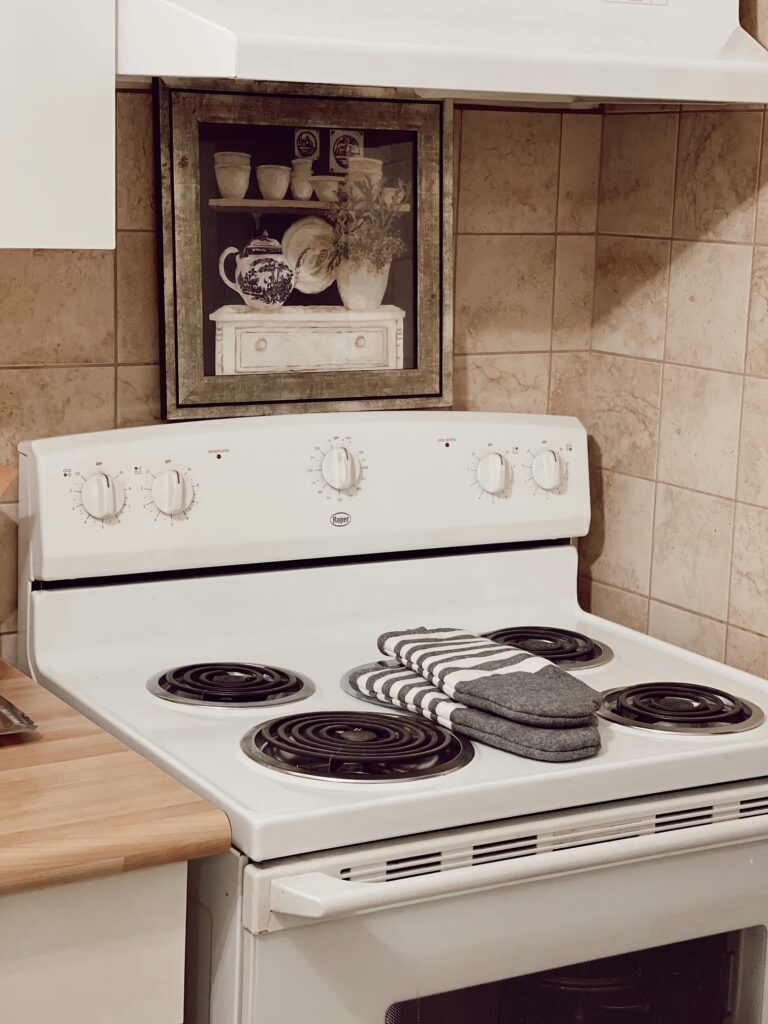
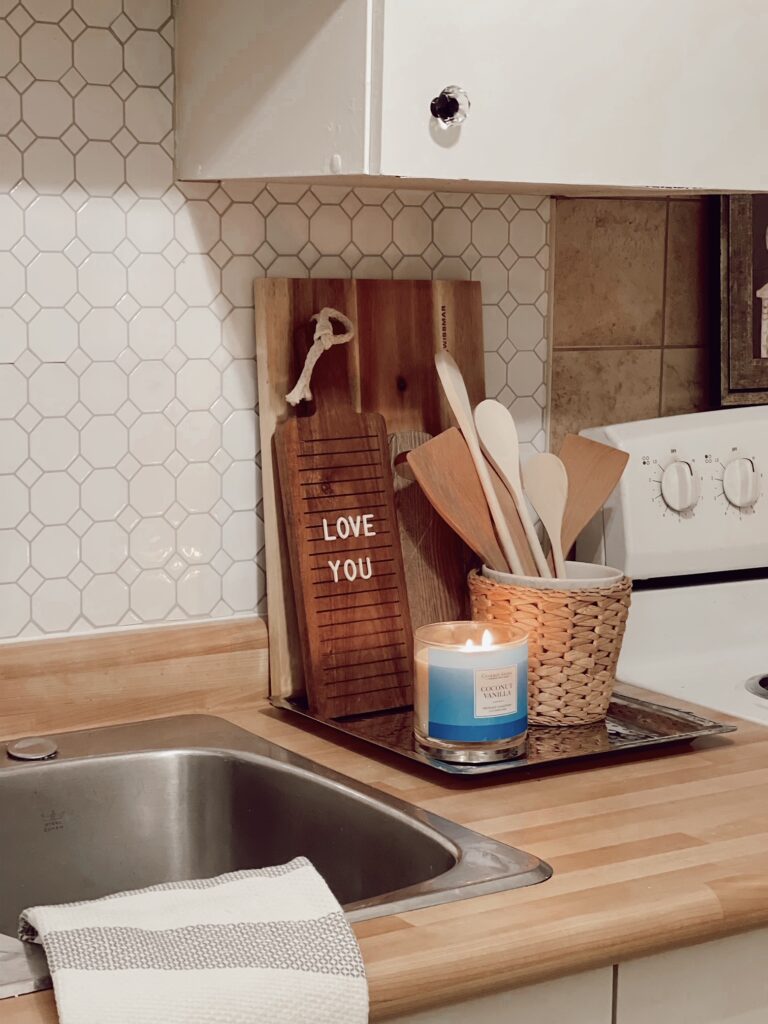
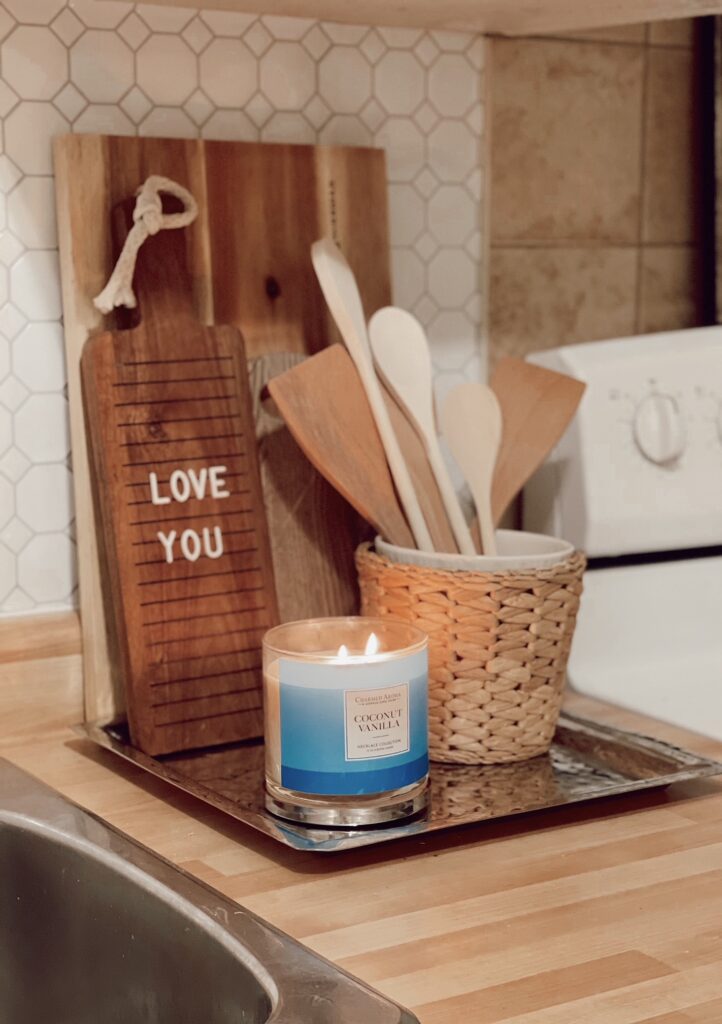
I added some fresh wooden spoons next to the stove and leaned a few cutting boards against each other for easy access.
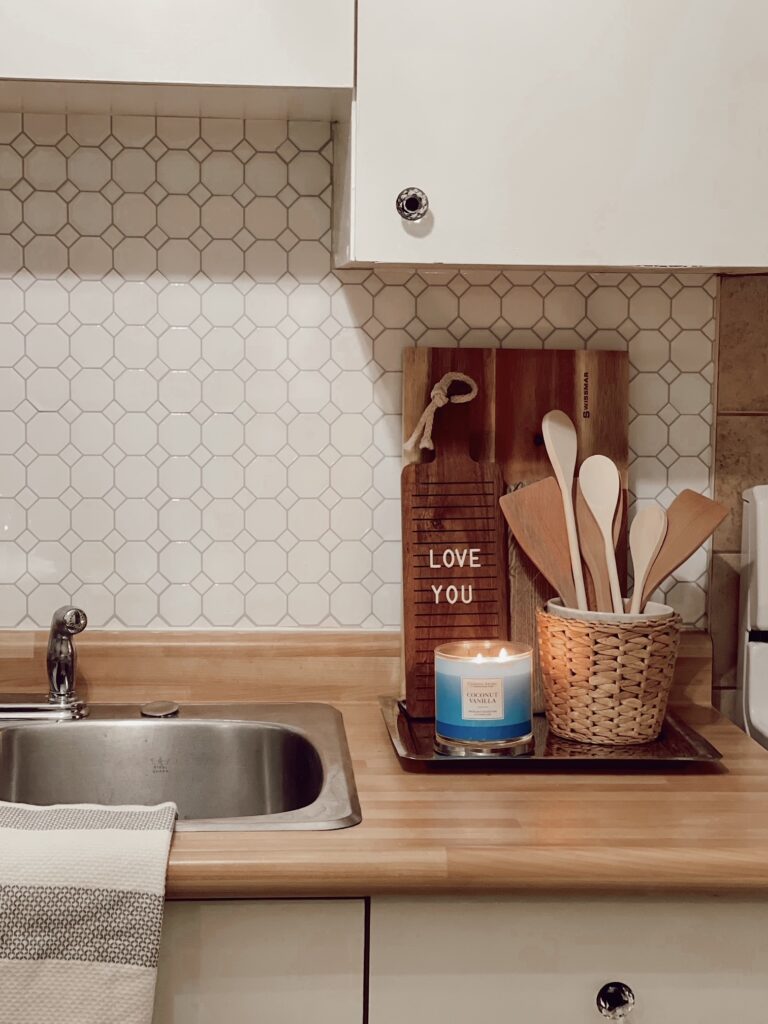
My husband and I made her this cutie little cheese-board-letter-board which is the perfect size for a kitchen counter. An added Charmed Aroma candle smells delicious and also gives the neutral corner the pop of coastal blue I was looking for.
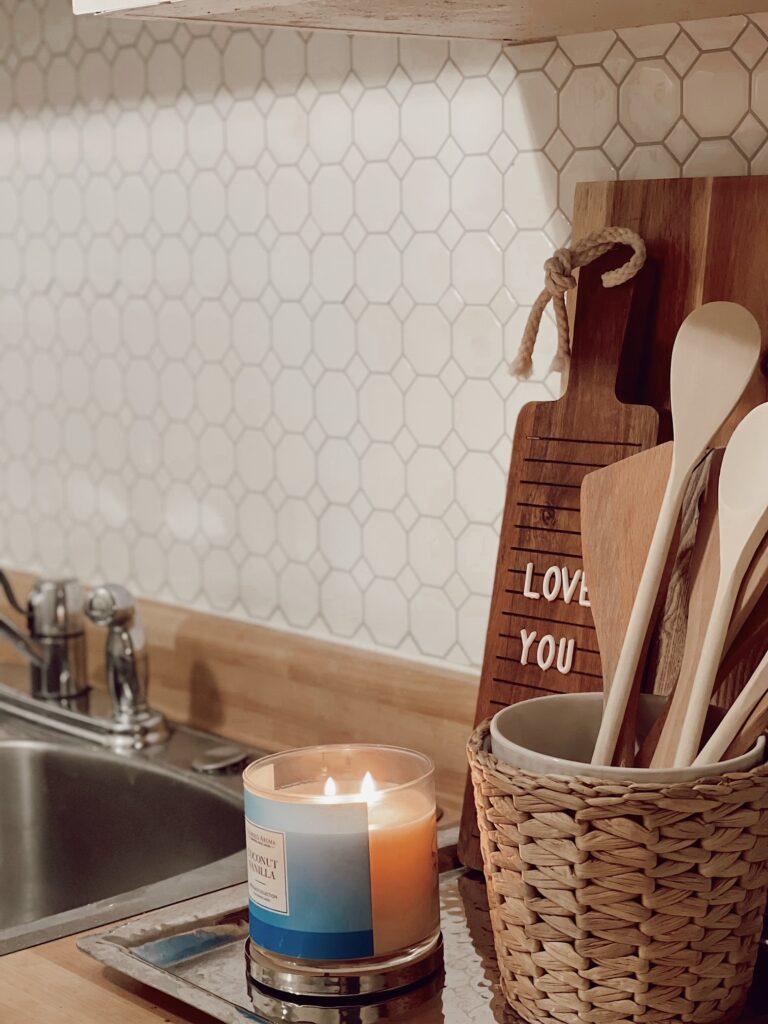
I grouped all the items on to a beautiful hammered silver square tray that echoed the shine of the newly installed silver chandelier.
(I googled silver hammered trays, like the pair I thrifted, and can’t believe that similar trays are being sold for upwards of $250 a piece!)
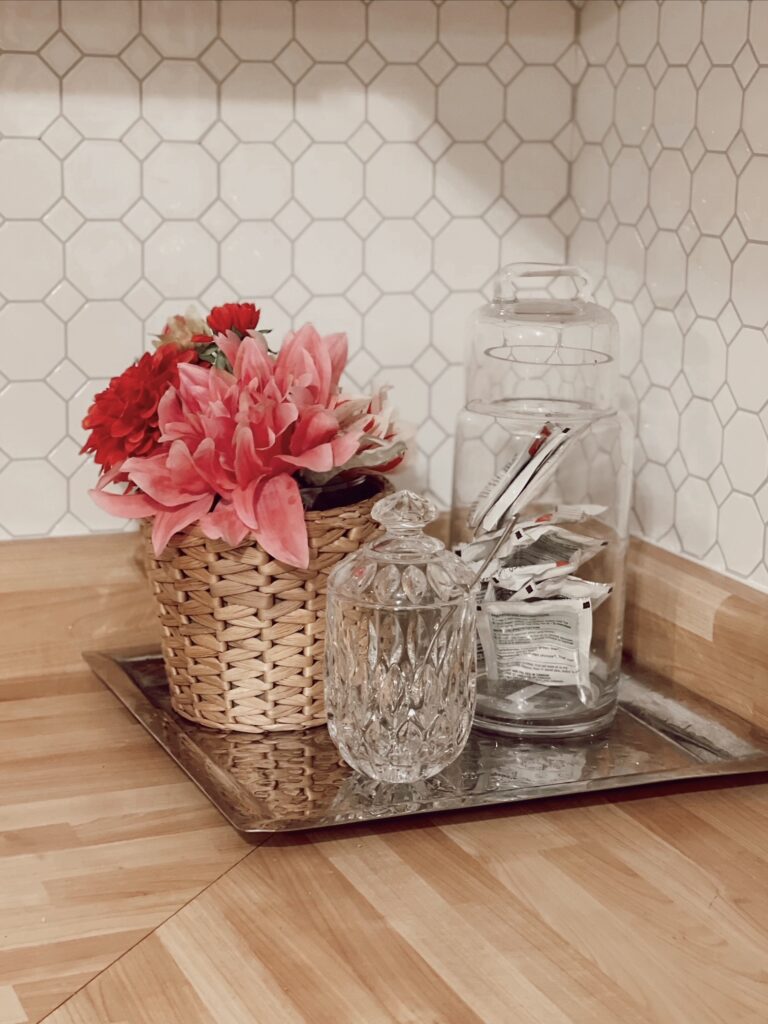
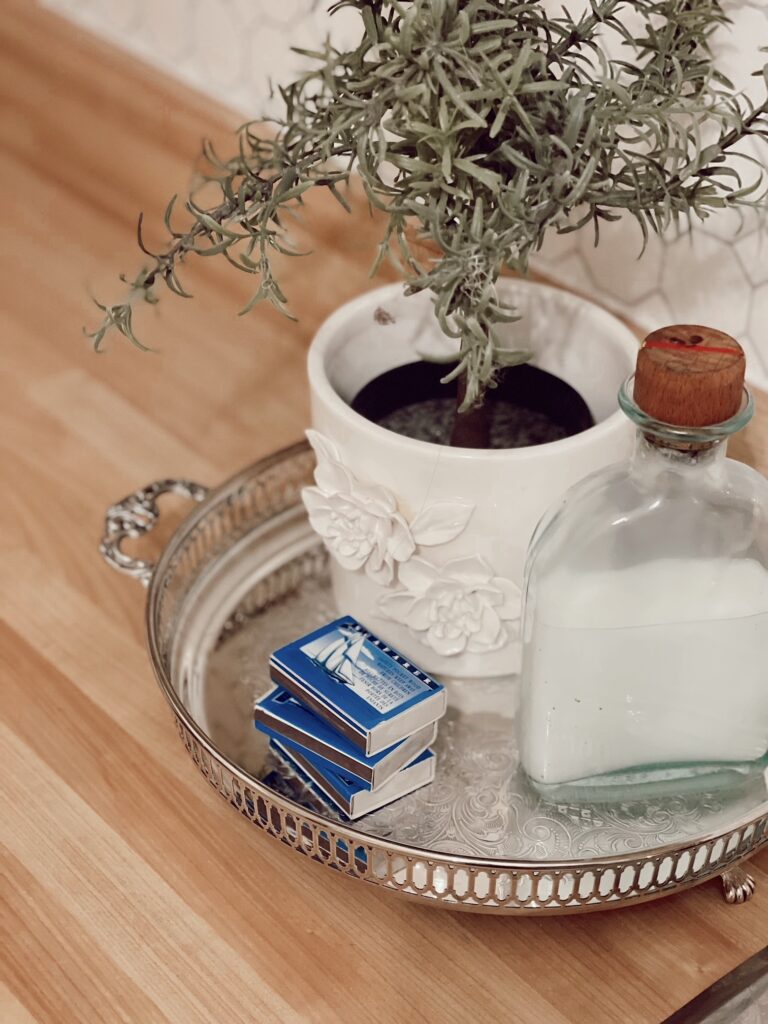
Beside her sink, I added a circular footed silver tray that was most likely originally used as a tea tray. The best part about it? A cursive “B” is inscribed on the center of the tray and just so happens to be my Grandmother’s and my shared first initial.
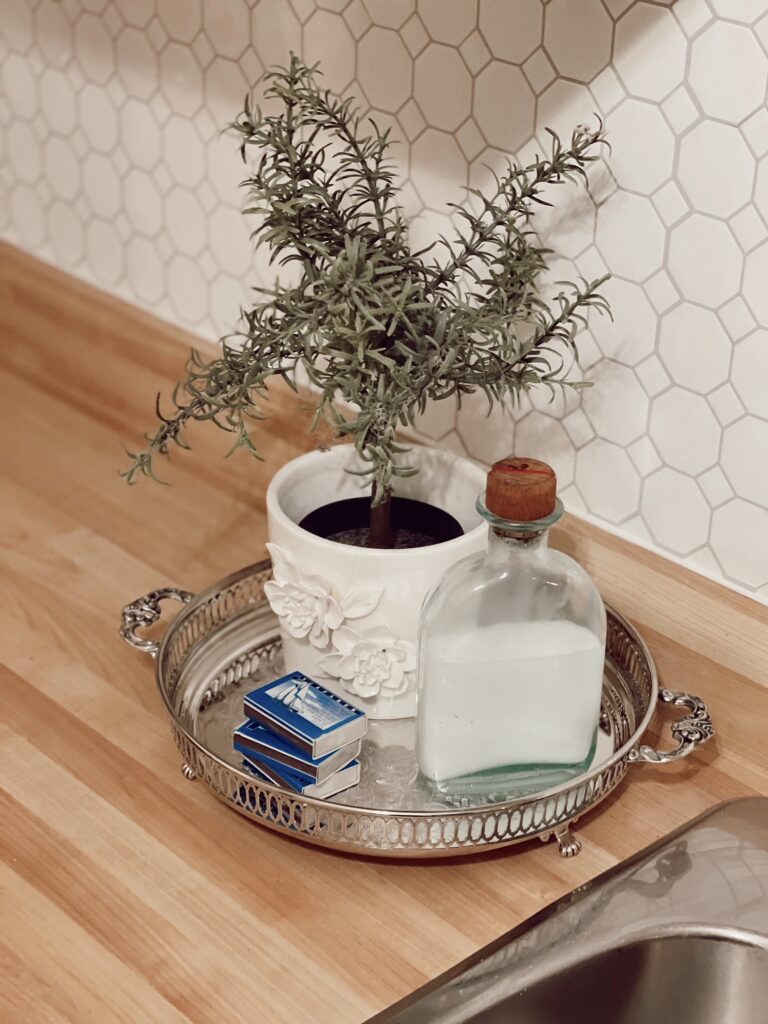
Since the kitchen doesn’t get any direct sunlight, I opted to add a little faux greenery to the tray as well. Instead of placing a typical dish detergent bottle here, I took the opportunity to add an element with a coastal vibe. I added a unique little blue-green glass container, complete with a cork closure, and filled it with creamy white dish soap. The stacked vintage boxes of classic striking matches with majestic boats on their cover are both parts useful and add a nod to a nautical component.
Another identical square hammered tray was placed in the back corner of the L shaped kitchen counter and holds some repurposed glass and vintage crystal containers with coinciding lids. One will easily hold tea bags and the smaller crystal dish has a spoon slot that will make sugar easily accessible while making it look beautiful and elevated as well.

While on my travels, I found the prettiest glassware and found it in a complete set of 12. They glisten shades of various blush tones with slight hints of emerald green and azure.
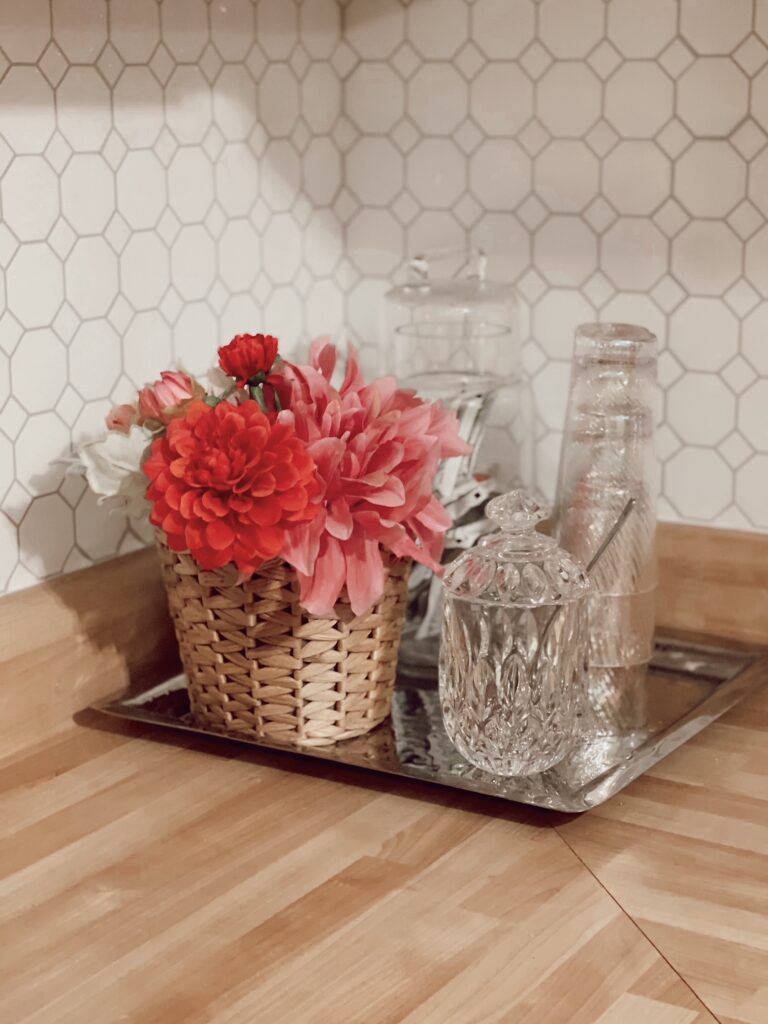
(When I first spotted them they reminded me of the inside changing shades of shells and particularly prompted my memory to think of the days when Grandma would proudly show me the pink iridescent conk shells she had found on her long beach combing days.)
I knew she wouldn’t want a dozen glasses filling up her small kitchen cabinets, so I decided to split the set between us. I told her I would think of her whenever I used these special glasses and thought the idea could connect us, even though we live so far away from each other now.
In the end, this space turned out to be a charming little kitchen, that is filled with items that evoke my Grandmother’s style.
She wanted the project to be a complete surprise to her, so the entire time my husband and I were busy making changes to her kitchen, she, in all of her ninety-year-old-adorableness, covered her eyes whenever she walked by the space!
After joking with her that we were painting her cabinets’ pink and purple with polka dots, she was relieved, happy and grateful when we revealed her kitchen looking brighter and reflecting her style.
Her sweet texts of gratitude that have been coming in post install, have been the most special gift to me.
If she’s happy and feeling special and loved, then I have been able to show her a little bit of the same care she has continuously shown me.

What do you think about the before and after of this space?
I still cant get over the fact that the “Before” photos were taken in the day time and the “After” photos were snapped at 9:30PM with no natural light.
It just FEELS brighter!

In case you’re wanting to update your space, while sticking to a strict budget, I will share the budget breakdown with you soon!
But, for now, I gotta know, did we achieve the coastal-glam vibe we were attempting to go for? Also, would you paint your cabinets? What colour would you choose if you were to paint your kitchen cabinetry?


