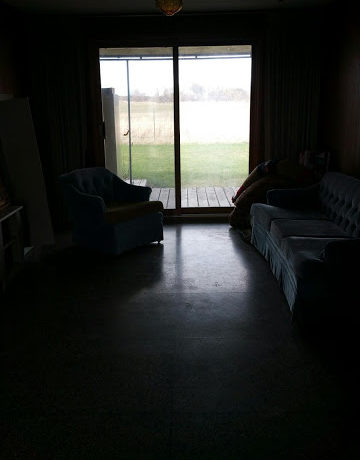
Our master bedroom was stuck in the 1950s when we took
possession of our home last year. Because we usually have our eyes closed when we are in this space, it was never a priority to make over. 😉


However the DIY-er in me couldn’t just leave it as is when we moved in, so I decided to paint the space a pretty cream tone to brighten it up and then took it one step further by painting out the wood trim around the perimeter of the room, around the linear window and the flat panelled built-in.
That little update worked for us, but it was far from a restful and peaceful
retreat. Truth be told we then got into the habit of allowing our bedroom to
be the space where everything goes to hide. All the dirty laundry baskets piled
high when people come to visit? All the half-finished projects? All the baskets
of unmatched socks? YEP! They ALL got
hidden behind closed doors in our master. Seeeeeeeeeee????

This summer though, we decided the whole space really did need a major over hall.
We needed a place to rest our tired heads after a long day of renovating our home, and this space above was just not cutting it.
We needed a place to rest our tired heads after a long day of renovating our home, and this space above was just not cutting it.
Immediately I knew we wanted a cozy and bright space filled with lots of texture
along with a lot of pretty and soft elements. I wanted our made over room to be a space that was equal parts feminine and masculine, both bright and dark. A high contrast room in all possible ways.
along with a lot of pretty and soft elements. I wanted our made over room to be a space that was equal parts feminine and masculine, both bright and dark. A high contrast room in all possible ways.

After a lot of back and forth about our dropped ceiling dilemma. (Read: I begged hubby we should spend money to change it and hubby talked me out of it while showing me our bank account, again and again and again…) We decided it wasn’t in our
budget to replace the original ceiling in our bedroom space because down the road we will raise the roof of our fixer upper and at that time will upgrade our ceiling with some wood planks of some sort. Although, this ceiling doesn’t match the design aesthetic of the made over spaces within our home it does match our budget as hubby so often reminded me.
In the meantime with this makeover,
we created a cozy cocoon with paint alone by carrying the same warm
grey from the top of our walls up and over our ceiling. This paint trick truly did wonders for this space! The ceiling now is much less noticeable and fades into the rooms overall design. What a quick and effortless change that’s perfect for any room with a less than loveable ceiling. Seeeeee?


I jumped right into this room’s makeover by choosing a beautiful warm grey tone called Thunder from Benjamin Moore to use on the upper part of our walls and ceiling. The bottom part of our walls were painted a warm white called Cloud White from BM as well. We love millwork and believe that a room should look finished even when it is empty, so we chose to create traditional custom wainscoting to install on the bottom ¾ of our walls to be covered in that creamy white. A pretty marriage of dark and light! (To see Cloud White used in another area of our home check out our Mudroom Makeover HERE)

This room took a lot of our summer evenings to complete, so I apologize for the dark progress photos. With the kids off on summer break when this room was being completed, we made a grand attempt at filling their days with the beach and hikes and then every night after work, we got a little more accomplished in our space as we worked around our spaces existing furniture. Many times we wished we could have emptied the room to complete it, but we are getting more accustomed to sleeping with sawdust after all and in the end had no other room available to store a king sized bed.

Night after night we caulked these walls and
painted coat after coat of paint over our paneling, ceiling, closets and
walls.
painted coat after coat of paint over our paneling, ceiling, closets and
walls.
There was one day in particular that I don’t wish back during this
process. That was the day I had an electric sander in our space because I wanted to create smooth blended walls after puttying all the paneling’s seams with
wood filler. At that point, I kinda wanted to give up as I watched our bedroom
get covered in a thin layer of sawdust, but I knew all of the late nights and
messes along the way would be worth it.


Seeing the room come together right in front of our eyes, night after night, was rewarding enough to encourage us to keep up our dusty momentum. We dreamt of a bright (okay, dark) future filled with restful night sleeps.

And then one night’s work turned into the day where our space came together! Now that our bedroom space is finally finished, it’s the room that everyone in the family finds themselves retreating to.

And I cant blame any of them! This space is now the puuuurrrrrrfect cozy retreat for all of us and we are so happy to have a master bedroom that is finished and functional now.

I’ll give you more details soon, but in the mean time if you want to see more snaps of our master bedroom makeover you can see the space featured in Leons Furniture’s 100+ page digital lookbook HERE and can also be seen at Hello Yellow HERE where I share a little more about our makeover.
We will show you HOW exactly this space came together in subsequent posts and share with you how we saved money and time along the way so you can do so too at your home!
Like, with this DIY project:


Stay tuned, more on our master makeover to come. What was your favorite part about this made over master? We would love to hear your opinions. Have you seen this space in Hello Holiday yet? What did you think?
Happy Wednesday Lovelies!