Woah. We are pooped butttttt guuuyyyyssssssss, we are also already in our third week of the One Room Challenge!
As you know, in true This Little Estate fashion, we are undertaking a huge do it yourself project for this one.
Last week when we showed you our space we shared with you a design board with a touch of farmhouse flare.
This week we want to share a three dimensional digital rendering of the space and we want to show you our progress! WARNING: As always we like to keep it real here and show you the raw footage of what living through a DIY reno actually looks like.
First, here is a glimpse of the pretty.
PS: This was Handy Hubby’s first time using this feature and although seeing this design from every angle was amazing, we also didn’t realize it wasn’t a program that auto saved. SO, this is all we have to show you. 😉
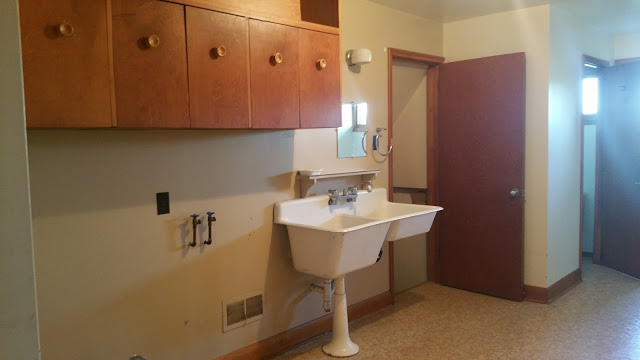
And here is a look at the “Before-before”. Meaning before the home was ours and still had the previous owner’s belongings in it.
And here is a look at the “Before”. Once we moved in.
And here is a look at the “Before”/once we got our hands on the place.

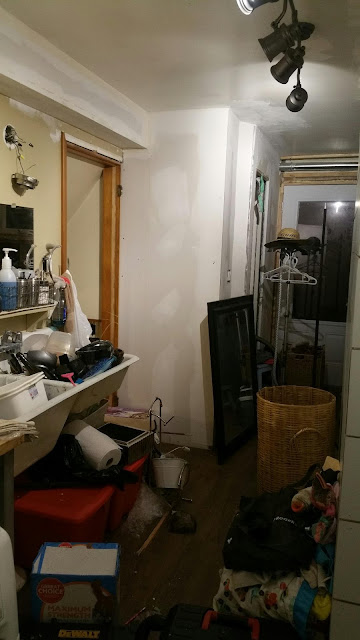
And here is our current chaos.

I know, I know, I want to cry too.
What our original design board failed to show you in detail is that we need to wrap our entire space in shiplap. I’ll recap the steps we took to complete this task in another post but here are some progress shots of us getting the whole family involved. (In the mean time if you want to see a tutorial we have made in the past about DIY planking you can read a post from us HERE)

As always, we love to get the whole family involved in putting this house together. Lucky for us, we all like to get our hands dirty.

We also desperately needed more square footage in this space so we decided to investigate and turn our side by side washer and dryer into a stackable version! We ordered a kit and Handy Hubby put them together in an evening. Note: that sounded easy. It wasn’t. In the process of stacking the dryer on top of the washer Hubby had to relocate the electrical so that everything could still plug in and work. This may have included him destroying our storage room in the basement to run wiring. So now our downstairs and mudroom are in total disarray. Please don’t stop by and ask to see the basement. On second thought, I may host a Halloween haunt down there. No decorating required.
Enough with the messy though because we finally nailed down some pretty components to this space and I want to explain them to you all.
Beside our recently stacked washer and dryer we will build an extra tall custom DIY cabinet to house my salon color and supplies. Beside that we will add a custom open concept base where we can house four laundry baskets. Two on the top shelf and two on the bottom. Our space is only large enough to house four baskets, so lucky us, we only have four bedrooms in our home and these baskets can be easily transported from the laundry room to each person’s bedroom. We had originally planned to put a white counter on top of a dark custom built DIY base. The flat counter surface space would give us a spot for folding laundry and mixing color, which meant it would pull double duty! That’s a big win for a small space.
Since our space is small and needs to double as many hard working spaces. However I also wanted to be realistic.
(Cause guys, once you’ve lived through this kind of mess….you become a realist.)

The reality is that I am a creative and a messy one at that. When I step away from the salon into this space to mix color, I end up leaving color tubes out and don’t always immediately clean up my messes and spills. I know that if we did install a traditional white counter in this place it would be ruined in no time by color and product mishaps. So, after a little deliberation we decided to switch light counters for dark counters and a light base in place of a dark base. This color selection will also help blend the white laundry baskets we will be using underneath the counter in the light base. The counters we will make out of durable pine boards and I will stain them to match the counters and beams we have in our living room.
In the end we will create a visually smooth transition from this space into our main living area by choosing to replicate some of the major design elements we have happening in that space.
So far we have tackled some of the heavy duty elements on our to do list. Ready?
MUDROOM/LAUNDRY ROOM MAKEOVER
Install doors and finishing trim (baseboards and crown)
Paint door and finishing trim (baseboards and crown)
Source hardware for doors
Install hardware for doors
Build custom color cabinet
Refurbish metal lockers
Install metal lockers
Build custom bench with storage
Stain and paint custom bench with storage
Install cabinets
Install hardware on to cabinets
Source and install a backsplash
Install backsplash
Install light above sink
Install open shelving
Source paint for space
Paint shiplap
Finish dry wall end of wall
If you actually read this in all of it’s entirety, I’m sorry for the little bit of anxiety you are feeling for us right now. You may have noticed we still have tons to do. Yeah, we have noticed that too. (insert nervous laughter here.)

We will be focusing on doing a lot in the next week. Tonight I survived dance class and a hardware store trip with three kids for some paint for the lockers. Hubby spent all evening driving from hardware store to hardware store collecting the supplies we needed. Fingers crossed that the custom cabinet installing and the bench get created this week! Hopefully by next week you will see more of this space come together. Now to figure out when we can squeeze in sleep.
If you are visiting from the One Room Challenge, I hope this doesn’t scare you away. We would love it if you stuck around to see what this space turns into!


Natasha Kalita
October 21, 2016 at 7:24 pmYou are so brave to show things in "real time", the way a reno really looks. I know , I've been there too and feel for you sister!
The great thing is, when it's done it's completely your vision and no one elses!
Your laundry room is going to be
Incredible!
Btw, love the ceiling in your salon.
I just discovered your blog today so will keep on snooping around! My fav things to reno are old, old homes!
Natasha Kalita Design
Jennifer Fancher
October 22, 2016 at 4:03 pmHow sweet is your little helper?! Such a cutie! We're making over our laundry/mudroom for the ORC as well! I can't wait to see the final reveal of yours!