I still cant believe I talked my husband into letting us do shiplap in our home.
When I met him he already had his own design sence. Think lime green walls, bright white leather sofas, foosball tables, salt water fish tanks and giant flat screens connected to all the latest gaming contraptions.
Think, every guys dream man cave.
When I suggested the idea of casual, textured, wooden shiplap to his clean line loving self, he didn’t get it.
At first.
Luckily for me, he is agreeable and loves a good project.
So, a few weeks ago, we did what we do most weekends; we traveled the half an hour drive to our nearest Lowes and made friends with the employee in charge of their giant saw.

(Excuse the cell phone pictures to come in this post. When you diy by the seat of your pants the good camera is the last thing you remember to take out. )
This wasn’t the first time we had meandered around the store trying to figure out what kind of paneling to utilize. This may have in fact been our fourth venture to this particular store. Love ya Hubby!
Which just proves to all the shiplap lovers out there, that with some nagging and some loving prompting read more nagging and begging you too can make your rustic textured wall dreams come true.
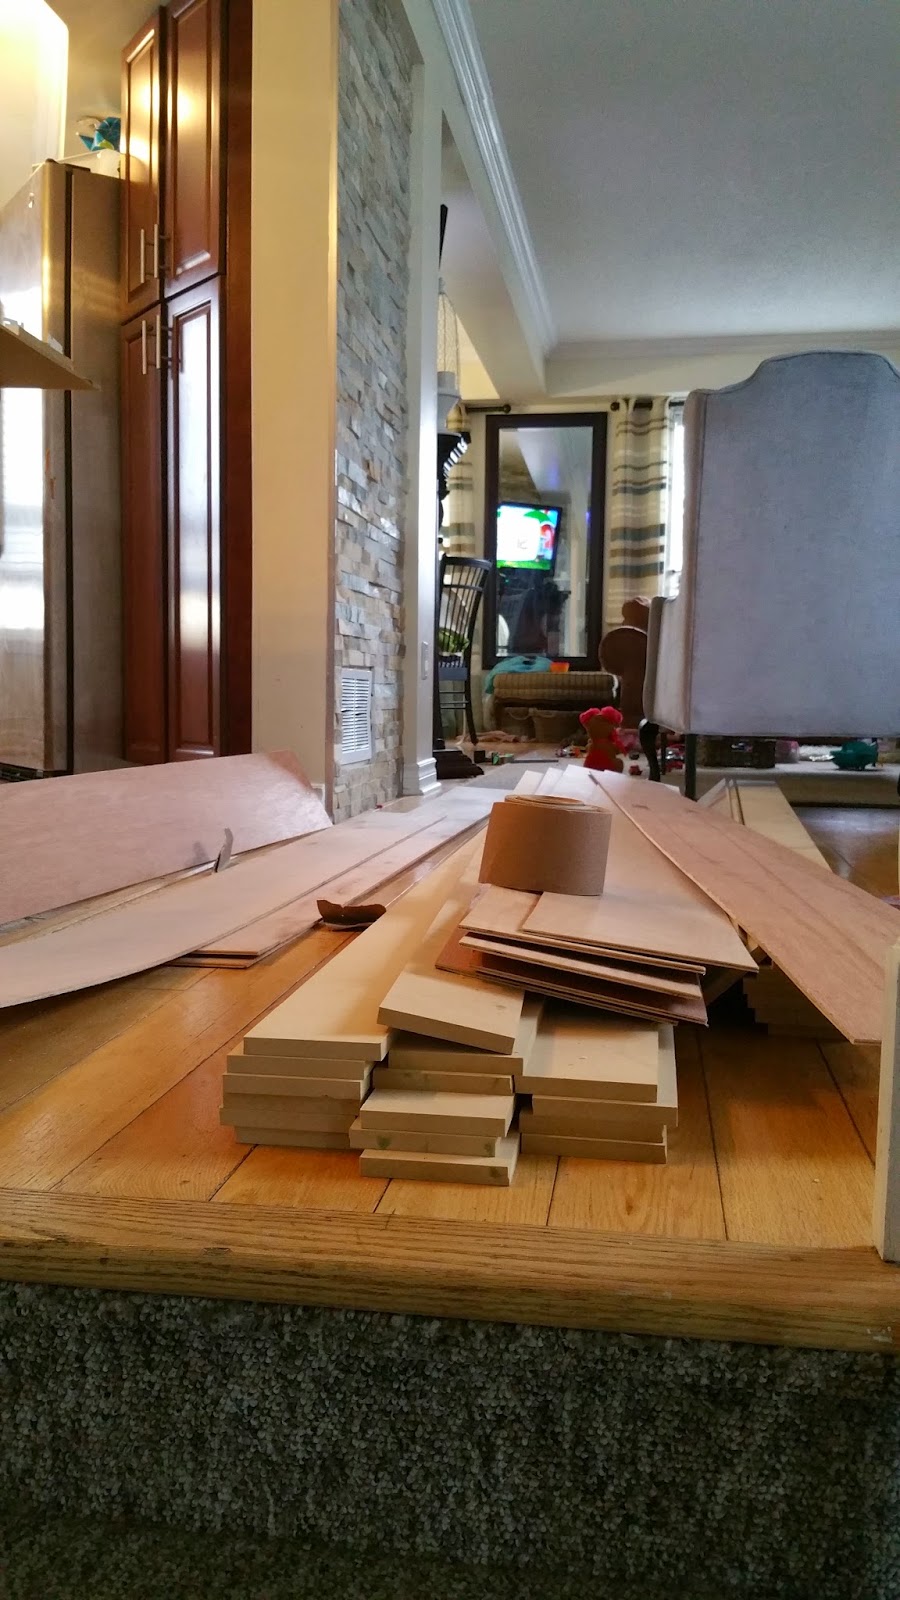
After a lot of going back and forth between the types of wood we could use for this project, we ultimately used 1 by 8 sheets of utility board. I loved the texture on the wood and that it wasnt as smooth as MDF, it was also super affordable and was just the thickness I wanted for our boards. We then got the boards cut into 8 inch wide boards.

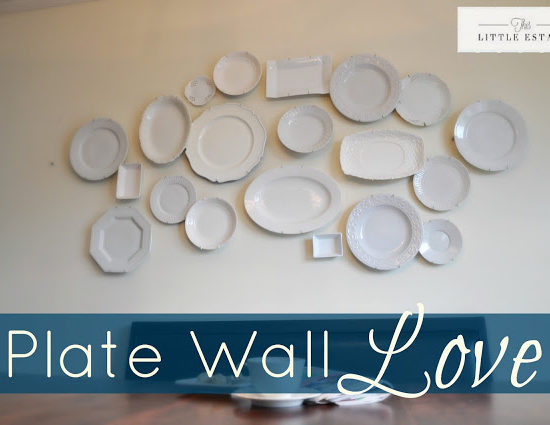
Then we got to work taking down our dining area plate wall while I challenged myself mentally to remember right where most plates had hung. Thank goodness for pictures though and the archives of this blog because most days I dont remember what I ate for breakfast.
PLATE WALL LOVIN’ POST.

Once our plates were down my hunky hubby dragged all of the ply wood lengths into the house. Since our garage is less of a work space and more of a dumping ground for all the things. Sorry to all my neighbours who get a glimpse of it every once in a while when I cant remember the code for the automatic closing door. #sensingathemehere


PS: We may have also tried our luck with getting that helpful Lowes employee to cut more mdf for some upcoming projects that will happen soonish. Stay tuned!

Once the boards were indoors I sanded down the ouchie frayed edges and made a giant mess that would later get trampled upstairs and downstairs.
#diykidlife
#Ispyamessygarage
Clearly I cant believe how many boards I will have to sand down. That face!


Once the boards were sanded to a smooth finish on all sides we started at the corner area of our wall and began attaching the boards from top to bottom.


To attach the boards we glued some adhesive to the back of them and then secured them with our nail gun.

For some reason we always seem to start our projects on what should be a lazy Sunday afternoon. Which means by 7pm hunky hubby has to rush to hockey practice with the boys. Since he is reliable like that.

Luckily we have helpful children that love to play camera man and who love to be involved in all of our diy projects. Think spreading adhesive on tables and dropping an entire box of cheerios on to the floor. No worries, they and the dog picked them up.

This is my attempt at cutting out pieces in the wood for around our outlets. It didnt need to be a perfect cut since the outlet cover would cover the cut lines. Thank goodness.
Yes Mom, I still have all my fingers.
Yahoo!

We used a yard stick to keep our gaps between the boards the same and to ensure that all of our boards stayed even.


Once they were all up in place, I stepped back to survey our new feature wall.

And I was a smitten kitten.
It took me another few days to figure out if we should paint over this wooden wall. I guess I loved the texture of the wood and the grain of it, but ultimately, I puttied and painted and took some pretty pictures of our updated dining room.
Stay tuned for the ultimate reveal!!!! Coming in an upcoming post!!


Also, apparently victories are happening everywhere over here, because that racoon we were telling you about, you know, the one who was living in our attic? Yeah, well, she and her babies are out now. Out and living the dream in a near by forest. I’ll leave that adventure for another post. You guys are going to want to see pictures of the cutie pattottie babies. All six of them!
And because I dont like to leave you guys hanging too long, and suprises arent my specialty you can see some sneak peeks of our shiplap wall on my Instagram.