
A
few weeks ago I showed you a glimpse into a few rooms over here at This
Little Estate when I joined forces with other Canadian bloggers. Together, we shared glimpses into our home with a virtual picture-filled home tour.
few weeks ago I showed you a glimpse into a few rooms over here at This
Little Estate when I joined forces with other Canadian bloggers. Together, we shared glimpses into our home with a virtual picture-filled home tour.
It was such fun, and the home tour generated many pondering questions from readers, and I have felt like a big meany every since, for not responding right away.
My favorite questions went like this:
“Bethany, I wish I could have a pretty bedroom like yours, but I don’t have the budget to make the room that I want. What are some tips you can give me? Where do you find all your stuff?”
“Where did you get that wallpaper from!? Want!”
“What colour is your bedroom, I cant find it on your blog…”
“That dresser in your master was soooo
ugly, I have passed so many of those up in the before, but now I cant
wait to find an ugly dresser of my own now to makeover like yours!”
ugly, I have passed so many of those up in the before, but now I cant
wait to find an ugly dresser of my own now to makeover like yours!”
Well,
sweet reader, let me start by saying thank you for the questions and
for not sending me messages that stated you noticed the dust bunnies in
the corners of all these pictures. 😉
sweet reader, let me start by saying thank you for the questions and
for not sending me messages that stated you noticed the dust bunnies in
the corners of all these pictures. 😉
You guys are swell and need glasses.

So first things first, friends you do not need a big budget to pull a room together.
I
don’t claim to be a design expert, but I do claim to be a major bargain
hunter, red sticker lover, avid junk store searcher and thrifting enthusiast. I have also been known, on occasion, to drag something home from your curb into my home and then re purpose it for free.
don’t claim to be a design expert, but I do claim to be a major bargain
hunter, red sticker lover, avid junk store searcher and thrifting enthusiast. I have also been known, on occasion, to drag something home from your curb into my home and then re purpose it for free.

Here is a great example, and break down of doing just that.
If
you are like us then it is quite possible that you would rather buy
your sweet babies the best crib on the market, tuck that sweet baby into
40,000 thread count sheets and then collapse on to your own sheet less
mattress — on the floor.
you are like us then it is quite possible that you would rather buy
your sweet babies the best crib on the market, tuck that sweet baby into
40,000 thread count sheets and then collapse on to your own sheet less
mattress — on the floor.
We can relate.
A
few years ago we opted to graduate ourselves to a king sized bed seeing
as our baby ninjas would often climb out from their silk sheets and
onto our double bed.
few years ago we opted to graduate ourselves to a king sized bed seeing
as our baby ninjas would often climb out from their silk sheets and
onto our double bed.
It was getting tight.
Along with a new bigger and better grown-up bed came the desire to have a pretty headboard and a completed master bedroom. But, as every young family knows, when you have little
children, your design budget is better spent on hockey, gymnastics,
swimming lessons, soccer and on a prayer that those activities will wear
them out enough to sleep in their OWN bed.
children, your design budget is better spent on hockey, gymnastics,
swimming lessons, soccer and on a prayer that those activities will wear
them out enough to sleep in their OWN bed.
You know, you KNOW.
I like silk sheets like the next toddler, but sometimes, being a grown up means being a little selfless.
That meant cutting down costs on our own bedroom and getting creative.
Thankfully, something I love to do.
So here is the break down:
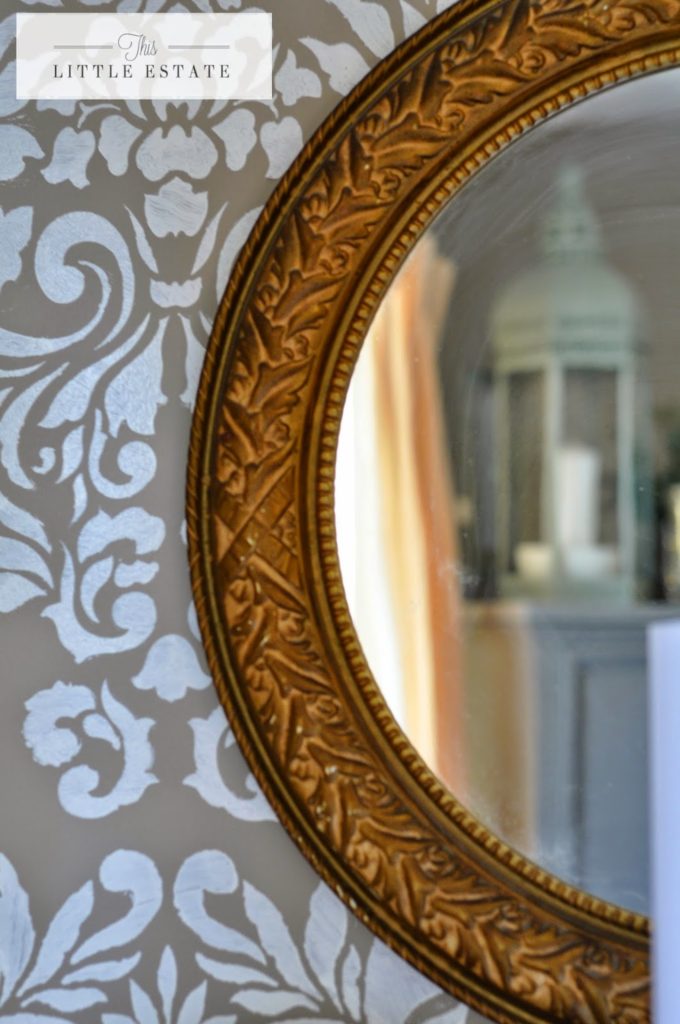
Our room got a budget-friendly-bang-for-your-buck-feature-wall,
by adding a stencil to one of our main walls. It was $75 (at the time
with a coupon) and was birthday money well spent. It can be found at Royal Design Studios and is called the large damask stencil. I used a semi gloss bright white paint to give it a bit of interest against our tan walls. (Behre Paint & Primer: Messa Taupe)
Our lamp was a curbside treasure updated with a new shade and some white spray paint.
Our round mirror was purchased thrifting
for $5 and is a vintage replica. I loved that it matched the round
mirror I had already painted and loved how it would add some symmetry to
our room.
for $5 and is a vintage replica. I loved that it matched the round
mirror I had already painted and loved how it would add some symmetry to
our room.
(I’m still pondering painting both round mirrors to match, and/or change both of their colours entirely.)
Thoughts welcome in the comment section at the end of this post!

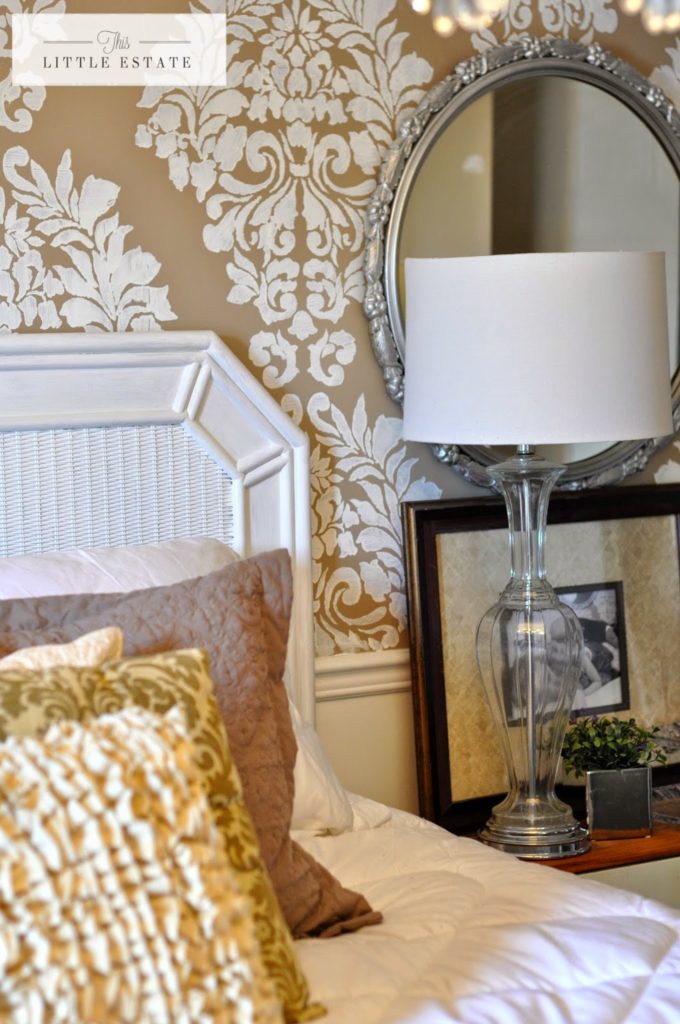
Our
pillows I hand stitched with my limited sewing abilities. (Thanks for
teaching me how to make scrunchies Mom! Thanks Dad for buying me that
sewing machine for my sweet sixteen birthday even if that DID mean I
could make myself mini skirts that you disapproved of!)
pillows I hand stitched with my limited sewing abilities. (Thanks for
teaching me how to make scrunchies Mom! Thanks Dad for buying me that
sewing machine for my sweet sixteen birthday even if that DID mean I
could make myself mini skirts that you disapproved of!)

Our version of the Rast hack was pretty straight forward. You can read the post HERE for more details. I horded paint from my local recycling centre for FREE.
Yes, FREEEEEE, people!
Check
out your local dump and recycling center to see if you too are missing
out on a plethora of paint in every finish and colour!
out your local dump and recycling center to see if you too are missing
out on a plethora of paint in every finish and colour!
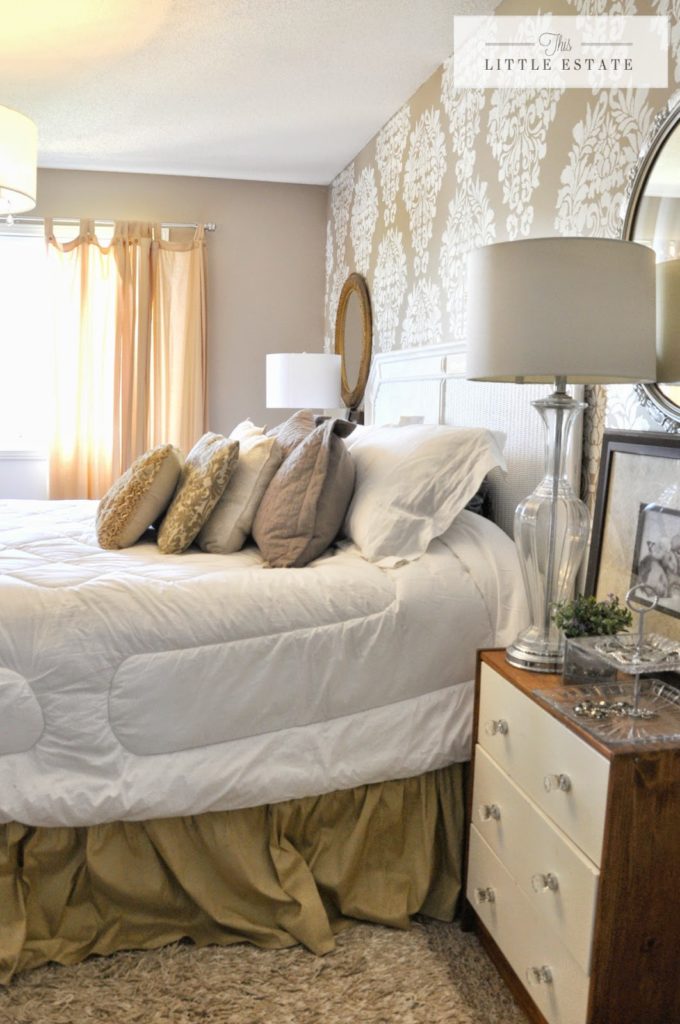
Our
curtains and bed skirt were purchased from a little consignment shop
and both felt extremely luxurious. A good wash in hot water and a good
steam later they have added the perfect amount of softness to our room
for under $20!
curtains and bed skirt were purchased from a little consignment shop
and both felt extremely luxurious. A good wash in hot water and a good
steam later they have added the perfect amount of softness to our room
for under $20!

Our side table accessories were all found treasures.
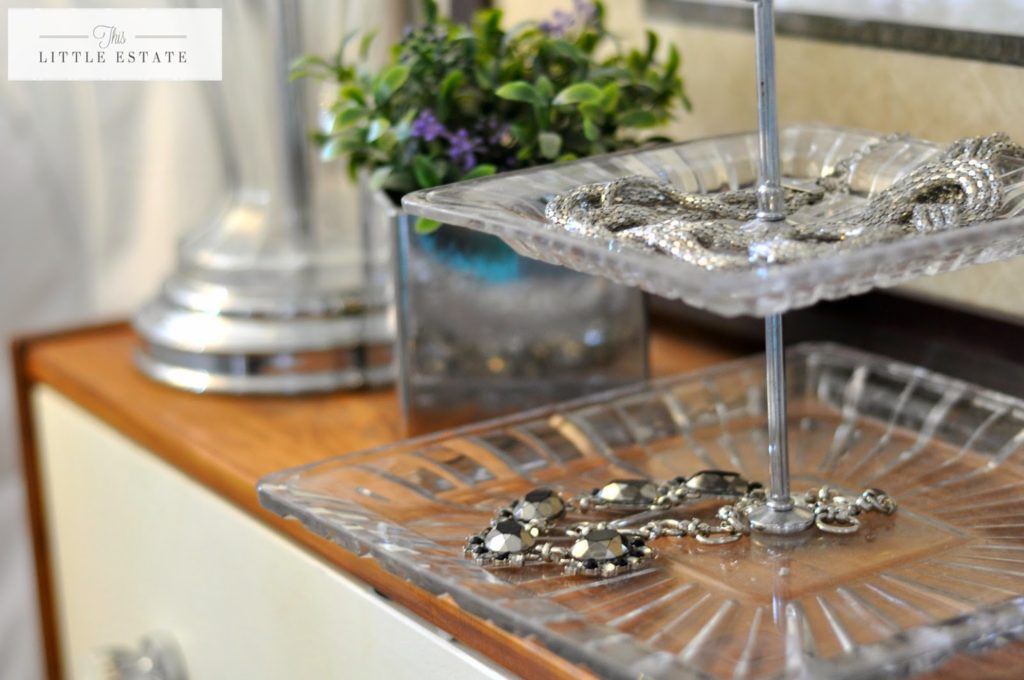
And
the best treasure of all are the twelve sparkliest drawer pulls I ever
did see. Finding them was literally an-unusual-extreme-thrifting-miracle-sent-from-heaven-into-my-cart kind of deal.
the best treasure of all are the twelve sparkliest drawer pulls I ever
did see. Finding them was literally an-unusual-extreme-thrifting-miracle-sent-from-heaven-into-my-cart kind of deal.
I love how our Rast Hack turned out, so I redid another long dresser for our itty-bitty-master, to help with the lack of storage in our itty-bitty-his-and-her-closets.

I scored this solid oak dresser
for $25. I redid it with recycled paint and some inexpensive pulls from
home depot (Buy the prepackaged pulls in bulk (usually 12 in a pack)
and you will save bundles. This dresser redo is still my most viewed POST after two plus years. You can check it out HERE.
for $25. I redid it with recycled paint and some inexpensive pulls from
home depot (Buy the prepackaged pulls in bulk (usually 12 in a pack)
and you will save bundles. This dresser redo is still my most viewed POST after two plus years. You can check it out HERE.

The accessories we have gracing the dresser’s top are sometimes buried under heaps of folded laundry, but that’s cool, because nothing is too precious around here.

I love how mirrors can be used as trays. But I DO also love a mirror hanging in its rightful spot, front and center on a wall.

The giant vintage mirror that hangs above our dresser was an absolute “start the car” kind of deal.
I went to my local Re Store (Habitat for Humanity) and fell in love with it. The only problem was it was being sold as a pair with a heck-of-an-ugly dresser.
TIP:
I have learned, over the years, that if you share your friendly
attitude with the lovely volunteers that help out at your local thrift
stores, not only do you build a nice relationship, but they become more
than willing to share the friendliness back. At times, at very good
times, it is returned to you in one big-heap-of-a-deal and you run away
with a giant mirror stuffed into your vehicle and your children with
cranked necks beneath it. 😉

On to a tale about another mirror:
I’m slightly obsessed with rethinking items in stores and the ones I have had kicking around our home forever. It comes like second nature to me and I’m sure was annoying to my parents (Sorry about that desk I cut up that one time with a hand saw! I totally didn’t know it was a wedding present!)
But I mean, how could I not see the potential in this mirror I have had since I was a teenager.
With a few cuts of wood and some FREE paint, I made myself a new-to-me selfie mirror and
now I no longer leave the house with my skirt tucked into my nylons or
walk out the door rocking see through dresses anymore.
now I no longer leave the house with my skirt tucked into my nylons or
walk out the door rocking see through dresses anymore.
Win-win.

So, you can see, through this thorough master bedroom breakdown, that any room can be completed with some ingenuity, creativity, some shopping around, some thrifting, some diy-ing and some love for the journey of making a room feel like home.
Hopefully I have answered all your questions on where things are from and how things are done.
I guess this now means that I will see you in the paint recycling center and scouring my favorite thrift stores. 😉
When you spot me yelling “Start the car!!” help a girl out, K?? I promise I will treat you to a hot drink and something sweet.
JUST. LIKE. YOU. 😀
BEFORE:

AFTER:

marty (A Stroll Thru Life)
September 11, 2014 at 7:31 pmI think your bedroom is stunning and all of our DIY and makeovers are totally genius. I love, love, love that stencil.
Megan Gordon
September 13, 2014 at 12:09 pmWow!! Absolutely beautiful. I just found your blog and am definitely going back to read more!
Auntie Bliss
September 13, 2014 at 2:49 pmI don't comment on blogs anymore 😀 but I can't leave this great post with only one comment!
Your bedroom is so elegant and a nice retreat. I'm sure your husband really appreciates you and what you've done!
Closet makeover {Then and Now} | This Little Estate
February 24, 2017 at 4:00 am[…] and added a large damask pattern on to it. You can read about the cost of our bedroom breakdown HERE. I promise that after you read our cost budget friendly makeover, you will want to meet up […]