When we last posted I showed you how we turned our outdated bathroom cabinets from gold to bold with some sanding and some paint! So simple! I completed this cabinetry overhaul a year ago (before I knew what a blog was!) and can happily tell you that the paint job has stood the test of time and I am overly pleased with how they look today!
I want to share with you the whole bathroom makeover today!
When we moved into our little estate, there was green everywhere. Most of our counter tops were green, and though we love green grass and green smoothies and trying to make green choices, we didn’t love the green counters in our upstairs bathroom.

I single handedly removed the old counter tops and chose a new counter top that had many neutral shades in it. (And by “single handedly removed” may sound like I am superwoman, all that really entails is unscrewing some screws and bolts beneath the counter top and carrying the old counter to the garage. Shhhhh! Don’t tell anyone, I made it seem like I was totally Mrs. Handy.)
On the day we got possession of the house, myself along with my five year old son and my sixty year old father went through the house like mad men and ripped up all the old (read dirty) flooring. You can read more about that HERE.
The bathroom was no exception. Though the flooring wasn’t visually displeasing (I happen to like white and black flooring in older homes) this linoleum was rotting away and STUNK was peeling in all of the corners. We knew it had to go when we replaced the little itty bitty one piece shower with a new one.
We picked a tile that was a medium grey and had some visual texture to it. We got the best deal we bragged about HERE.
Once my loving hubby laid the tile, and I had made over the cabinetry (get all the details HERE!) we were ready to put the room all back together!
Together we chose this square sink that rests on top of our new counters. We loved that it was wide enough for two little children to use at the same time and we loved that there were no sharp edges for when the kids ARE fighting over the beloved sink space.
We love reusing and recycling and find it so easy to do so by checking out our local Re store for items we need for a diy project. It is the best to save some money too when you can, and we know that being informed on what products are available to us can help us make choices that save us money. Being a young family, every penny saved counts!
We found this faucet, that was the perfect height for our above counter sink, at our cities Habitat for Humanity Re Store. On line it was priced at $250 but because they get the end of stock items from certain companies, we scored this shining beauty for $60.00!!! I couldn’t believe it and I am so in love at how it adds just a little bit of shine to our neutral decor.
We love adding new and reused elements to all of our spaces and I especially love adding items that remind me of comfort and family. The sunset landscape pictures were taken by my late grandfather and my lovely grandmother on one of their evening walks. I have such special memories as a young girl spending summers with them and learning to love nature while holding on to their loving hands.
These photos mean so much to me and I love displaying them in this unconventional place. Their frames were once gold but with a coat of black paint and new white mattes the pictures are what you notice first.

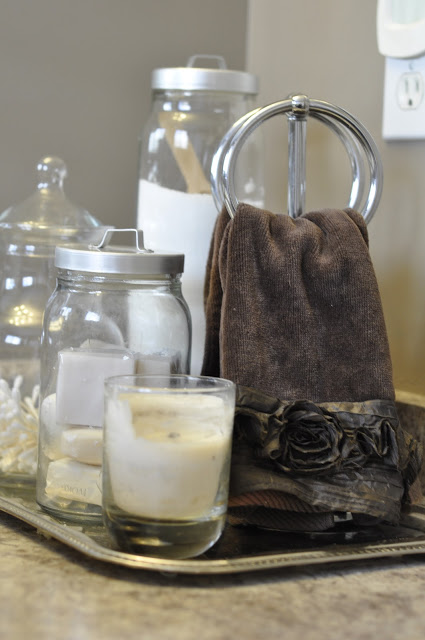
Underneath these pictures on the corner or our counter we have a little shiny tray with some bath time necessities. In our house we love collecting items on to a tray. This tray holds bath salts, soaps, our hand towels and a candle for Mommy’s use only. 😉
On the other side of our sink we have the soap which is easily accessible to the kids.
On the little glass tray they have their own selection of flossers…
And a little timer to help them brush their pearly whites for a whole minute.
I ripped off removed the builder grade towel bar and patched the big ole holes that were left in its place. I actually had to do this twice, since I rush things and painted before it was actually a smooth surface. Instead, we added some hooks behind our bathroom door so we have a place to hang a towel or two.
I love these little rosettes at the hem of these dark towels!
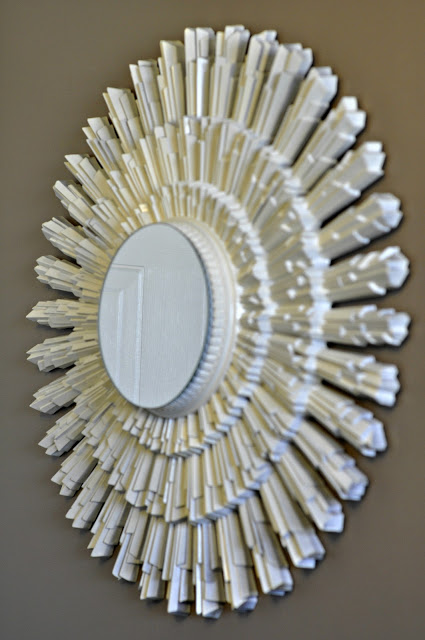
This starburst mirror is actually a DIY project that I hope to share with you in a future post!!
I love the way it turned out and how it adds a little punch of white and reflection.
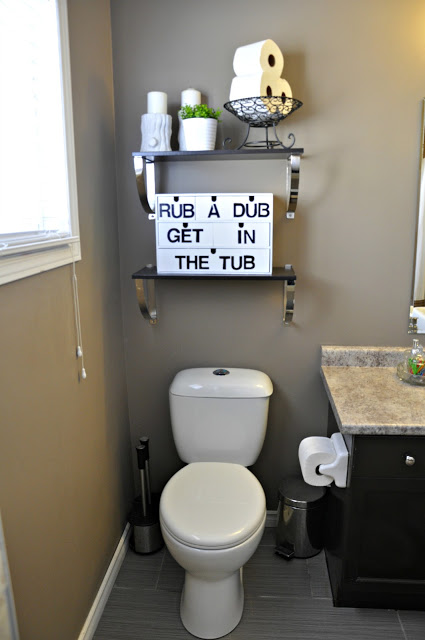
At the end of our counter we replaced our old 13 year old toilet that didn’t flush properly with a new efficient toilet with an option for a half flush. Teaching the kids about the different flush “buttons” is a whole different post too!
The shelves are made up of simple brackets from Ikea and dark stained boards to match our new painted cabinetry. I hung them to give us a bit more accessible storage and to display some pretties.
This collection of drawers was purchased from Ikea too, about 15 years ago! It has been many colours and has lived in different areas helping us organize small items. It got a new coat of white paint and some font for some added whimsy.
These candle holders have been in our home forever, and I love the natural looking element they add to the bathroom.
Here is a close up of our new flooring that my husband installed.
We love the “grain marks” that run through it making them look textured.
Our bold bath mat isn’t the typical bathroom variety you would most likely see in a bathroom, but I love that this one is large, adds some visual interest with its graphic pattern and can assist the babies from slipping on the new tile.
This little stool also helps the kids to reach the sink by themselves and to brush their teeth by themselves. This plane-Jane Ikea stool got a coat of the same paint we used on the vanity.
We scrubbed the original light fixture clean and I polished the silver finish and it turned out good as new!
Lastly, we added a ruffled shower curtain to compliment the new tiled shower (post to come!) and to complete the whole new look.
We are so pleased that we were able to go from this:
To this:
We love our new-to-us bathroom and how we were able make some choices to up cycle and reuse while remodeling. I hope you enjoyed the little tour!!
Now, when you visit you will know which bathroom is completed and which one you can escape to for some peace and quiet when it is time to do dishes.
What? My husband cant be the only one who does this?? 😉
Sharing at:


Ashley Smith
January 8, 2013 at 11:03 pmI always want to redo something but have such little faith that it will turn out an beautiful as you manage to make things turn out! great job!
Claire TheRusticPig
January 9, 2013 at 3:23 amFabulous job!! It turned out gorgeous!! Love all the little pops of white!
Anonymous
January 11, 2013 at 1:31 amI am inspired!
jennifer calzada
July 2, 2013 at 6:32 pmWhat is the name of the paint color on the walls? You did a great job!
ElleAyeBee
July 10, 2013 at 3:50 amSooo I am in love with your bathroom. I actually showed your post to my mom (who is redoing her bathroom) and she's head over heels, too! We actually have a question – where are your rug and shower curtain from? We've been web searching and can't seem to find them. Thanks so much. Thoroughly impressed! 🙂
ElleAyeBee
July 10, 2013 at 3:52 amSooooooo my mom and I are in LOVE with your bathroom… She's actually redoing one in her house and we're using yours as inspiration! We were wondering – where did you get your shower curtain and rug? We've been furiously googling, but can't seem to locate them. Would love to know! 🙂 🙂
ElleAyeBee
July 10, 2013 at 3:54 amI feel like I'm doing this comment thing wrong! So sorry if this is a repeat. My mom and I are dying to know where you got your shower curtain and rug from. Sooooooo cute!
bethanygier
July 11, 2013 at 2:07 amElla! Thanks for your comments! Glad you like the final product. Your Mama and you can find the shower curtain from Home Outfitters and the rug was from HomeSense almost two years ago 🙁 I havent seen any like it in a while since I am a regular there. Though, depending where you are located they will have different selections!! I hope that helps sweet girl!
bethanygier
July 11, 2013 at 2:12 amJennifer, the color is a Rona Eco brand and it is called "Shore" they have a premixed line of paints that are earth friendly, super well priced and have good coverage! I hope that helps!!!
SofiaP
September 1, 2013 at 3:58 amMy husband and I love the color of your bathroom but we live in the US and are unable to purchase that brand of paint. Any idea how we might be able to find that color elsewhere? We usually buy sherwin williams' no VOC paint. Any help you can provide would be greatly appreciated!
bethanygier
September 2, 2013 at 8:34 pmSophia! I wish I knew what a similar colour would be to help you and your hubs out! Im wondering if you can go on line and find the Rona swatch and have a color match made?? Good luck! I hope your room turns out just the way you were hoping it would!
A Dirty Little Secret {Progress not perfection.} | This Little Estate
February 24, 2017 at 3:56 am[…] we also fill the bathtub and counter tops to overflowing with reno supplies. Remember how it use to look?? Well, beware…it doesnt look like that at the moment. You see, around here, […]
Just Keeping It Real! {A master bathroom reno.} | This Little Estate
February 24, 2017 at 4:03 am[…] PRETTY POST TO GET THOSE AWFUL IMAGES OUT OF YOUR MIND…. You can visit: KITCHEN REVEAL BATHROOM REVEAL DINING ROM REVEALLIVING ROOM REVEALMASTER BEDROOM REVEAL bathroomdiyen […]
North East Factory Direct
March 31, 2017 at 1:07 amBeautiful bathroom! love the way you write your post. Each and everything is simply perfect.
Poulin Design Center
March 31, 2017 at 1:08 amthis is too beautiful! Great job.