Happy weekend friends!!!
We have been so sick this week and haven’t been able to tackle the mountain of laundry, pile of dishes or post about one of the million projects we have half completed. We hope you are feeling well, doing well and are having a happy relaxing day like you deserve.
I did want to answer some of the questions we get asked about our DIY kitchen remodel. After some careful consideration we compiled a novel a list of things that will help you tackle your kitchen!
We are not professionals here and have no prior learning when it comes to remodels in general. We are just like YOU and want to learn and save money along the way!
Our hope is that you can gain a little insight into some of the things you need to ask yourself before you start your own remodel!
We are so excited to share with you everything we learned while
completing our DIY kitchen remodel!!!
Best of wishes to you as you take in this info and store it away for the day when you need to upgrade your own space.
After many sleepless nights and long weekends covered in paint, dry wall dust and plaster, we showed you our kitchen!
Our kitchen wasn’t suppose to be demolished and rebuilt when we purchased the house. We knew eventually we wanted to change it to be more functional and more our taste. It just wasn’t on our radar to completely gut the kitchen.
Then, we crunched the numbers, realizing with some wise decision making, we could create a kitchen we would be happy with, while maintaining a strict budget!
We are so happy to have completed the work all by ourselves!
If WE can do it, then you can do it too!
We are here to share with you EVERYTHING we learned while doing our DIY kitchen remodel.
You need to know your families needs!
As a family that cooks 99% of our meals at home, we definitely knew our needs and what we expected out of a new kitchen.
We knew immediately that our current-new-to-us-kitchen did not have enough cupboard space. Though it looks like enough in this before photo below, the corner cupboards were actually unusable because of a very awkward design. Also, the cupboards above the fridge were essentially unusable since they needed a lonnnnng arms reach to access them.
It wasn’t bad to say the least, just could be utilized better.
Since we are always cooking and baking around here, and make almost every meal at home, the kitchen was a big deal to us. We dreamed of ample space to hold all of our kitchen gadgets.
Also, we knew we needed a large pantry since we usually buy in bulk. In the long run this has proven to save us money, so we knew ample food storage was a must for our gigantic bags of all purpose flour and giant boxes of granola.
Consider larger or smaller more efficient appliances!!
We knew an industrial gas stove would be used every day by us.
Hunting down the perfect stove for our family was at the top of our priority list. We wanted one that had energy star ratings and one that could heat up a pot of water in minutes. (The one we inherited was in perfect condition and was gifted to my parents.)
The current fridge we inherited couldn’t even hold all of the condiments from our old house! We weren’t planning on replacing it, but knew that it would never hold the fresh produce we buy from the market or the grocery store. It was the right time for us to upgrade to a larger fridge and to add in a water purifier and an ice machine right away.
By changing things right away, we wouldn’t have to spend more money later.
(This also let us eliminate the need for an under the cabinet water osmosis system, which in the end helped us save a little more money. The itty-bitty fridge became the perfect second fridge for my in laws.;) )
Not everyone needs a larger fridge though!
If you live alone on the other hand, or barely cook at home, it might be wise to sell your larger appliances and get some that are smaller and use less power. There is no point in having a refrigerator chill air!
Jenny and her handy hubby created this gorgeous island
on their blog.
The island houses a small fridge and a microwave. This idea would be
perfect for someone that doesn’t need the storage that a large fridge offers.
I adore this
little corner kitchen! It shows you that fridges come in all shapes and sizes and some are small enough to fit discreetly into a tight corner. Imagine how much energy consumption you could save with this mini kitchen! (And everything about this little corner kitchen is to die for! That grey paint, hardwood, back splash and big crisp molding! Love!)
Consider how you live!!
I know that I love a white kitchen. They have remained a classic choice and can look light and airy and chic and sophisticated. I could sit in a white kitchen forever. I lurve a white kitchen — but I know it would never be as clean as what I would like. With my three messy sticky fingered babies and my messy hubby, we knew that a beautiful white kitchen, like this one below, was just not for us. 🙁
The same goes for open shelving. I
love a kitchen with lots of open shelving. I love to display cherished items and beautiful dishes, I love to decorate shelving with the changing seasons, but I
know that open shelving for me would be visual noise. Does that make sense?
 Here
Here is open shelving done perfectly! Neat stacks of neutral dishes and long shelves that blend into their background. No visual noise here! Love these!
Research and plan, and then do it again!
Oh my goodness, that totally rhymes! 😉 When we built our kitchen I didn’t have a Pinterest account. I WISH I had of! There are so many beautiful spaces (especially kitchens!) all in one place for the expectant DIY-er. It is great to be able to see what kind of counter tops go best with dark cabinets, and so on and so forth.
Plan your kitchen layout!!
Knowing
how you work in a kitchen will help you decide if you need the added expense of an island or would it be best to have a peninsula (a counter that juts out into the room but is still attached to your lower cabinetry.)
A few years ago I had no idea what a kitchen “peninsula” was!
If you cook with a spouse or children, or you host a lot of gatherings where an island would be utilized, then go for it! If you would rather just have a quick place where you can have breaky and read the morning newspaper, then a peninsula might suit you best.

There are so many different layouts to choose from! It is extremely important to know what type of a layout you enjoy to work in. You can find more info on this and kitchen design HERE.
Plan where things will go!!
Where do you want your everyday plates and bowls to go? Where do you want to your large bread maker and food processor to go? Do they need to be readily accessible? Knowing ahead of time will help you establish if you really
need that extra deep pot drawer or that “lazy Susan” in your cupboard.
If you don’t need these extras, then you can save some moula, if you do, then perhaps you can scrimp in other places.
Plan out how functional you want your kitchen to be!!
If you are building your kitchen from scratch or if you are just remodeling a little bit, either way, it
is possible to make your kitchen a lot more functional!
Though it can get expensive to move a stove or a dishwasher, while taking into consideration relocating plumbing and gas lines. A fridge however, is free to move wherever you would prefer it! There is no cost in moving a fridge, so try it out all around your kitchen before you decide where it suits your family best.
Picture your appliances in different locations.
If you are downgrading the size of your fridge in a relatively quick kitchen remodel, perhaps you can fit in an added half pantry that can house mops and brooms and things that might not have a place otherwise.
Source
This isn’t exactly what I described, but you could design something like this in the extra space your fridge left behind.
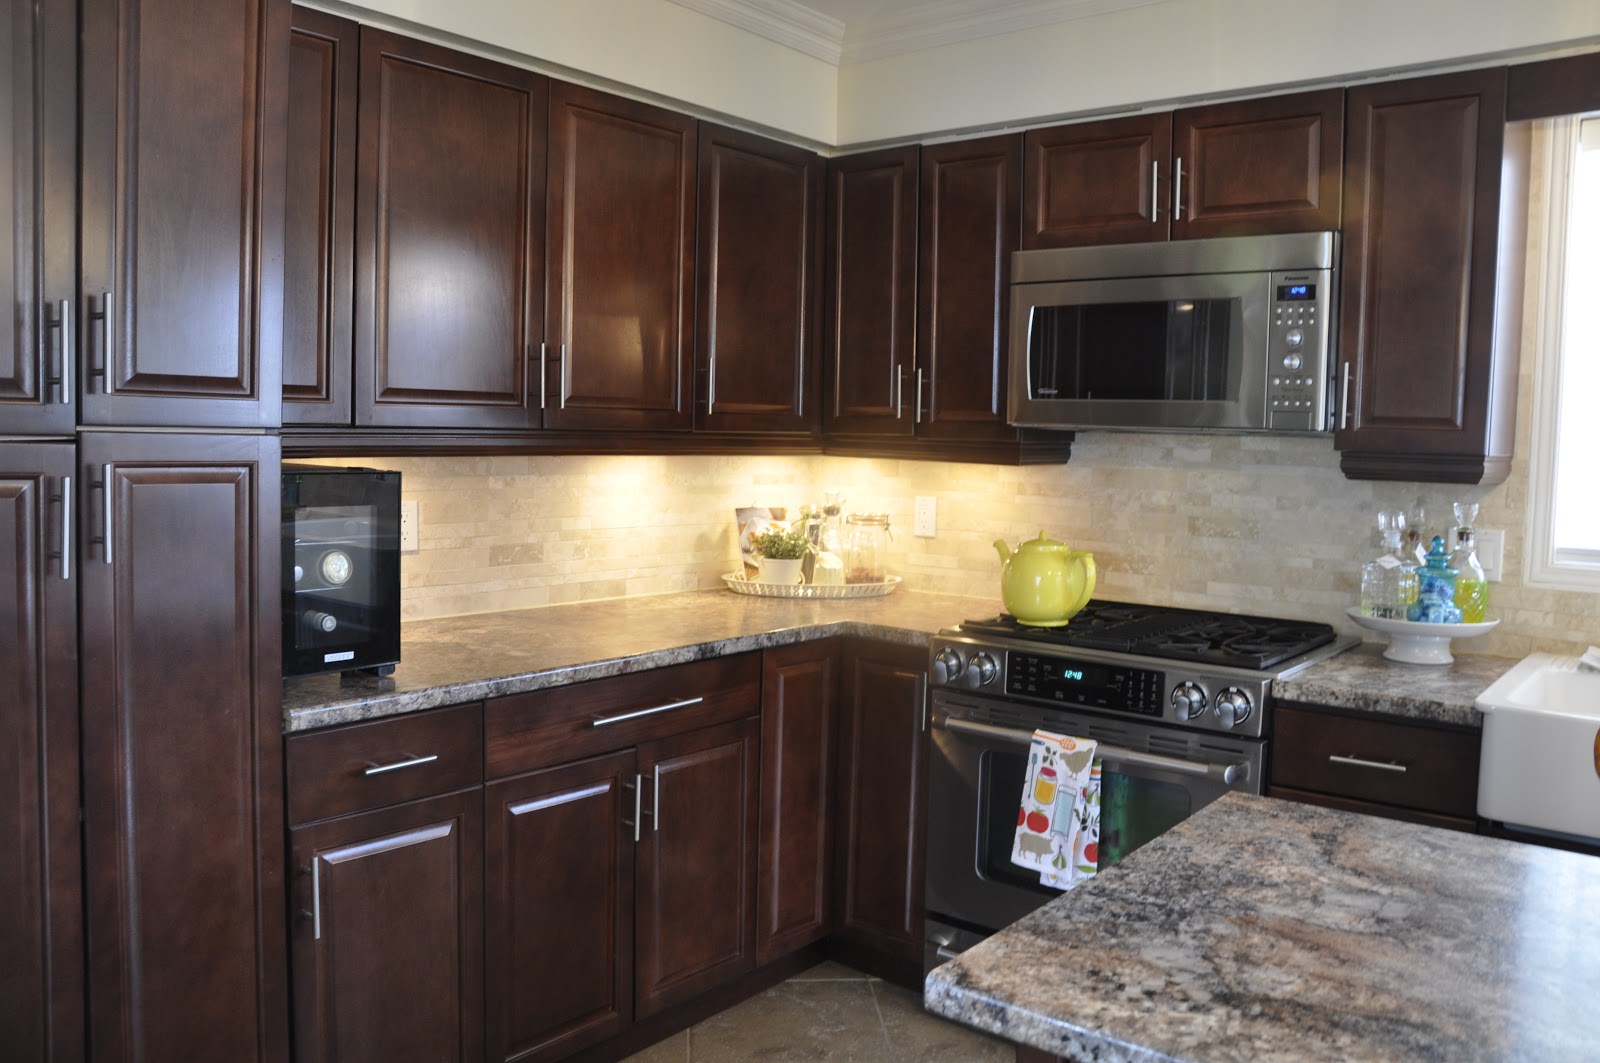
A microwave also does not need to go above a stove (like we have it above) or on the counter top!
You can add a shelf into your lower cabinets and save money on cabinetry, making it accessible to little helpers and hidden away at the same time.
Southern Living showed exactly what I would do if my kitchen was a little differently designed.
This wonderful idea with the microwave on a pull out shelf is just perfect. If you are custom building your cabinet boxes like we did, this would be so easy to do, and well worth the extra effort
and counter space!
Houzz shows another great way to hide your well loved kitchen appliances, leaving your kitchen counter to be a more functional space. Add in a few hinges and you could do this too!
I wish we could have had an industrial looking hood fan over our stove and had of tucked the microwave away, but with the bulk head filled with important stuff, it wasn’t an easy possibility for us.
But it could be for you, and it could be amazing!
This type of
industrial hood fan is beautiful and could allow your kitchen back splash to draw the eye upward.
This
hood fan is encased in a crisp white wood treatment and adds a traditional touch to this industrial looking gas range.
We ended up loving our final result, though we had to work around a dreaded bulkhead.
Which brings me to our next suggestion!
Become proud of your kitchen problems!
I know this sounds crazy, to accept something you don’t like, but sometimes it is your only option.
Structural issues might be looming around the corner and you might not be able to knock down a wall you dislike. Being flexible, and open to accepting a design flaw or problem can end up being a great decision.
Our half wall seemed like the silliest design idea. After we realized we couldn’t get rid of it, since piping and air exchange vents were hiding inside of it, we knew we had to find a solution to our kitchen problem.
Building the wall up enabled us to use the wall to our advantage in the kitchen and in the other rooms on our main floor (future post coming soon on the rest of our main floor overhaul and what it looks like now!)
We were able to build a custom pantry into a difficult angle, and were able to add an awesome little coffee nook by embracing our problem and dealing with it.
I know that so many families love an open floor plan, and what is not to love about opening up a space making it feel bigger and better! But sometimes, those walls can be structural. So instead of using the sledgehammer and worrying about the house collapsing later, figure out if you can turn a full wall into a large doorway, or maybe you could use that wall as a full wall that includes a pantry, or a wall that holds bookshelves for your large collection of cook books.
Thinking outside the box when finding a different solution to your problem can make you feel love and pride for your final product!
This half wall is a great idea if you cant remove a wall.
It creates architectural interest with the board and batten molding and the “pillars” on either side give it symmetry.
If it makes sense to have a half wall in your home, and creates a type of hallway like this one, then try making it even better! Be proud of your houses so called problems! This one can be found
here.

They are constantly updating their second home and letting everyone in on all of the tiny details. They had a half wall too, and decided to build an eating area right up to it! From their dining room, you don’t see the mess that could be left on the bar and yet you still get a nice open feeling when looking at their house! I love everything they touch, it is no surprise that I adore this solution too.
Find ways to save money in every corner!!
Seriously, no pun intended, there is money in every corner of your kitchen waiting for you to claim it! If you want to save money, you need to know how much everything is and where you can save!
Get quotes from everyone!
We knew that being informed on every option for our kitchen would enable us to make a well informed decision on how we wanted to go about redoing our space.
We went to our local hardware store for a consult, we wanted to know what options they had for redesigning our kitchen. The kitchen specialist told us about everything we would “need”. Like lazy Susan’s in food cupboards and granite counter tops and expensive hardware. We took some good advice from the meeting and then researched some more.
We wondered if just getting new cabinet doors was an option and then we could add in our own (contrasting in colour) island. We got a quote from the local hardware stores “Refacing specialists” for this option. They quoted us a huge charge and we still would be left with the awkward kitchen lay out and the old dilapidated cabinet boxes.
We flipped through the classified and called around to all the different kinds of “refacing specialists” listed there.
Now here is where it gets confusing. If you want to replace your cabinet doors completely and get new ones made to attach to your existing cabinet boxes, that is called refacing. If you want to use your (real wood) cabinet doors that you presently have, and you want someone to sand and paint and seal them, that is called resurfacing. Two separate things, but referred to sometimes by the same name. It is always good to triple check with the person giving you a quote to make sure you are discussing and agreeing to the same outcome.
This means that if you generally enjoy the layout of your kitchen you could have the cabinet boxes remain in place and instead have these refacing experts add new doors to your remaining boxes.
If you are like us, and you have enough clearance for an island or a peninsula that could double as a breakfast bar, it might be worth it to you to add those cupboards through the refacing specialists.
Extra well thought out storage is always a great additive to a kitchen remodel!
Hopefully, after you are armed with all of your quotes, you can figure out which option is best for you. If you want to get some assistance, or if you want a complete DIY project.
Less Cabinetry means more money in your pocket!!
Though, more storage added to a remodel is a great idea, sometimes less cabinetry in certain spaces and places in your kitchen is a great idea too!
This picture is a great example of how gorgeous open shelving can look! This Is
Emily’s house from
Jones Design Company. I love her style and fell in love with this bead board back splash and Ikea shelving. (We may just have the same ones.)
Save money with open shelving! I stated earlier that open shelving in large quantities, wasn’t meant for my family. BUT, it might be meant for you!
Especially, if your budget doesn’t allow for a lot of extra cabinetry. It might be the right decision to have beautiful long shelves flanking a window, or on either side of a sink, or both!
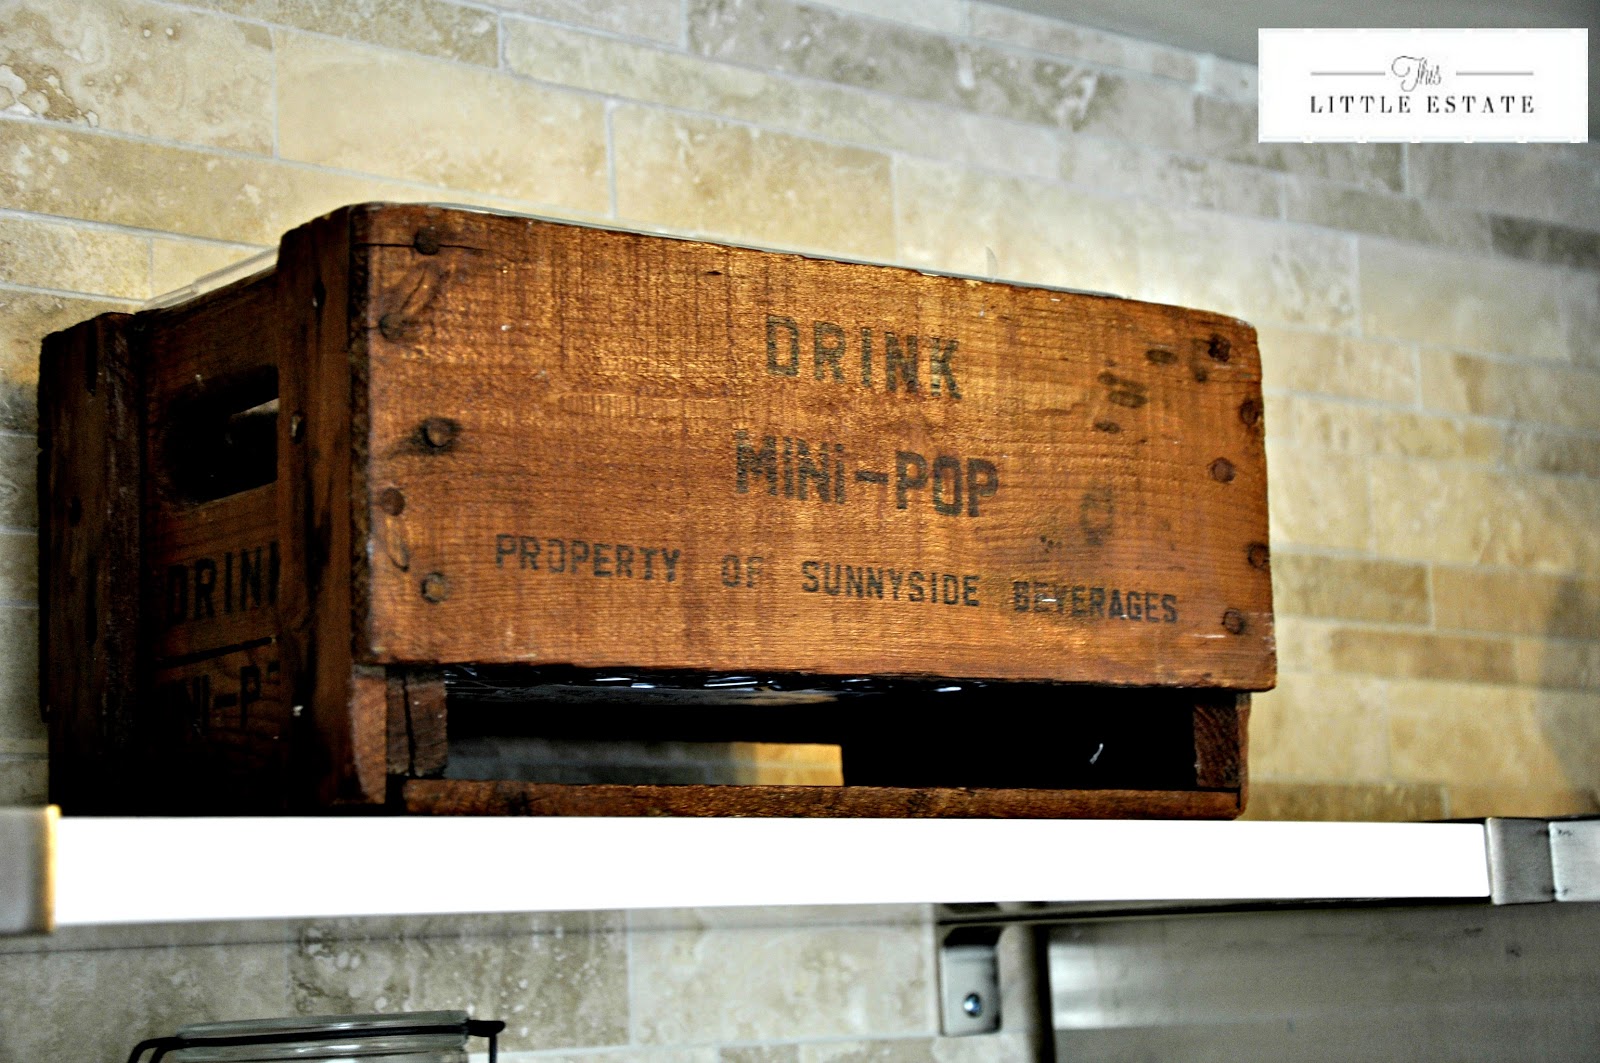
We kept our open shelving in moderation –and hidden!!
It is so nice to have your every day dishes easily accessible or your pretty dishes on display. I knew it couldn’t be in my every day sight line. Instead, we incorporated open shelving over our coffee corner. The shelves don’t have to be perfect all of the time because they are slightly hidden by our refrigerator. A perfect combination for our sometimes messy (read three kids and hubby) house. 😉
Save money with stock cabinet boxes!!
Did you know that a simple cabinet box with a drawer in the top of it (one that is 15 by 30 by 23) with the doors can cost $230 dollars? That is before applicable taxes, and the cheaper version you can find at a hardware store as opposed to a custom cabinetry place.
The boxes for the cabinets come in different colours. In case you are confused, the boxes are just the insides of your cabinet; you have the cabinet door and then the cabinet box. Different companies refer to them by different names but “cabinet box” is pretty self explanatory in most cases.
The pine coloured ones (that are meant to resemble a wooden interior) are more expensive then their plain white counterparts. Who knew? Not us! We quickly learned that choosing the white cabinet boxes would save us a bundle in the long run!! We also decided that making
our own cabinet boxes out of white particle board would save us a TON of money.
It isn’t that difficult, just three sides to a box, simple straight cuts, YOU can do this too and save thousands!
These boards are sold in sheets, each one is typically 4ft by 8 ft and are under $30. If you are handy enough, or could hire someone who is, you could save a lot of money in the long run too!
This is precisely how we made most of our kitchen and how we were able to build a custom pantry into an awkward shaped space. If you choose to make your own cabinet boxes, the sky is the limit for what you can do to customize your kitchen to suit your needs! Saving money while doing so is just an added bonus!
Also, keep your eyes on your local hardware store; sometimes they have cabinet clearance sales! You can get a whole pre made cabinet and door for $99 a piece! Less work and for a reasonable price. 🙂
Will you get a good return on what you choose?
Some choices you make when doing your kitchen remodel may not be worth their investment.
For us, that meant choosing to forgo a solid surface counter top. For us, it didn’t make sense to spend the thousands it would take to have beautiful granite or quartz counter tops. I am like you, and would love a solid surface to roll dough on and to chop directly on to. But, for our family friendly neighbourhood where we probably wouldn’t get back our investment, it didn’t make sense to add an additional cost that would essentially cost more than our entire kitchen remodel!
If I wanted a Granite counter top, I wanted the $100 a square foot variety, not the $68 a square foot, and expensive taste is sometimes better to satiate else where. Since we like to switch things up anyways, it didn’t make sense for us to make the investment into the granite counter tops (or the like) and to for aesthetic reasons want to change them in seven or so years.
We do however love a good concrete counter top!
Connie has an awesome tutorial
here at her blog called
Salvage Savvy. Aren’t these counters unique?!
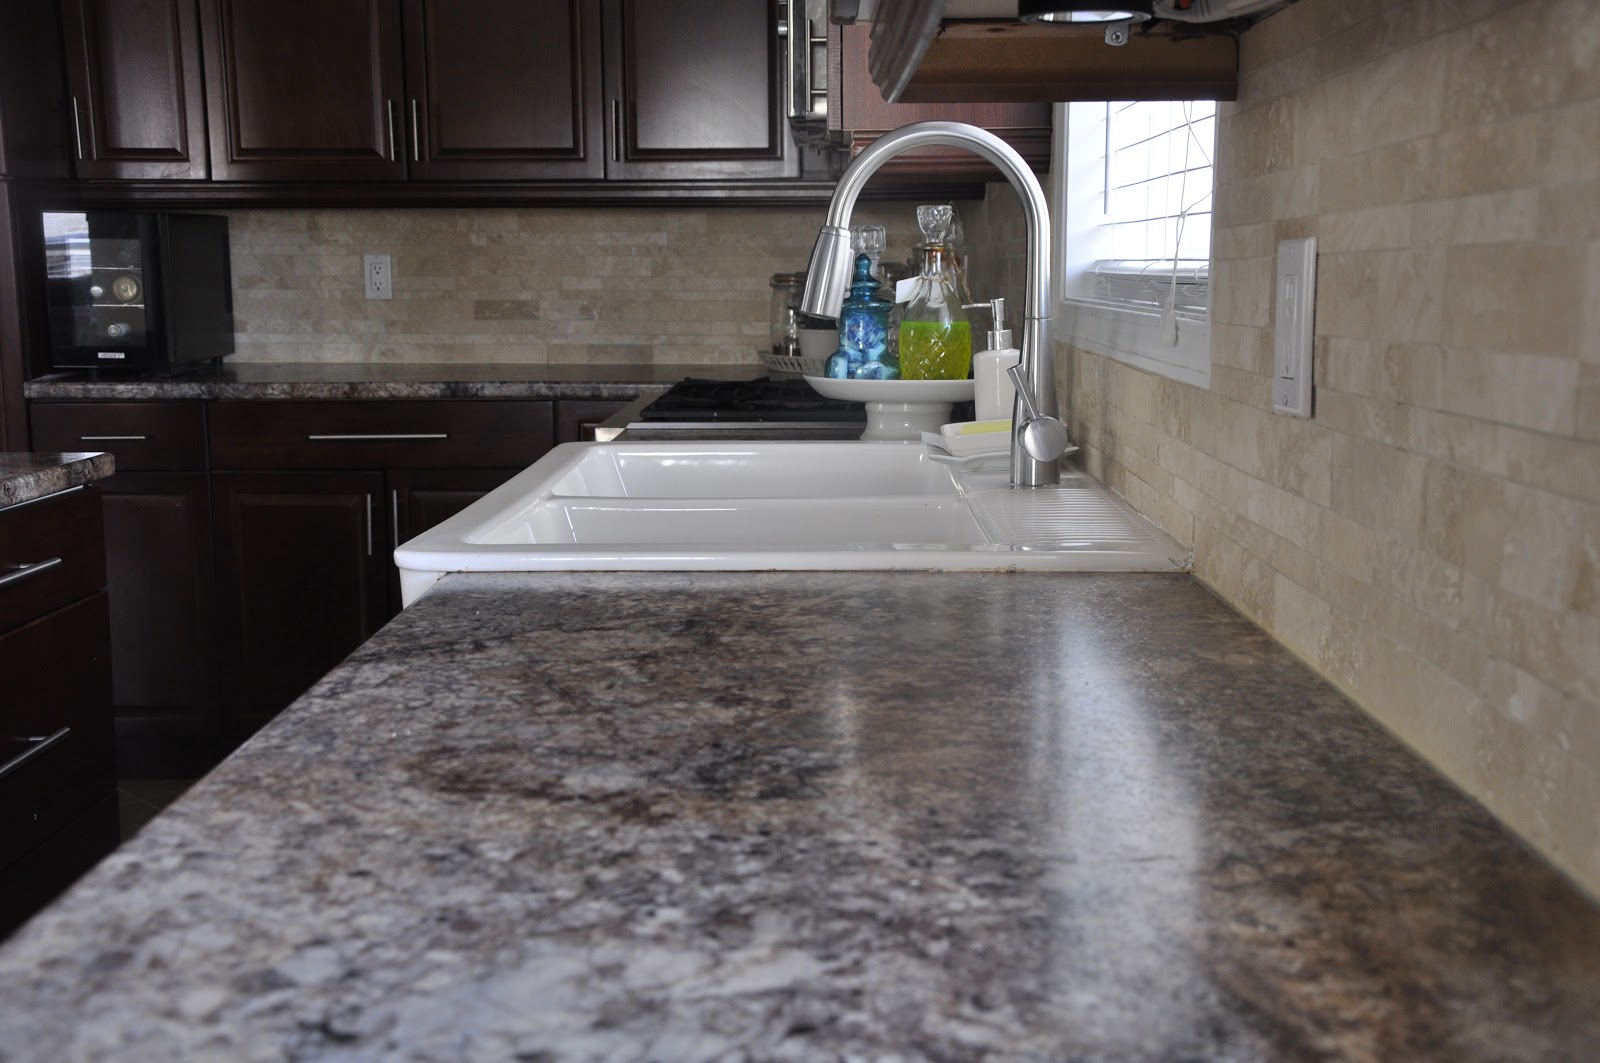
We didn’t choose, granite or concrete, instead we settled on an upgraded laminate that has a textured surface, it is considered an upgraded laminate.
I don’t feel badly cutting directly on it, leaving spills to dry on it (don’t tell my mother) and resting extremely hot or cold items on top of it. If the counter gets ruined in a few years, or we grow tired of it, or we win the lottery and can afford to replace it with granite every few weeks (remind me to start playing the lottery please ;)) than we can.
Details make a kitchen pretty!!
Small details go a long way when designing a kitchen. We believe that the little things can make a space look custom and they are so easy to do.
Cabinetry details go a long way!!
An island or an exposed breakfast peninsula is usually sided with plain smooth “faux wood’ to match your existing cabinetry. This type of material is essential a wood-like-sticker. It is sold on a big roll and you can cut it and change it to fit odd shapes and to finish off the ends of your cabinetry. This is great and can help any do-it-yourselfer make their own kitchen to suit their needs; BUT, one small change can give your regular kitchen a regal, upgraded feeling.
Changing this smooth surface to something that is textures can add depth and charm to a vast stretch of kitchen real estate. Replacing this smooth finish with actual cabinetry doors can make your island look a solid piece of furniture. Which is exactly what a good island needs to anchor a space. You can do this on the ends of your exposed upper and lower cabinets too. It will cost you a tiny bit more but will give your kitchen an extra edge against the others.

If you are going with a beautiful white kitchen, or painting your cabinetry a specific colour for a quick upgrade it would be worth it to clad the ends of your cabinetry or the surround of your island in a bead board or a tongue and groove paneling. This is very cost effective and can add depth and weight to your exposed kitchen areas. The best part is, it can be left white or you can paint it any colour you choose. This creates so many options as now you could leave your upper cabinetry one colour and mix up your lower cabinetry to contrast in a totally different colour. Choices are the spice of life! So spice it up!
Don’t forget your moulding!
At our last house, we didn’t finish our projects until we were ready to sell. This included, and is not limited to, adding moulding under our cabinets to hide our recessed task lighting.
This proved to be an easy upgrade then, and you can do it now to give your kitchen a custom, upgraded look.
At our old house, we simply got the same wood as our cabinets (oak in this case) and stained it to match. We then attached them with “L” brackets under the cabinets, and by doing so, hid the unsightly cords and let the task lighting be the star of the kitchen show.
If your kitchen is white, you can go with lots of different types of moulding that are already coloured white and are sold in the trim section of your hardware store. Some stores even cut to size, if you have your measurements handy!
Also, don’t forget that adding crown molding on top of your cabinets adds such a great finished look! Unfortunately, that wasn’t an option for us since we have a pesky bulk head above our cabinets, but if you want to do so, please visit
Girl in Air and read up on their
do-it-yourself step by step guide along with the cost it took her and hubby to upgrade their kitchen!!
So helpful! Click on the picture below to go right to the post!
Hardware doesn’t have to cost you an arm and a leg!!
When I first priced out hardware for our new kitchen cupboards I was devastated. Each piece that I liked was $9 or more. And that was going with the well priced options!
We then realized that places like
Ikea carried well priced hardware, and are constantly selling off old stock at a reduced price! it might be worth it for you to wait a few months to find the perfect hardware to compliment your cupboards then to settle for something you don’t love.


These three selections are from Ikea. The long brished nickle pulls are 2 for $9.99, the fun coloured knobs are 6 for $1.49 and the oil rubbed bronze knobs are 2 for $3.99. Great deals!
We looked around some more though and were surprised to find hardware at our
local Re Store!! They had long pot drawer, (or pantry type handles) for $1!!! No lie!! We priced them out at other stores for $27!! It pays to wait and let your kitchen come together patiently.
I also discovered the best catalogue ever!!
Lee Valley Hardware carries so many different types of pulls, hinges, cupboard name plates, key holes and other awesomeness. (No I am not getting paid by them to say this. It is just true that they have a plethora of options for your kitchen or if you are refinishing dressers and other pieces that need new and improved hardware.)
If you are replacing all of your kitchen hardware it pays to buy in bulk as there are significant savings offered to those placing larger orders. Savings typically start if you are buying 5 pulls or more! They can be delivered right to your door step for added convenience too!
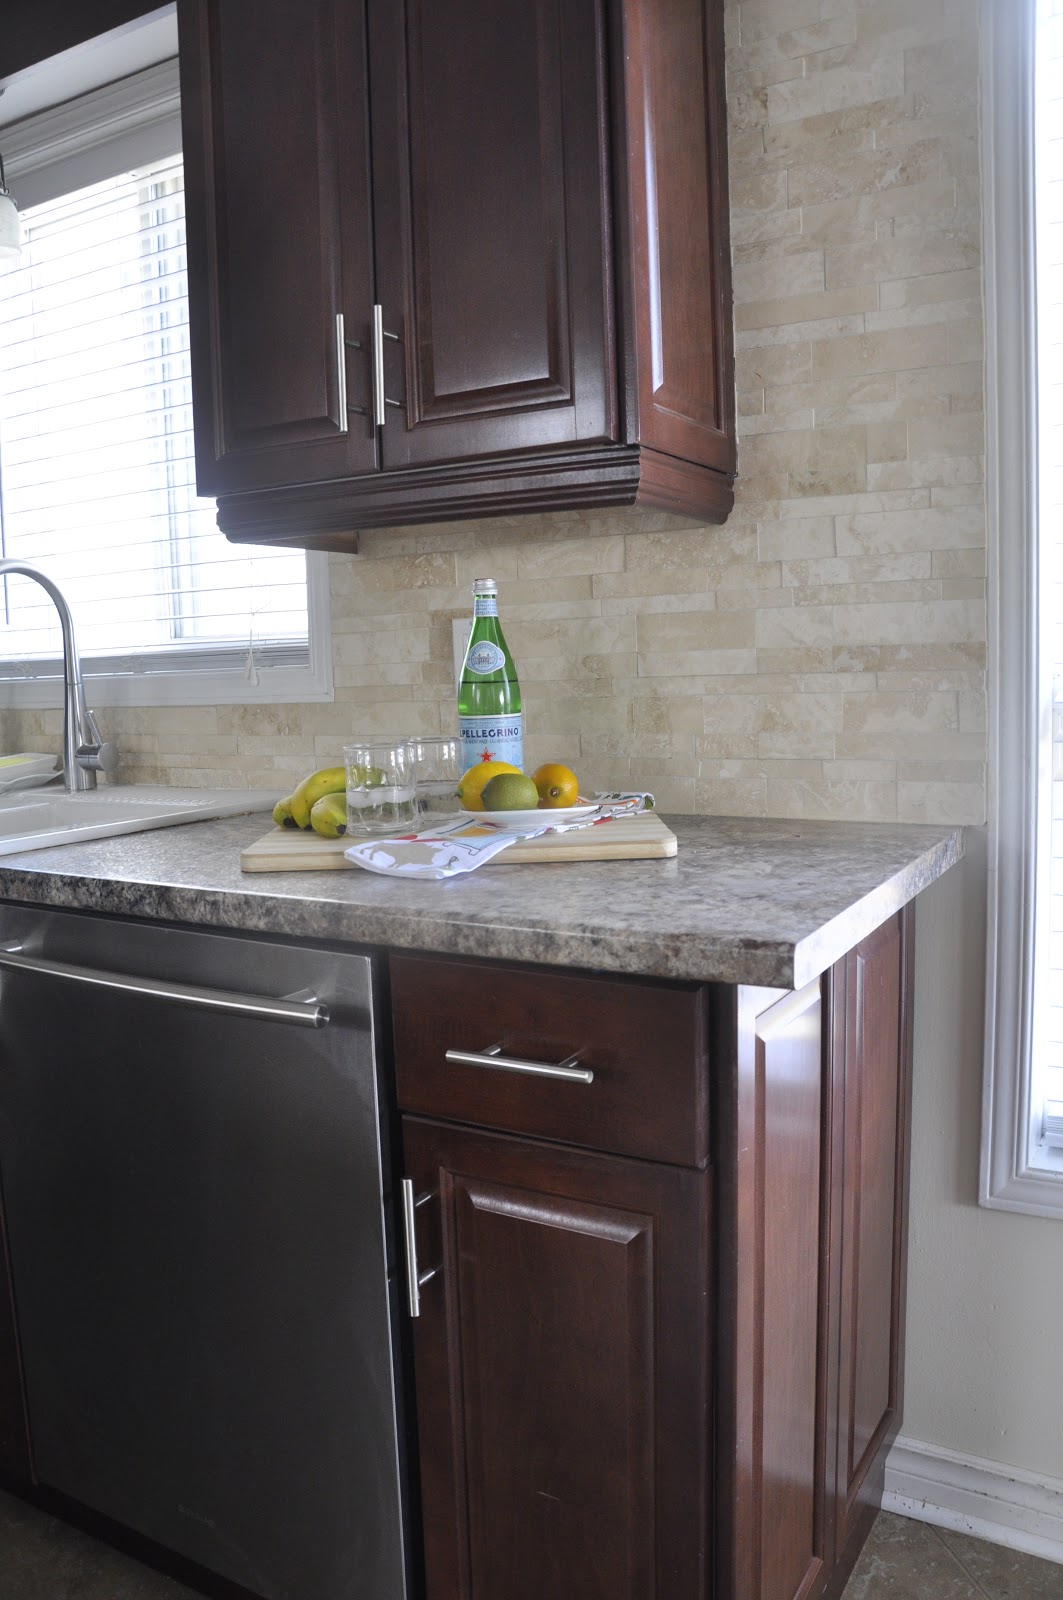
Spend in the places that are most visible!!
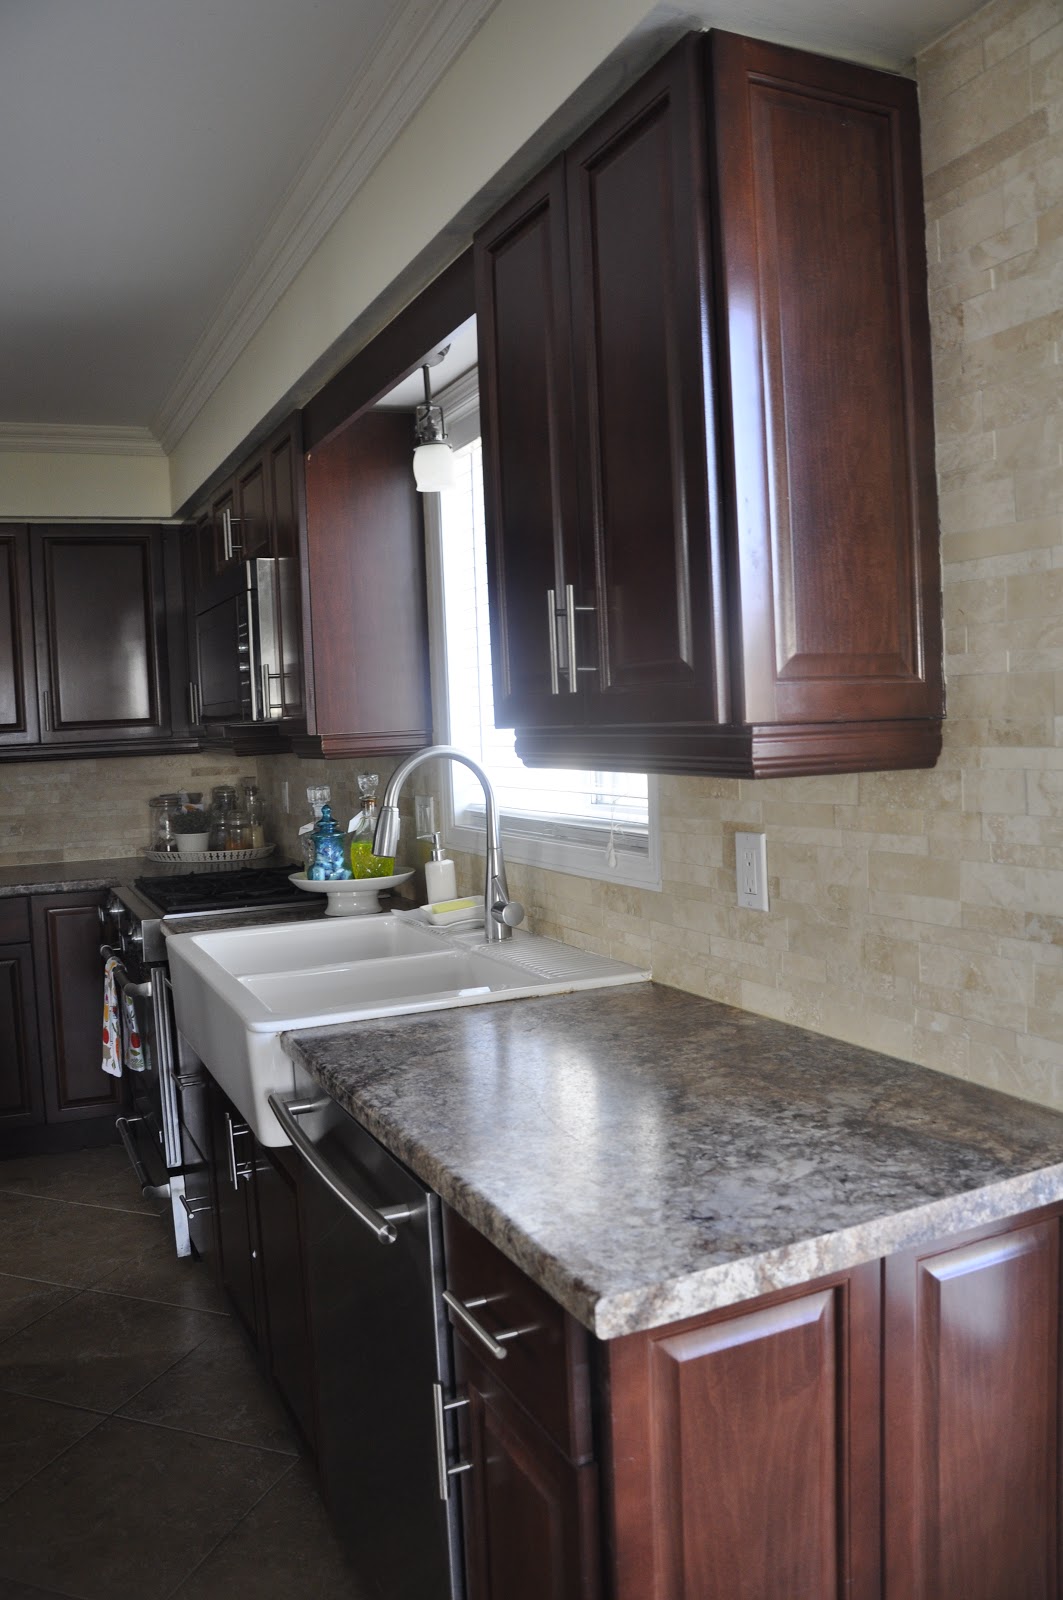
Our kitchen sink is perfectly placed below our kitchen window, which to a symmetry loving girl means that the entire kitchen revolves around our sink. To me, it seems to be the focal point of our kitchen when you quickly look into the room.
For us, it meant spending some extra money on our sink since it is directly in your sight line.We knew that we needed a new sink to house all of our dirty pots and pans too.
But if you are not an everyday cook, and your sink is not smack-dab in the middle of your kitchen for everyone to see, maybe a more economical sink would be where you could save money. Instead, you could get an upgraded kitchen faucet that was more of a statement piece. You will be surprised what people will notice if it is in a place that draws the eye in.
This would be saving in one area to spend in another.
(Our faucet was on sale for $89.99. Less than $100 and everyone seems to love it.) The end comes off to spray clean the deep crevices of our kitchen sink and can even reach to the stove to fill a pot of water!
Spend in places that will help maintain the integrity of your kitchen!!
It is so true that spending where you can help preserve the newness of your space, will pay off in the end.
Take into consideration “soft closing” door dampening hardware. The things that can be added to your cupboards to keep them from slowly deteriorating every time you use your cupboard.
It will save you in the long run if you add these special closing mechanisms to the cabinets most used in your space. Not only will you not cringe and jump every time a man or child uses the cupboards (oh wait, who are we kidding, they don’t slam cupboards! They barely end up closing them!) but you will end up preserving their life time.
We have a cupboard above our dishwasher that is used for our every day dishes. It is constantly being opened and closed and slammed. By adding this small detail to this overused area of our kitchen, it has slowed down the wear and tear of this particular cupboard. I am so grateful for not being terrified any longer when the cupboards slam but also to know that my cabinet will have a long healthy life time lovingly keeping our dishes safe.
For you, saving the integrity of your kitchen might mean lining your most used drawers and cupboards with spill proof damage resistant products. Like this one.
Having your kitchen garbage can connected to a cabinet door for easy access ( no more dropping waste into the depths of your cabinets!) Ew.
Don’t forget your well loved appliances!!
Do you have a kitchen appliance that you cannot live without?? I know for most it is their breakfast appliances, the ones that help make their transition from bed to out the door even easier! For most it is their coffee maker and their toaster. For us though, it is our blender.
Hubby and I have sinfully coveted our current blender for almost ten years. though, as a child I would see this specific blender at trade shows and would taste its delicious mixing abilities and pray that I too could own such a beautiful appliance. (I also have a slight obsession with a Dyson that I will never be able to afford).
If you have appliances that you like to have sitting out for every day use, like a blender or a toaster or a coveted blender, or a wine fridge, make sure you have clearance for these items to tuck carefully against the wall between your upper and lower cabinets.
Pre planning where you want your counter top appliances to go will help you make the best decisions for your kitchen and the functionality of your space. If you dont have enough room for clearance, consider leaving an area above (meant for upper cabinetry) empty.
We did this at the end of our kitchen counter. That way, we can have our beloved blender sitting on the counter safely, far away from curious child hands that might reach up and grab a cord and hurt the blender, hurt themselves.
For now, that is what we have come up with. I wanted to compile a list that will truly help you get started with your kitchen renovation. I hope these tips will help you make the best decisions, you are fully capable of making, when it comes to completing an efficient good looking kitchen– all by yourself!!!
All the best to YOU as you and your DIY adventures!!


dee dee
November 11, 2012 at 2:55 amSo many wonderful ideas for remodeling a kitchen! You kitchen turned out fantastic! I love the idea of building up your angle wall!
dee dee
bethanygier
November 12, 2012 at 5:36 pmThanks dee dee. That angled wall turned out great for us. Thanks too for stopping by and taking the time to comment! have a great day!
Anonymous
November 13, 2012 at 9:52 pmon 7/17 2012 we went with home depot to have our kitchen remodel. They came out did the lay out of what I wanted. Did blue prints and pictures that show the finished project as I wanted. 2 cupboards one on each side of the kitchen window, one sink base with undermount stainless steel sink and granite counter tops. cupboards above stove 2 and a microwave stove. No hood our home is 50 yrs old and has a ceiling fan. too much time, cost to get hood, vents , roof vent etc. Well if is now Nov.13. They are not done yet. the designer turned in my design with a hood going up and he knew better and pictures show that in my final kitchen design paperwork. Never told me. Got cabinets and the underside of them is raw plywood edges and beige lining. Not the maple cognac color of the cabinets. did I mention damaged, nicks , scratches in the material and cabinets and doors sent and had to be reordered. Then to make a long story short, I was not happy looking at raw plywood so out of my pocket I had to pay to have them put skins under the stove cabinets. And put light rail trim around the cabinets to not show the plywood and beige under side. And the supplies arrived for that with the wrong material and not enough material to finish the job. So we worked with the cabinet company and made our own design for the light trim boards. They were too big and not stained! so we reversed them and it held the skins in place nicely. I wish I would of found your web page when I first started. I also had a bow in the wall and nobody told the granite co. and they did not check the wall. we had a 1/2 in gap by the sink wall. They filled it with colored caulking and it looks nice now. they put scribe around the cabinets and floor baseboards has scribe on them . the kitchen area is 10 ft by 8 ft. and in the kitchen is our washer and dryer plus pantry closet. No way to change that and hide them. I am use to it and am Blessed to have a Home. it is a small 3 bd ,1 bath rambler. last yr. we gutted the bathrm and did everything. I will be relieved to have my kitchen done.
bethanygier
November 13, 2012 at 10:22 pmWOW! You have been through soooo much! I am terribly sorry to hear about all of the problems you have had to face with your kitchen remodel. 🙁 Kitchens are the worst to remodel because we use them everyday all of the time! I cant imagine your frustration! Unfortunatly, I have heard this happening with people who went with cabinetry specialists too. ;( I will be thinking of you and hoping that your kitchen gets finished FAST and is just as gorgeous as you had dreamed up!! All the best!!!!
xo
Sarah Tackett
November 16, 2012 at 1:56 amThanks for sharing, I will definitely remember this when we remodel our kitchen! Visiting you from Debbiedoo's party and I am your newest GFC follower (us newbies have to stick together)! I would love if you would take the time to visit my blog and follow back – http://sarahsaturdiy.blogspot.com.
Sarah @ 20 State
December 10, 2012 at 10:31 amThank you so much for the tips. I'm 95% done on my kitchen remodel, it's hard work but so worth it!
9fed0fbe-bc8a-11e3-8819-000bcdcb5194
April 5, 2014 at 6:22 amLove your kitchen. Would you mind sharing where you purchased your counter chairs? They are just what I'm looking for for our new counter-height eating area. Thanks and take care!
bethanygier
April 9, 2014 at 5:29 pmIm glad you like the chairs, they are so comfy, we actually just sold them! They were from the states from a surplus store purchased two years ago, Im not sure of the make, but they are very sturdy and could stand up to children swinging on them. I hope you find some that are similar!!
good luck! 🙂
Poulin Design Center
June 2, 2017 at 11:33 amThanks for these outstanding pictures . These are really beautiful. thanks for sharing with us
North East Factory Direct
June 2, 2017 at 11:34 amWhat a beautiful kitchen! You are definitely an inspiration for me while I try to style my own home. Thanks for sharing..