

Our master bedroom is the place where our whole family spends time. We have the three babies that sleep in their own beds and then somehow, unknown to us, they sneak into our bedroom like being a ninja is their day job.
Their sly little bodies crawl up beside us and we are usually so exhausted we don’t seem to notice until light streams through the windows and the morning has arrived.
So, the need for a larger bed spurred a bedroom renovation.
An unplanned makeover of sorts.
And unplanned makeovers mean a low, low LOW budget.
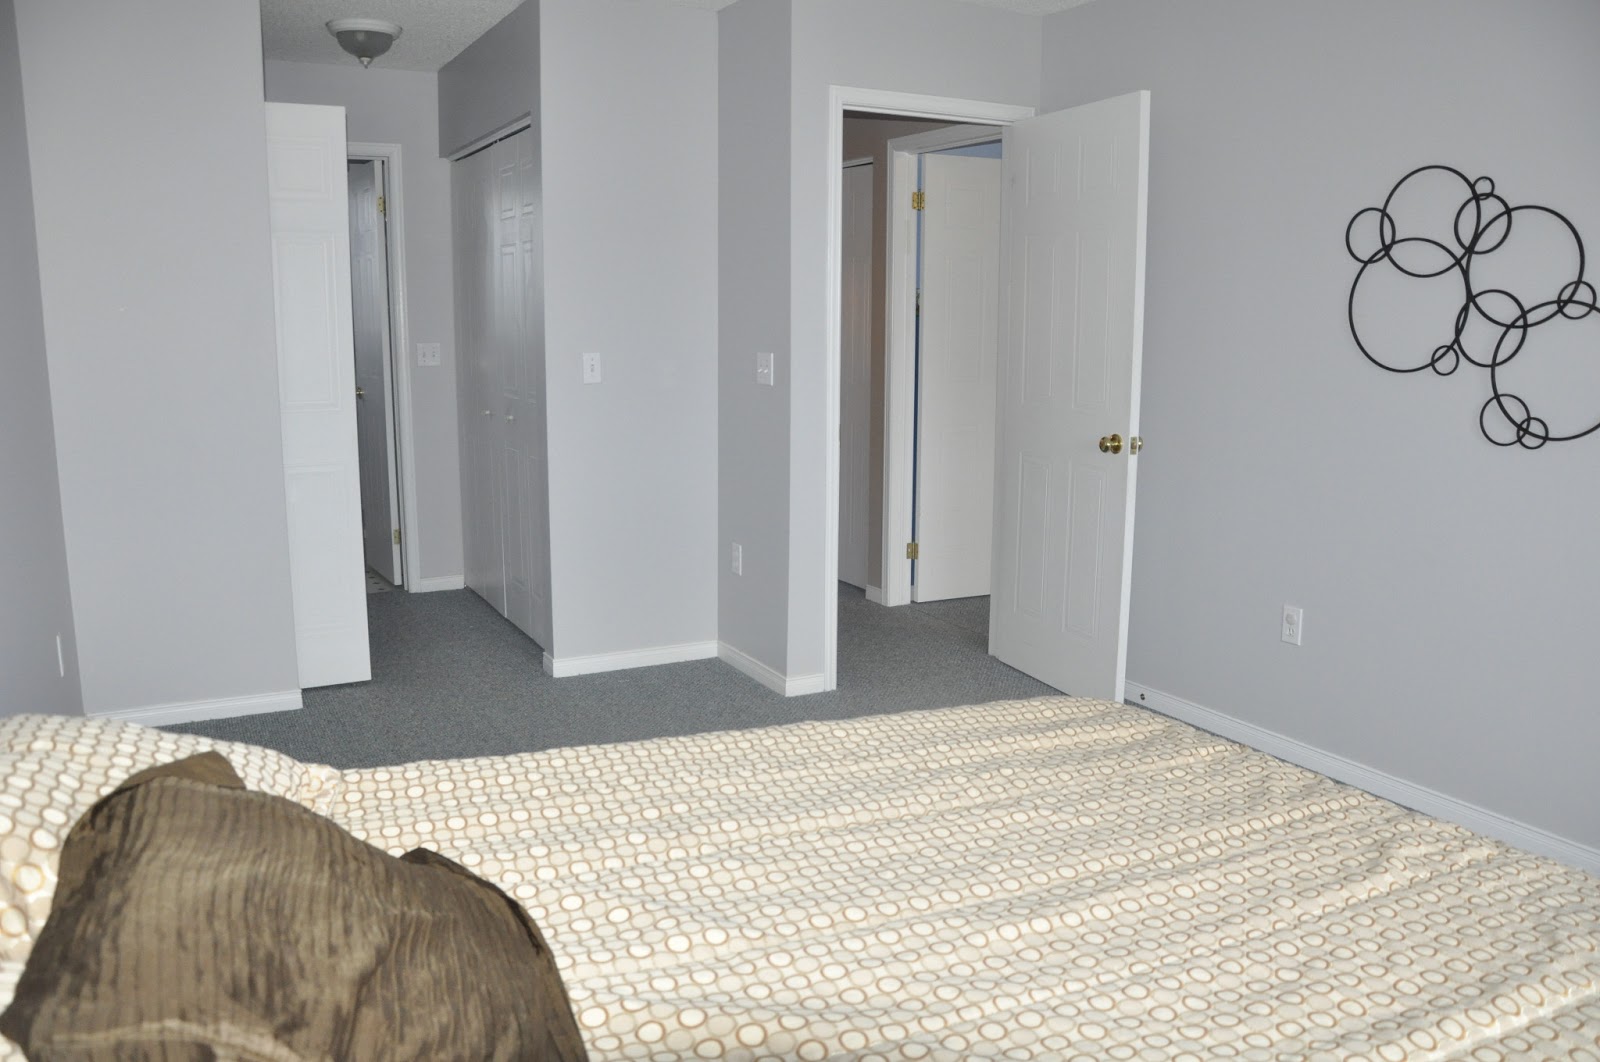
We started off viewing this plain-jane room almost two years ago.

As you can see, this room is quite small.
During our house hunt, two years ago, this seemed to be one of the smaller master bedrooms we saw, BUT, with the house in a perfect location, we sacrificed a lot of space for other wonderful features the house did have.

This next picture was taken the day we came to see the house and to get accurate measurements.
We needed that dirty, bright blue carpet to disappear fast! 
Our master is modest in size…
…but it is never about the size of the room that matters, yet what you can do with that size that really makes the difference!
So here is the story of how our master bedroom has evolved….

With a limited bedroom budget, I wondered what we could do to our bedroom to make a big visual impact.
We started off by painting our room a beautiful caramel taupe tone on the upper parts of the wall. We added a chair rail and beneath it painted the walls a bright white. We have great plans to create molding underneath the chair rail, but lots of other projects have gotten in the way!

I purchased a beautiful stencil from Royal Design Studio, and spent a few evenings after work, painting this large fabric damask pattern all over one whole wall in our room. For a small investment of funds and time, our main wall now has some visual interest!

We hacked some Ikea bedside tables that I talked about HERE.
This is my side of the bed, and that tall vintage Lucite lamp was purchased at my local Re Store for $5.00!! I cleaned it up and added a new shade from Home Sense on top of it.

With my limited sewing abilities I made the damask pattern pillows on our bed.
The ruffled pillow is another Home Sence find that I coveted until it went 50% off!

The picture on my night stand is one of my favourite photos ever. I showed a close up of it HERE A pile of sweet baby goodness. Couldn’t get better!

Our youngest is two weeks old in the picture and I just adore how it shows our babies love for each other. I love that the picture was taken right on our bed in the very room I am showing you!

My husband and I DIY-ed the mirror in the corner of our room. You can find that project HERE.
The mirror above the bed was another antique purchase and was painted silver to match and flow better with our existing accents.

My hubby’s night stand has a mirror and a wedding picture layered on top of it. The white iron lamp was actually a treasure I found curb side one day. It was black in its previous life but got a new coat of paint and another Home Sense lamp shade.

This picture that shows the length of our bedroom really does show that I may have a slight pillow obsession.
But if my husband asks, I wont admit it!
We have so much natural light coming into our bedroom that it has become one of my favourite rooms to relax in. You wont spot a television in our room for that very reason. We want our bedroom to be a place to refuel and recoup after a long day. If you are a mama you know that silence, any way you can get it is welcomed! 😉

The armoir in the corner went through a similar makeover as its sister, the long dresser, did.
I talked about the new and improved dresser HERE
Our dresser and the pretties that are on it are constantly changing, as is anything that can be picked up!

I am still as happy as ever with our chalkboard gallery wall.
I re purposed some old mirrors and pictures that we had grown tired of, by painting over them in chalkboard paint and hanging them around and within old frames. A couple coats of paint later, and that little corner of our room has become a happy cohesive grouping where we can leave little love notes to each other.

The lamps on either end of the long dresser have been many colours so far, and are enjoying being a bright while colour – for now!
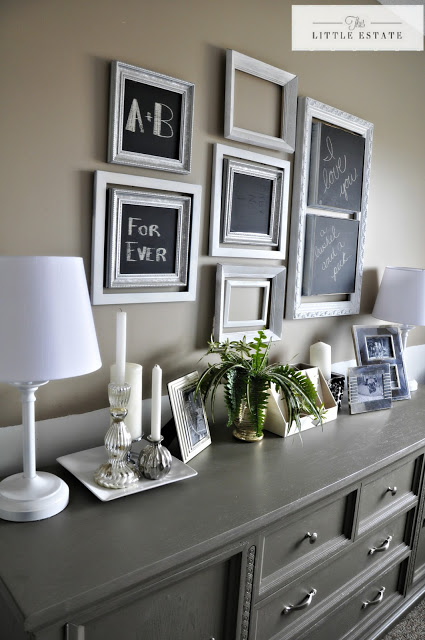
Here is a little close up of some silver and white elements that adorn our dresser for the moment.

Our bedroom wouldn’t be complete without family pictures and white candles. 🙂
And that friends, is our master reveal (for now.)
We tried our best to give our small master bedroom a lot of life by re thinking items we already had and re purposing little treasures we found along our travels.
It is lovely for now, but like any good room, it is constantly evolving and changing and we are already adding to the list that reads:
- diy headboard for master bedroom
- finish crown molding in master
- finish chair rail in master
- try to get all the ninja children to sleep in their own beds once in a while!
For now, we will focus on how far we have come!!
Before and after…

I hope you enjoyed touring our master bedroom today!
Now, we can rest for a week or so, before I want to get started on that diy headboard!!
In the mean time, I would love some opinions on some headboard ideas, now that you have seen the whole space?
This indecisive mama will be patiently awaiting your input!
Sharing at:
Common Ground
French Country Cottage
Craftberry Bush link party
Chic on a Shoestring
Redoux


Jenna
March 14, 2013 at 6:58 pmWhat an incredible transformation! That master bedroom is soooo beautiful!
Suzan Sweatman
March 14, 2013 at 7:13 pmOh it turned out just gorgeous!
That wallpaper is over the top beautiful – I see a tufted curved headboard against that glamorous wall!
Great job,
Hugs,
Suzan
Pudel-design
March 15, 2013 at 10:56 amThis room is stunning!
Love the grey`s and beige!
The little night stands are so gorgeous too!
Love the wallpaper!
Great job!;)
Lydia
Anonymous
March 15, 2013 at 11:29 amWonderful job amazing.I never have used a headboard…I use euro shams..just a thought.
Becky Totten
March 15, 2013 at 2:26 pmGreat job Bethany!! I absolutely love it :). Where did you get the light over the bed?
Claire Berard
March 15, 2013 at 10:14 pmI LOVE it!!! You did a gorgeous job! Just stunning!!
Hugs,
Claire
Laura @ Top This Top That
March 15, 2013 at 10:32 pmwhat an amazing transformation!! good for you.
Laura @ Top This Top That
March 15, 2013 at 10:33 pmwhat a great transformation. good for you!
Angela Santaniello
March 16, 2013 at 12:01 amLove the accent wall behind your bed! I have been contemplating doing something like that in our master. Also, incredibly jealous of that lamp! What a fantastic find. Pinning.
Have a great weekend!
Angela @ Number Fifty-Three
decoratewithalittlebit.com
March 16, 2013 at 2:43 amGorgeous! Amazing transformation! Little Bit from http://www.DecorateWithaLittleBit.com p.s. I'm pinning
Debra @ Common Ground
March 16, 2013 at 2:45 amthis room is really incredible, I love how the stenciled wall totally transforms the space!
bethanygier
March 16, 2013 at 2:46 amThank you so much ladies!! Your sweet words mean soooo much to me!! xoxox Thanks for stopping by today!
Chelsea @ Making Home Base
March 16, 2013 at 4:25 amoh my goodness – it's GORGEOUS! I love every detail – especially the ikea hacked bedside tables and your cute chalkboard wall gallery! Fabulous makeover! Following you now 🙂
Sandi~A Cottage Muse
March 17, 2013 at 7:04 pmLOVE this space, you did a wonderful job!! So happy I stopped in!
Jenny
March 19, 2013 at 12:22 amWow! That is gorgeous, I love the muted tones. I'm getting ready to makeover bedroom and I may have to steal a few of your ideas, hehe!!
the cape on the corner
March 19, 2013 at 6:21 pmLOVE the accent wall and the ikea hack. fabulous!
Courtney ~ French Country Cottage
March 21, 2013 at 2:00 amBeautiful! I love what you did with your bedroom! Sharing at the party tomorrow~ thanks for linking up at Feathered Nest Friday!
Sherry @ No Minimalist Here
March 21, 2013 at 4:26 pmGorgeous, Bethany! I have the same stencil but haven't used it yet. Seeing your wall makes me want to get starting stenciling our dining room. It is a beautiful room! I am a new follower.
xx,
Sherry
Gee Singh Newbanks
March 21, 2013 at 4:42 pmHi, Not sure how I stumbled upon your blog… but I am glad I did.
What an awesome job you did with the stenciled wall. Patience 🙂
We are working on a master redo… but life has a tendency to step in the way of progress. Our eldest is house hunting and we find ourselves being pulled along for the exciting ride. No matter… it will get done. In the meantime, he needs us and we are there.
Glad I came by.
Come on over a visit.
Cheers, Gee
Kathy @ Creative Home Expressions
March 21, 2013 at 6:42 pmWhat a fabulous makeover, Bethany! I love the wall stencil you did. I have one but since we are going to be painting our new {to us} place this year, I've held off doing anything with it until the painting is done. This really gives a nice idea of how something like that would look on the bed wall. Love your chandelier, too. I like these in a bedroom because it's not too girly for a guy. : ) Great job!
Patti@OldThingsNew
March 21, 2013 at 6:45 pmWow! Everything is absolutely beautiful down to the very last detail. Thank you for sharing your amazing decorating talent. By the way, I love your name. Bethany is the name of my youngest daughter. Blessings to you, Patti
Robin from highpointcircle.blogspot
March 21, 2013 at 6:51 pmWhat an eye for design! It is gorgeous and so romantic. I love all of the chalkboards.
Anonymous
March 21, 2013 at 7:31 pmLove this!!! Did you use a special brush for painting? Thanks for sharing. Beautiful transformation! Kenda
Kathryn Ferguson Griffin
March 21, 2013 at 8:43 pmBethany!!! OMGoodness! You did an amazing job! I love it all. And, your wedding photo is gorgeous!! Thank you for sharing. I would love it if you would share this at my Make it Pretty Monday party which is still live. Here's the link if you want to check it out. http://thededicatedhouse.blogspot.com/2013/03/make-it-pretty-monday-week-41.html Or, you can wait till Monday to link up. Hope to see you at the bash! Toodles, Kathryn @TheDedicatedHouse
Barbara
March 21, 2013 at 10:29 pmNow this is an amazing transformation! I love that large damask stencil…gorgeous! You did an excellent job on a tight budget my dear…enjoy!!!
Visiting from the Feather Nest Friday party.
XO Barbara
Jamie -Better With Age
March 21, 2013 at 10:55 pmThat's amazing! I'm so glad I found your blog!! I'm your newest follower and now I'm off to look through the rest of your blog. You did an incredible job!
Jamie @ somuchbetterwithage.com
LittleMyoo
March 23, 2013 at 8:53 pmSoooo lovely! Congrats on such a beautiful makeover!
-andi
Dear Emmeline
March 31, 2013 at 12:44 amgorgeous! such a dramatic and beautiful transformation.